
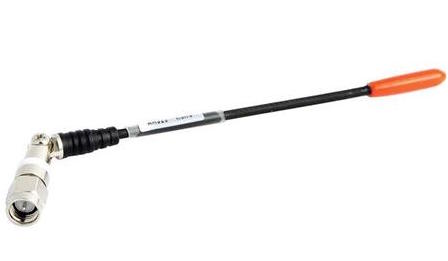
 The Lectrosonics Elbow, or jointed whip antenna, has been the subject of some concern since their introduction with the SRa and subsequent rise in popularity. The pin in the antenna’s connector has a tendency to become detached internally from the elbow, breaking the connection between receiver and antenna.

Damn it! Another one!
The problem can go unnoticed, because Lectro’s diversity reception receivers have two antennas, and the opposite antenna keeps the receiver working well most of the time. Eventually, the broken pin falls out, which can take a long time from the initial break. This visual indication is often the user’s only sign that the antenna is broken. Of course, if the antenna is used on a transmitter, and the results would be immediately apparent. However, the elbow antenna couldn’t have been intended to work on a transmitter worn by an actor. Why? The elbow exposes the antenna conductor, which can come in contact with the talent’s skin and sweat, severely de-tuning the antenna and possibly reducing range dramatically. Not to mention, in stabbing into the talent’s backside, or stuffed in a pocket the elbow joint could be subject to subject to enough tourque to break the pin.
Lectrosonics has addressed this issue with testing of their jointed antennas, intentionally applying stress to the structure, and exploring means of strengthening the build. Their last announcement stated that 20 pounds of torque was required to break the connection. Therefore, the only reason they should break is due to abusive treatment. I suggest the break develops over time, as a result of reasonable, regular field use.
Apparently, Lectrosonics and/or their dealers have selectively been providing free-of-charge replacement antennas to those who bring in their broken units. My inquiry to the Lectro home office regarding the 8 or 10 broken units in my possession was met with “warranty limitation” issues. They explained that my antennas were over a year old, and therefore were no longer under warranty. I would have to buy new antennas at about $40 a piece.
After buying replacement whips (and abandoning the elbow antennas entirely), and also being somewhat of a DIY-er, I went about building my own whip antennas, using SMA connectors and steel antenna cable. Success came soon enough, but in toying with my handful of broken Lectrosonics Elbow Antennas, I wondered, can a repair be possible?
Possibly… Here’s what happened next.
You’ll need to be good a soldering. Also have a small, table top vice. You’ll also need a Dremel tool with a miniscule drill bit (the kind for drilling circuit boards). A Dremel sanding/cutting disc. A big pair of Vice-Grips. A small allen wrench. Good wire cutters. A means of measuring a few mm accurately. Some thick, solid tinned wire, like from a 1 watt resistor.
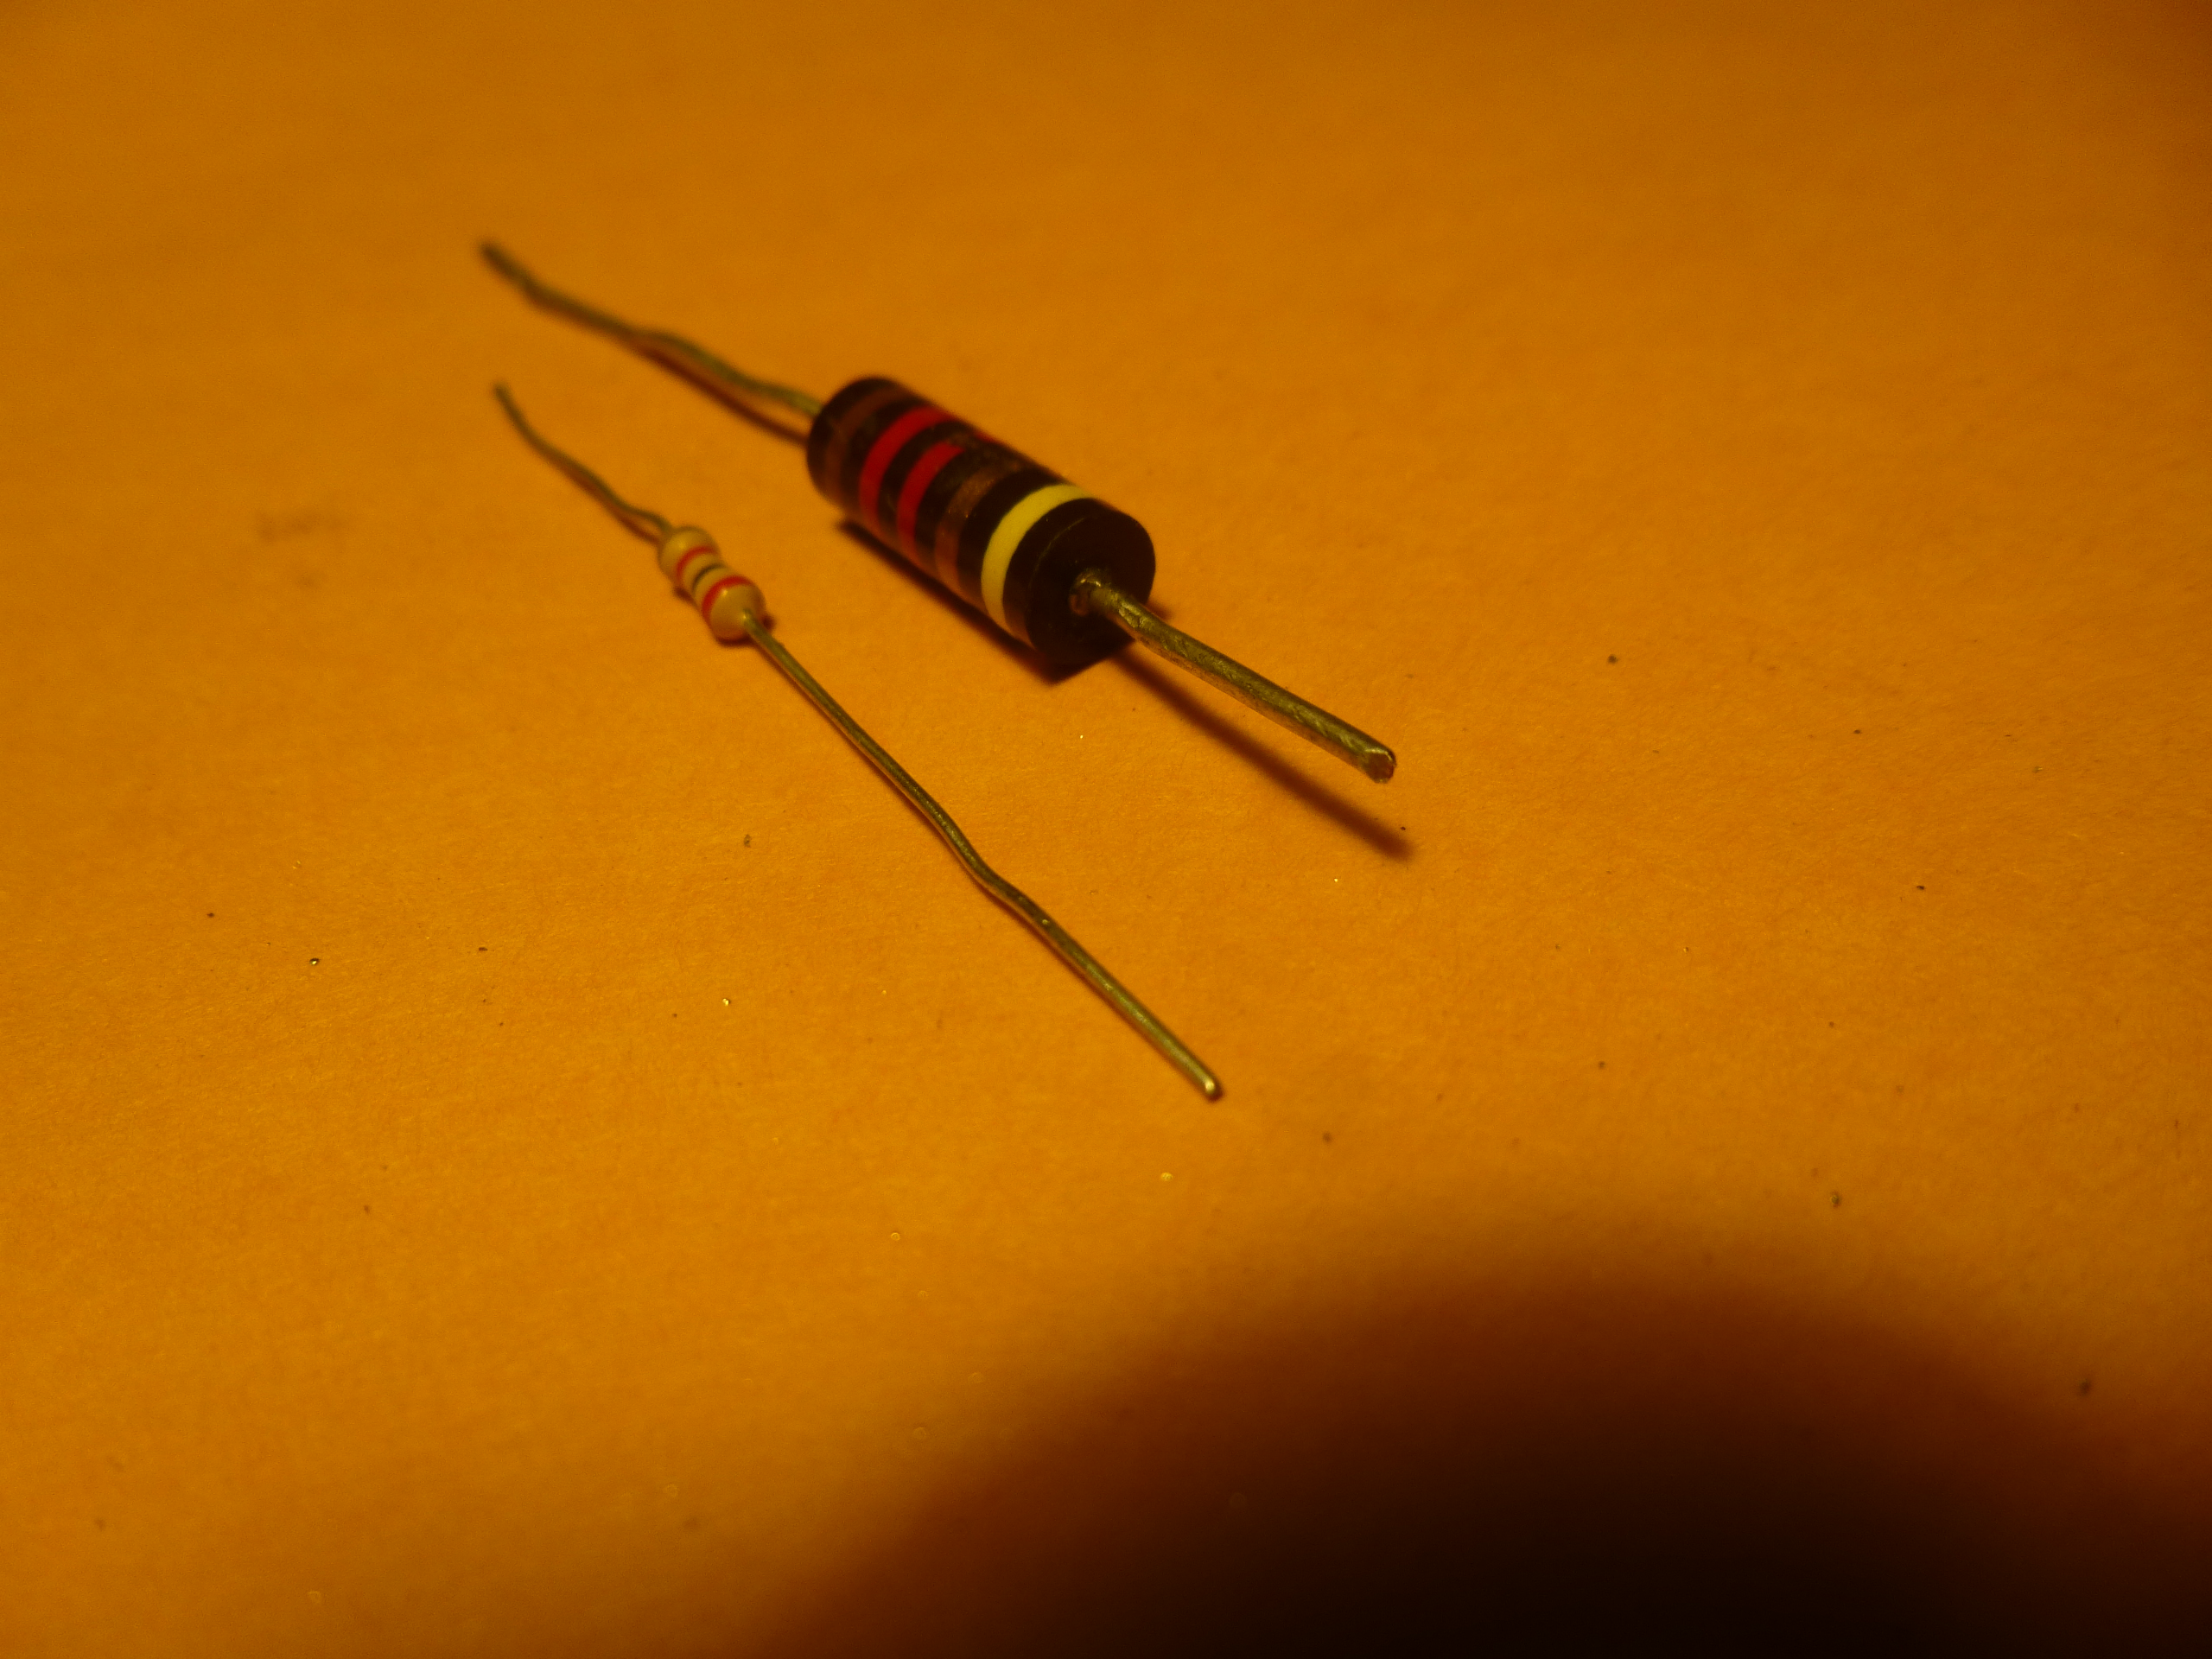
Use Thick WIre like from a 1 watt resistor. Don’t use thin wire, like from a 1/4 watt resistor
Have good eyesight or wear some headworn magnifiers. You’ll need supply of pins from virgin SMA connectors from the various sources that sell these things. The Chinese ones are pretty cheap, Try www.aliexpress.com. For this project, all you’ll need are the center pins that are included with the SMAs. For experimentation, I ordered 50 of them, in many different cable-size configurations. Most of the pins are the same from one kind of SMA to another. Use the pins that look like the ones in the photos, below. 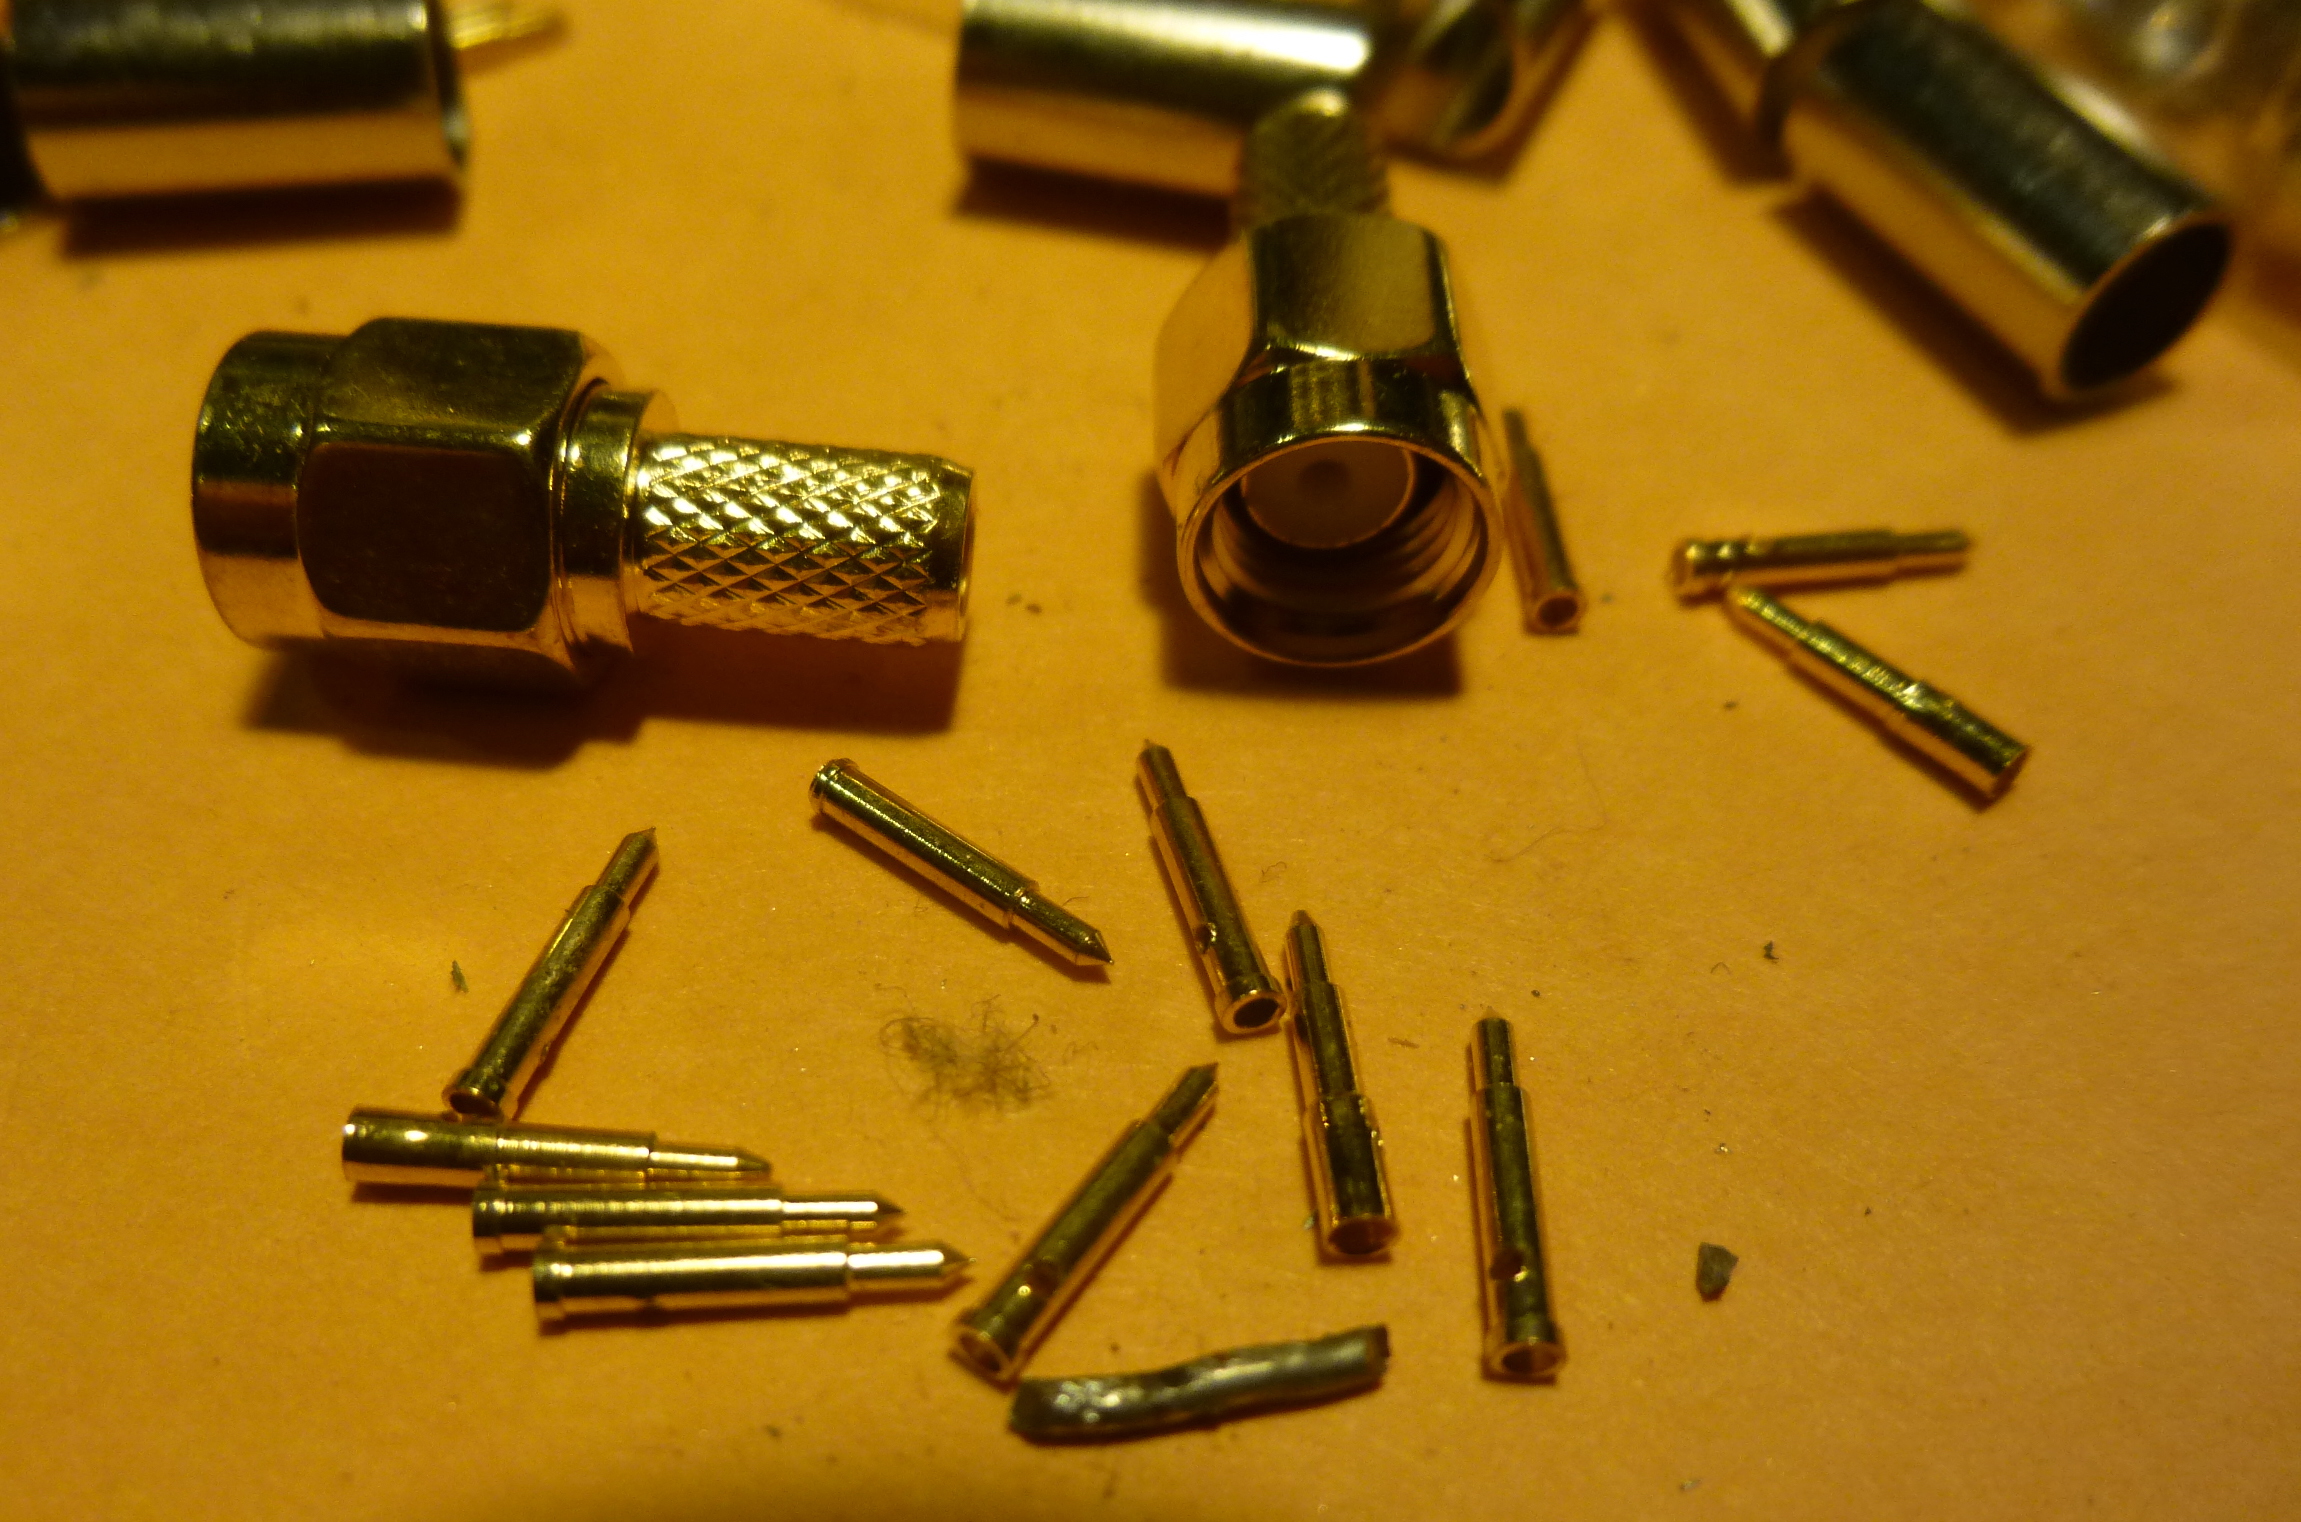
 1. Plug in your soldering iron, dummy.
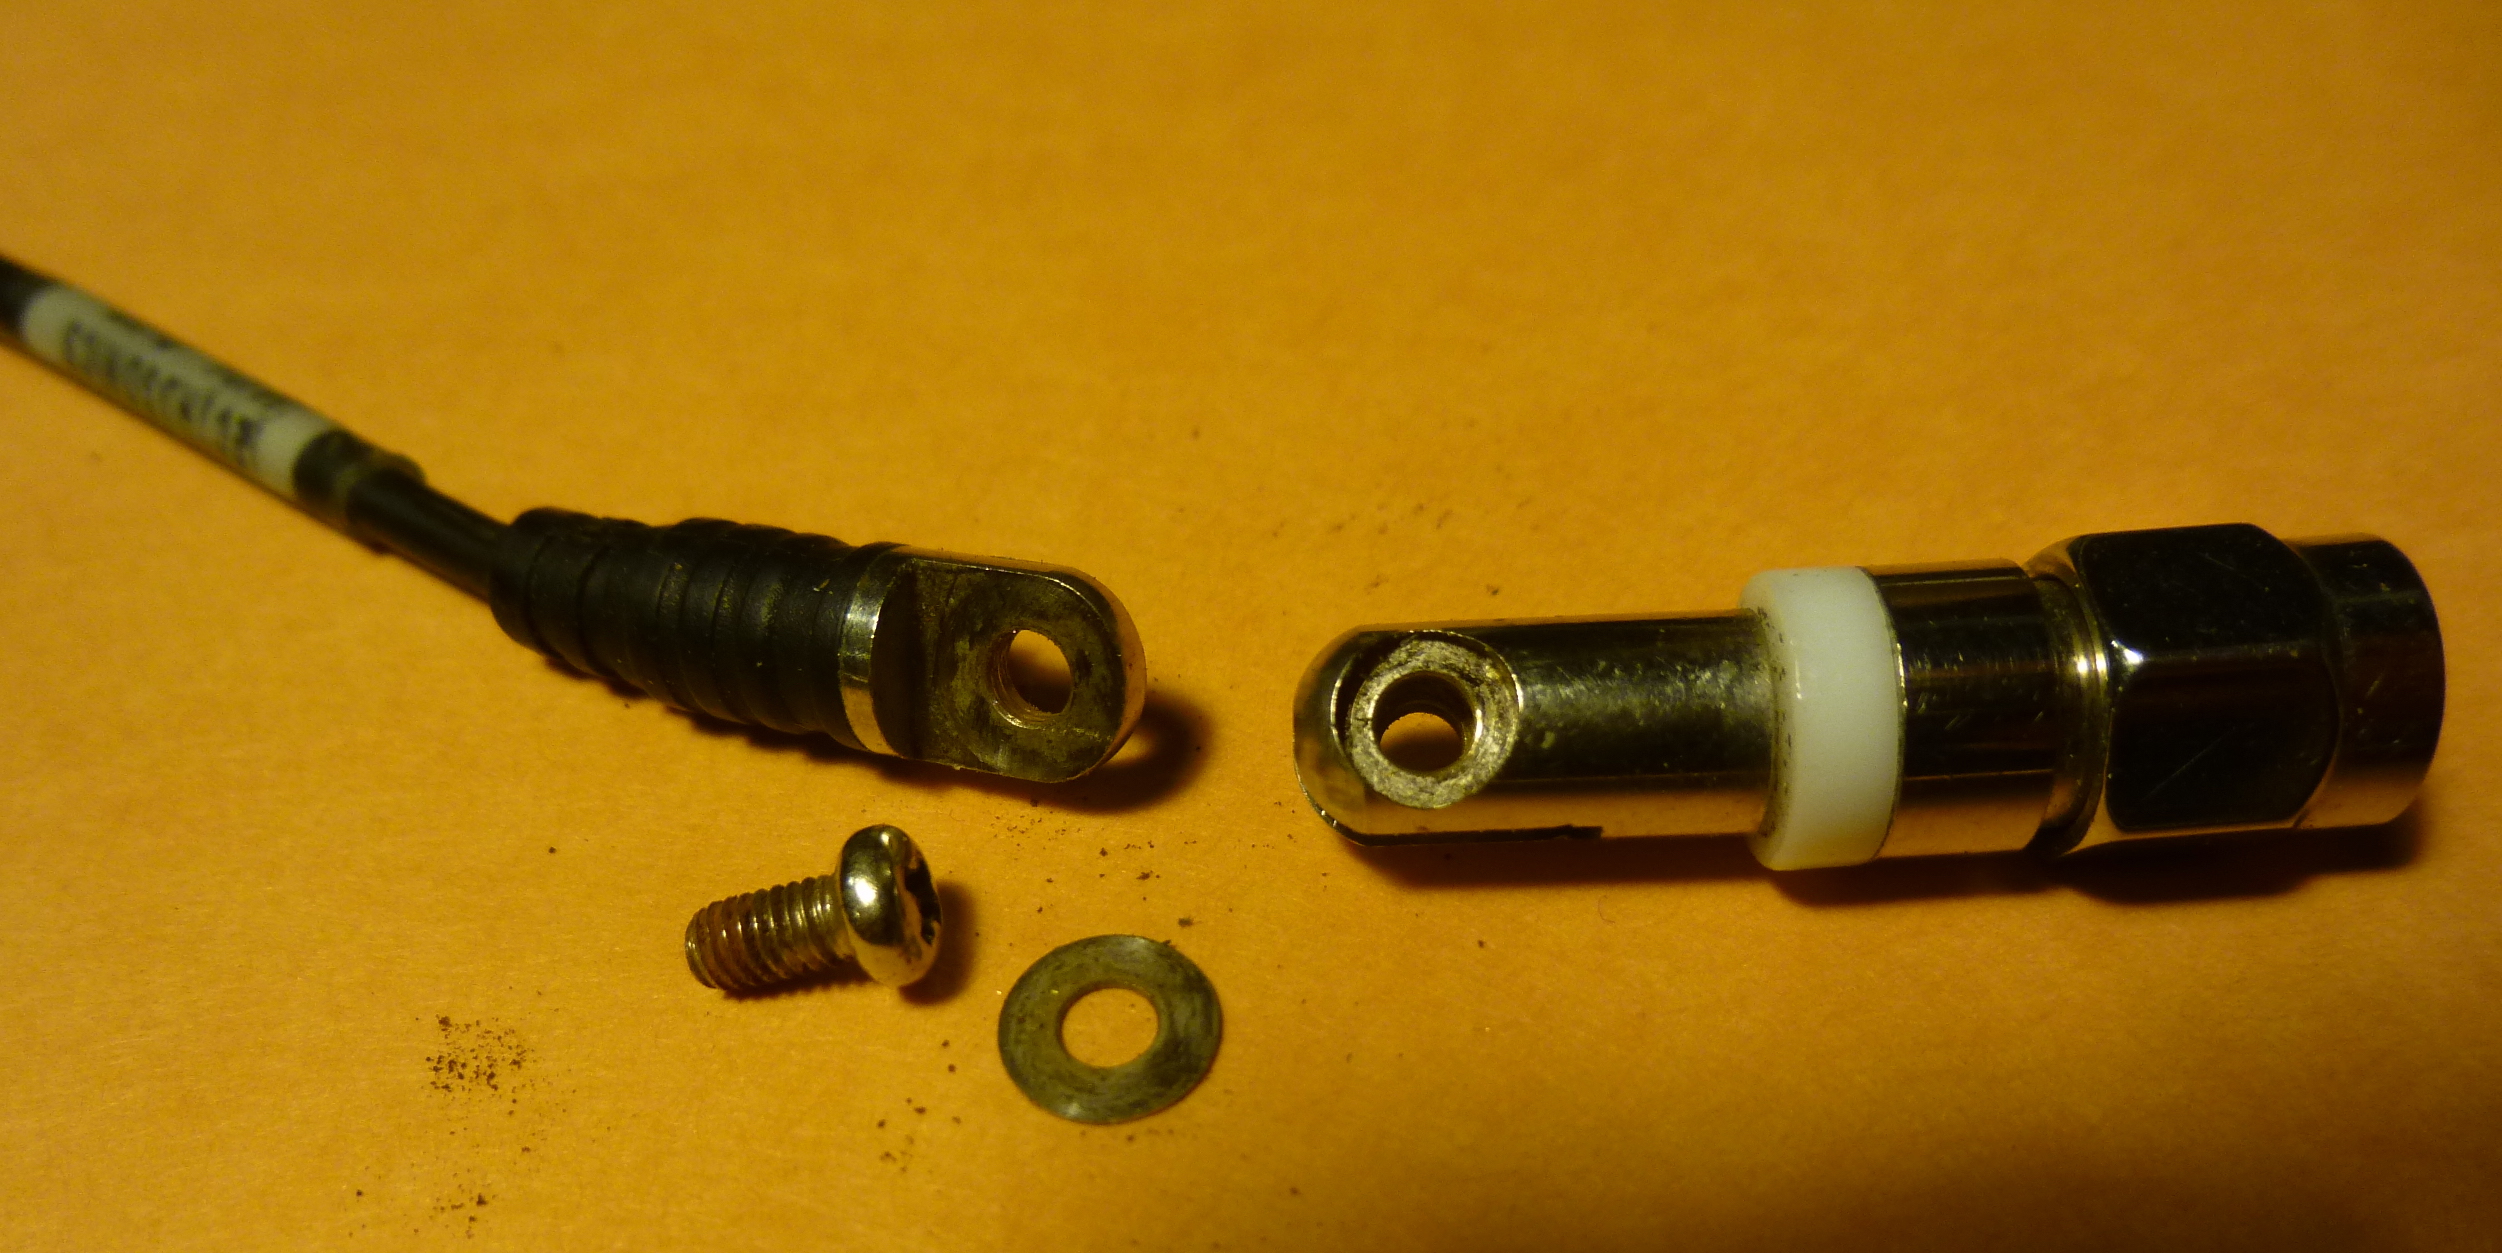
2.Remove the screw from the broken Lectrosonics antenna and remove the whip. There will be one or two washers in there, and a bunch of dirt and crap to clean. save all of it for reassembly later. 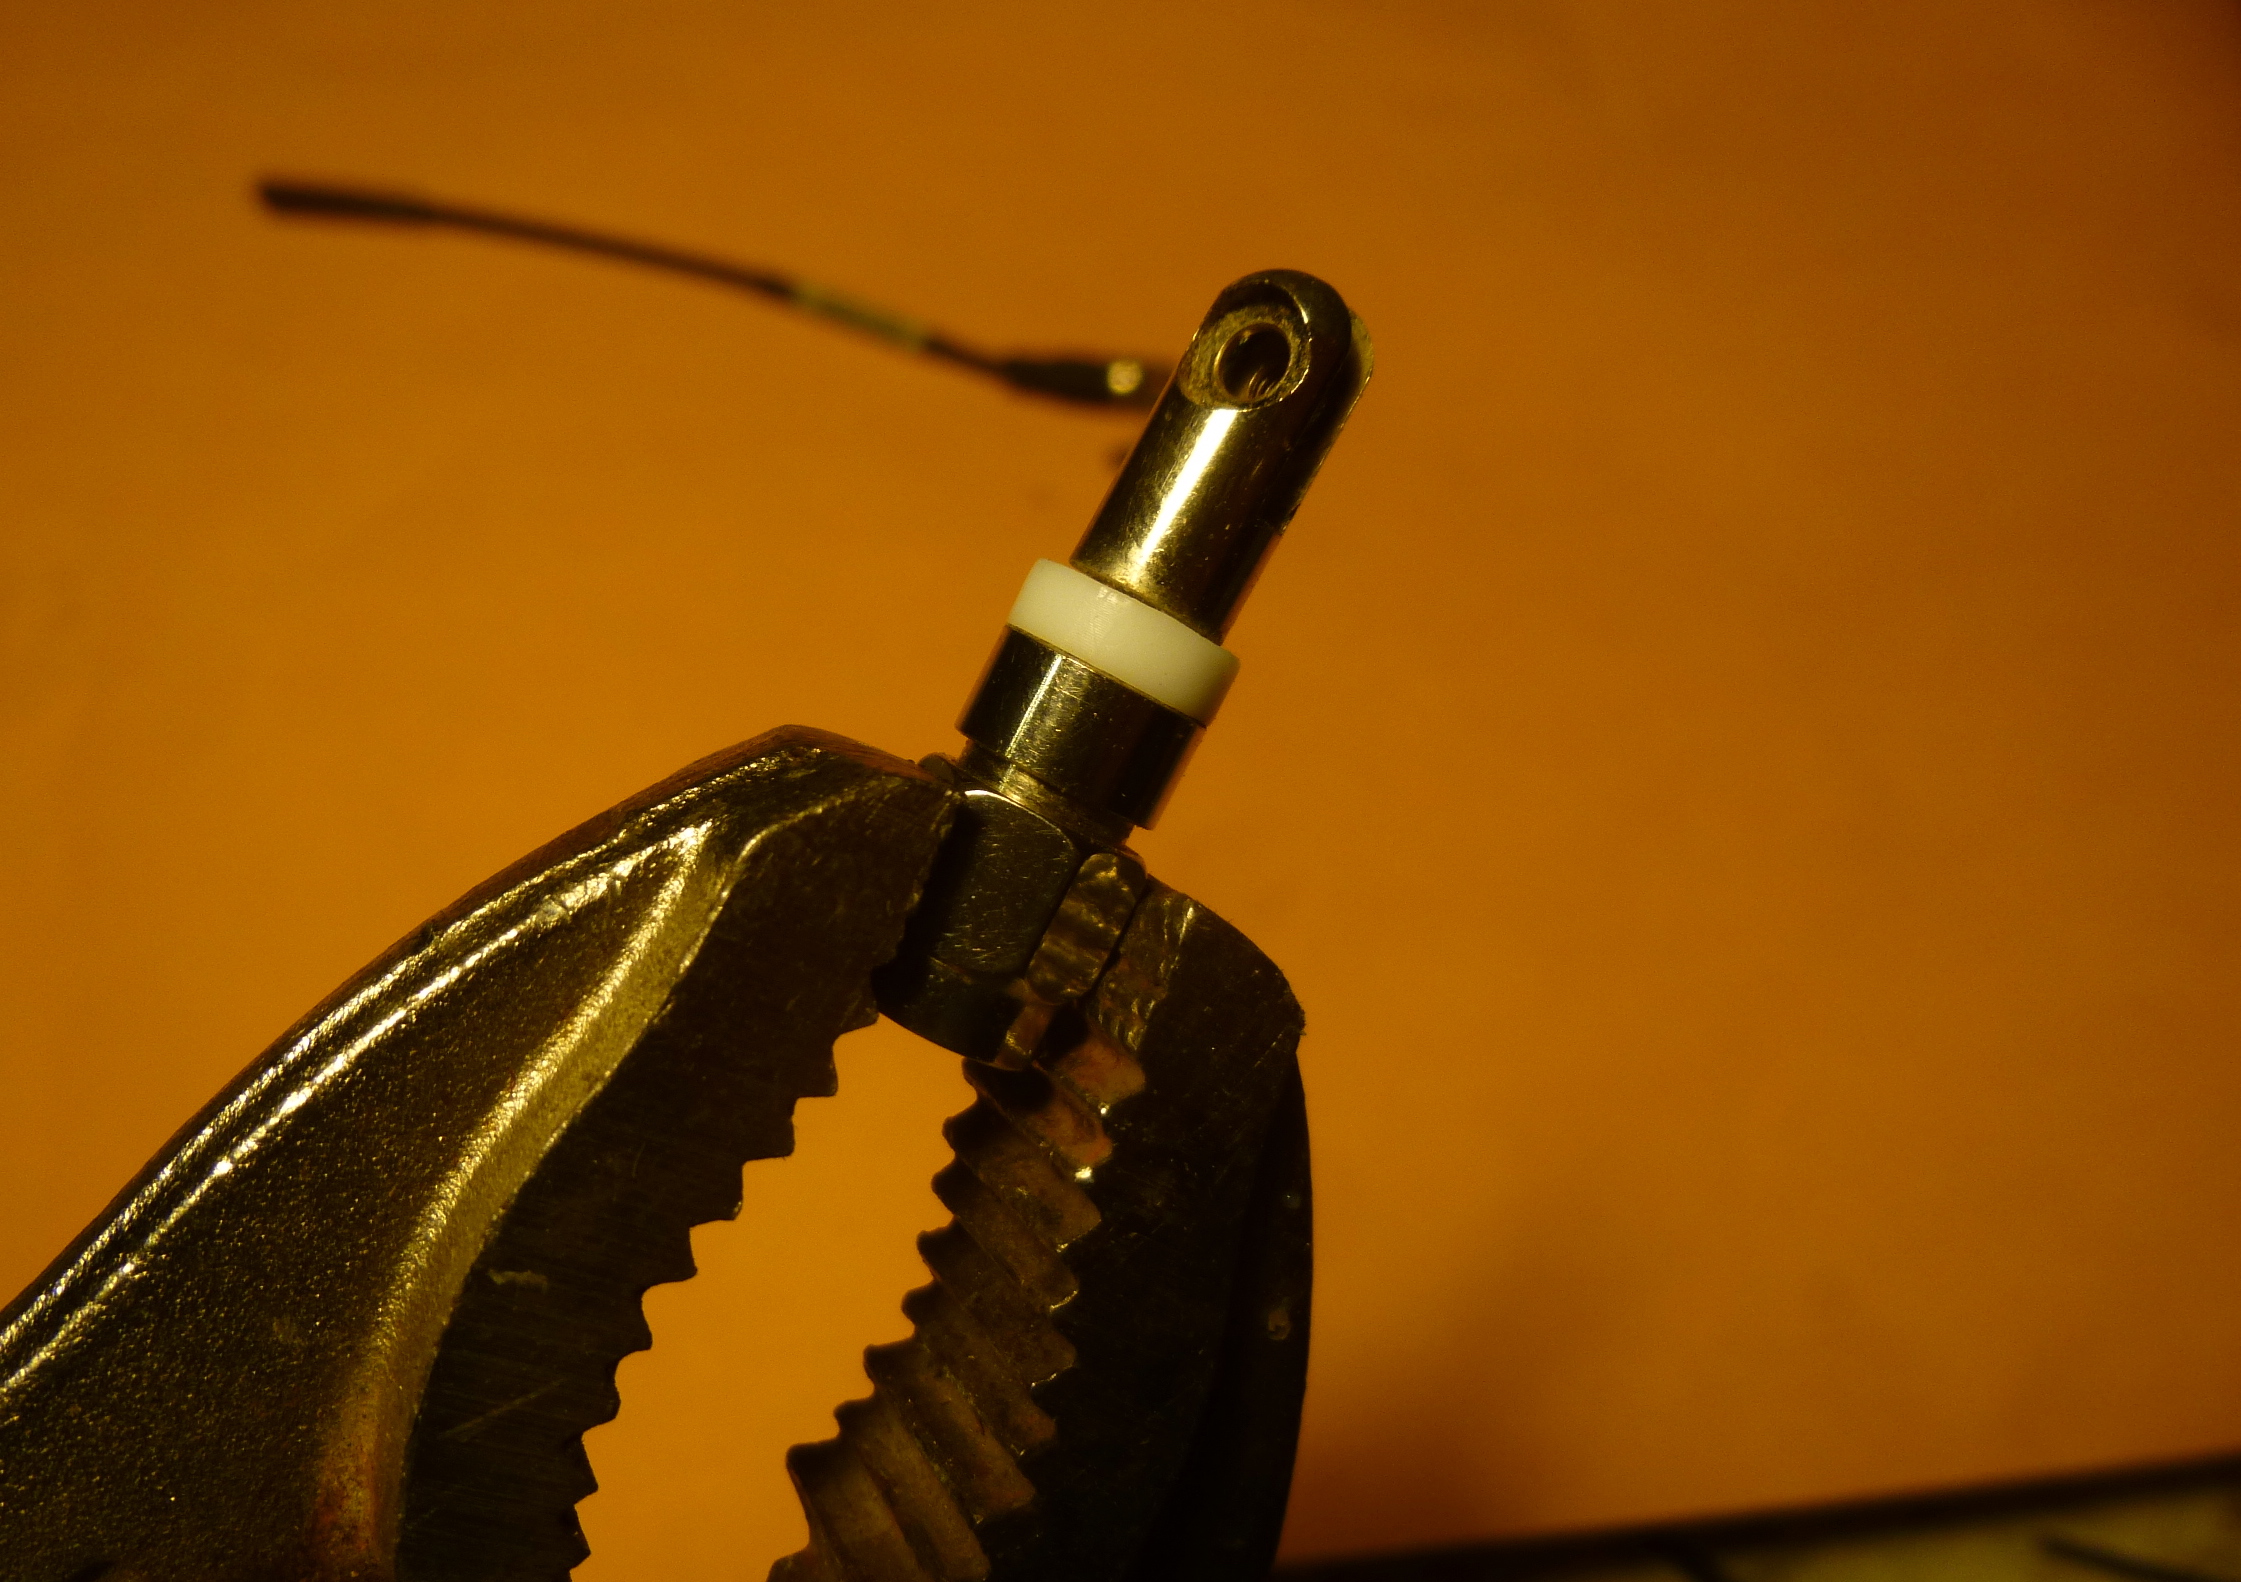
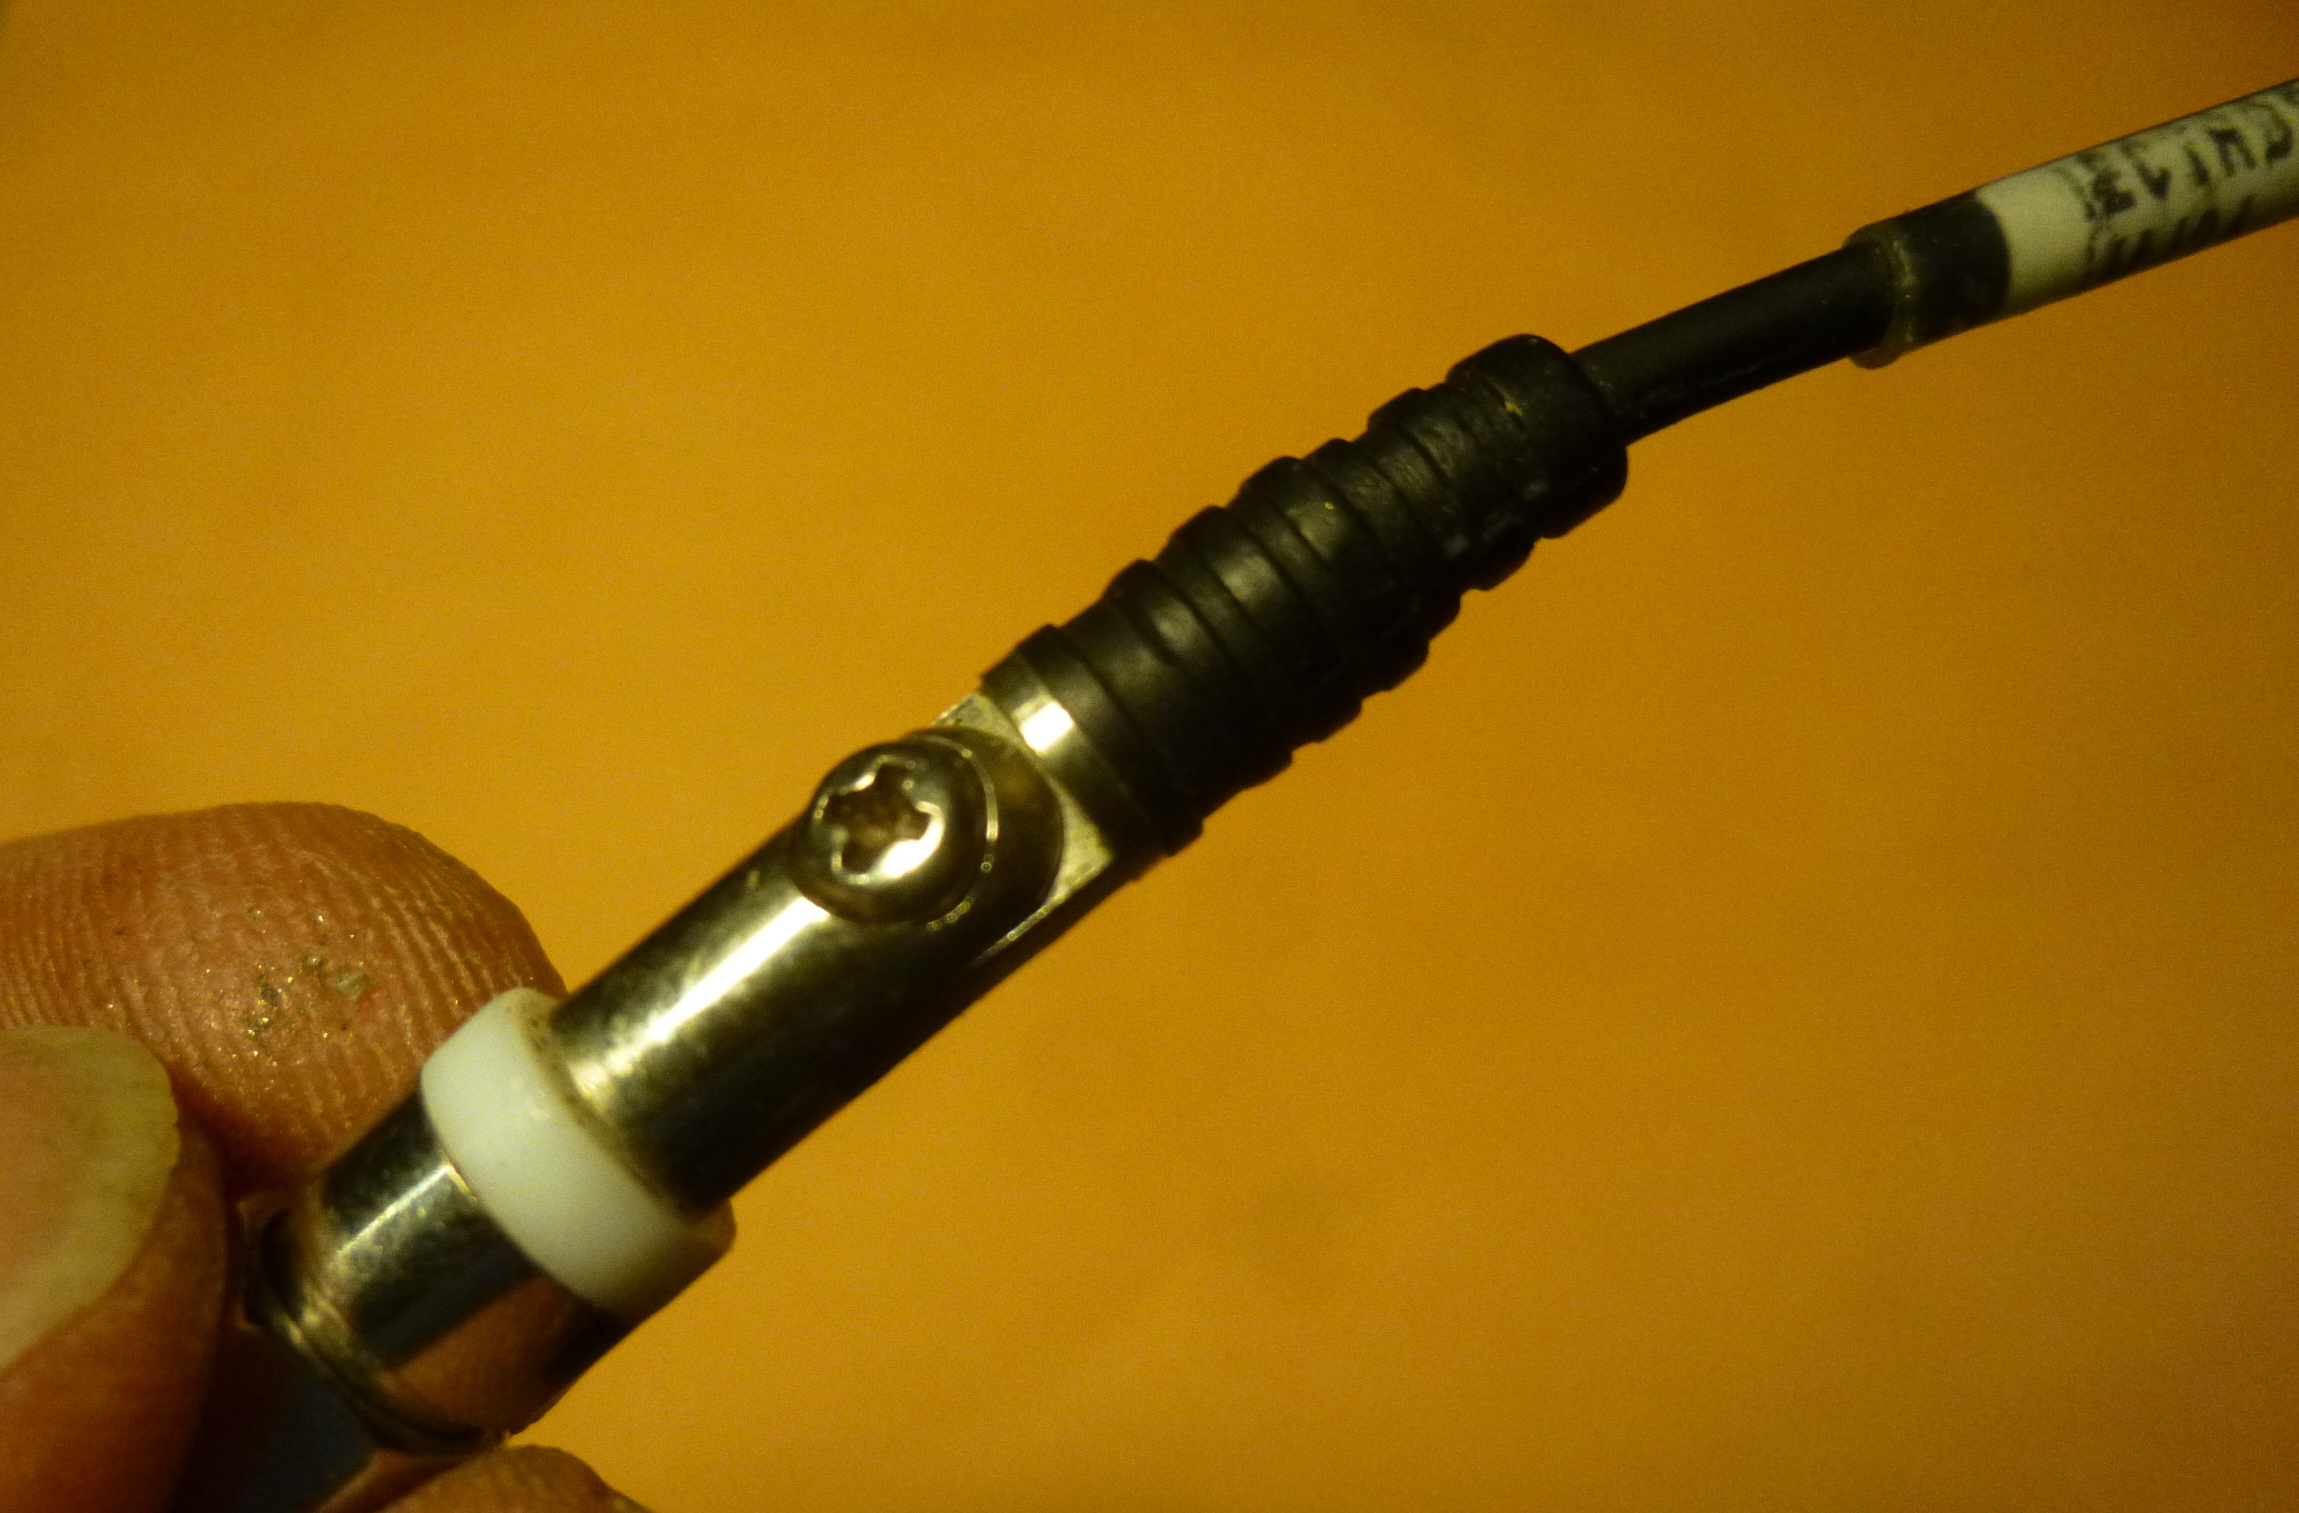
3. Clamp the SMA screw-on nut in the vice grips like so. Do not over tension, or you’ll squash the damn thing. 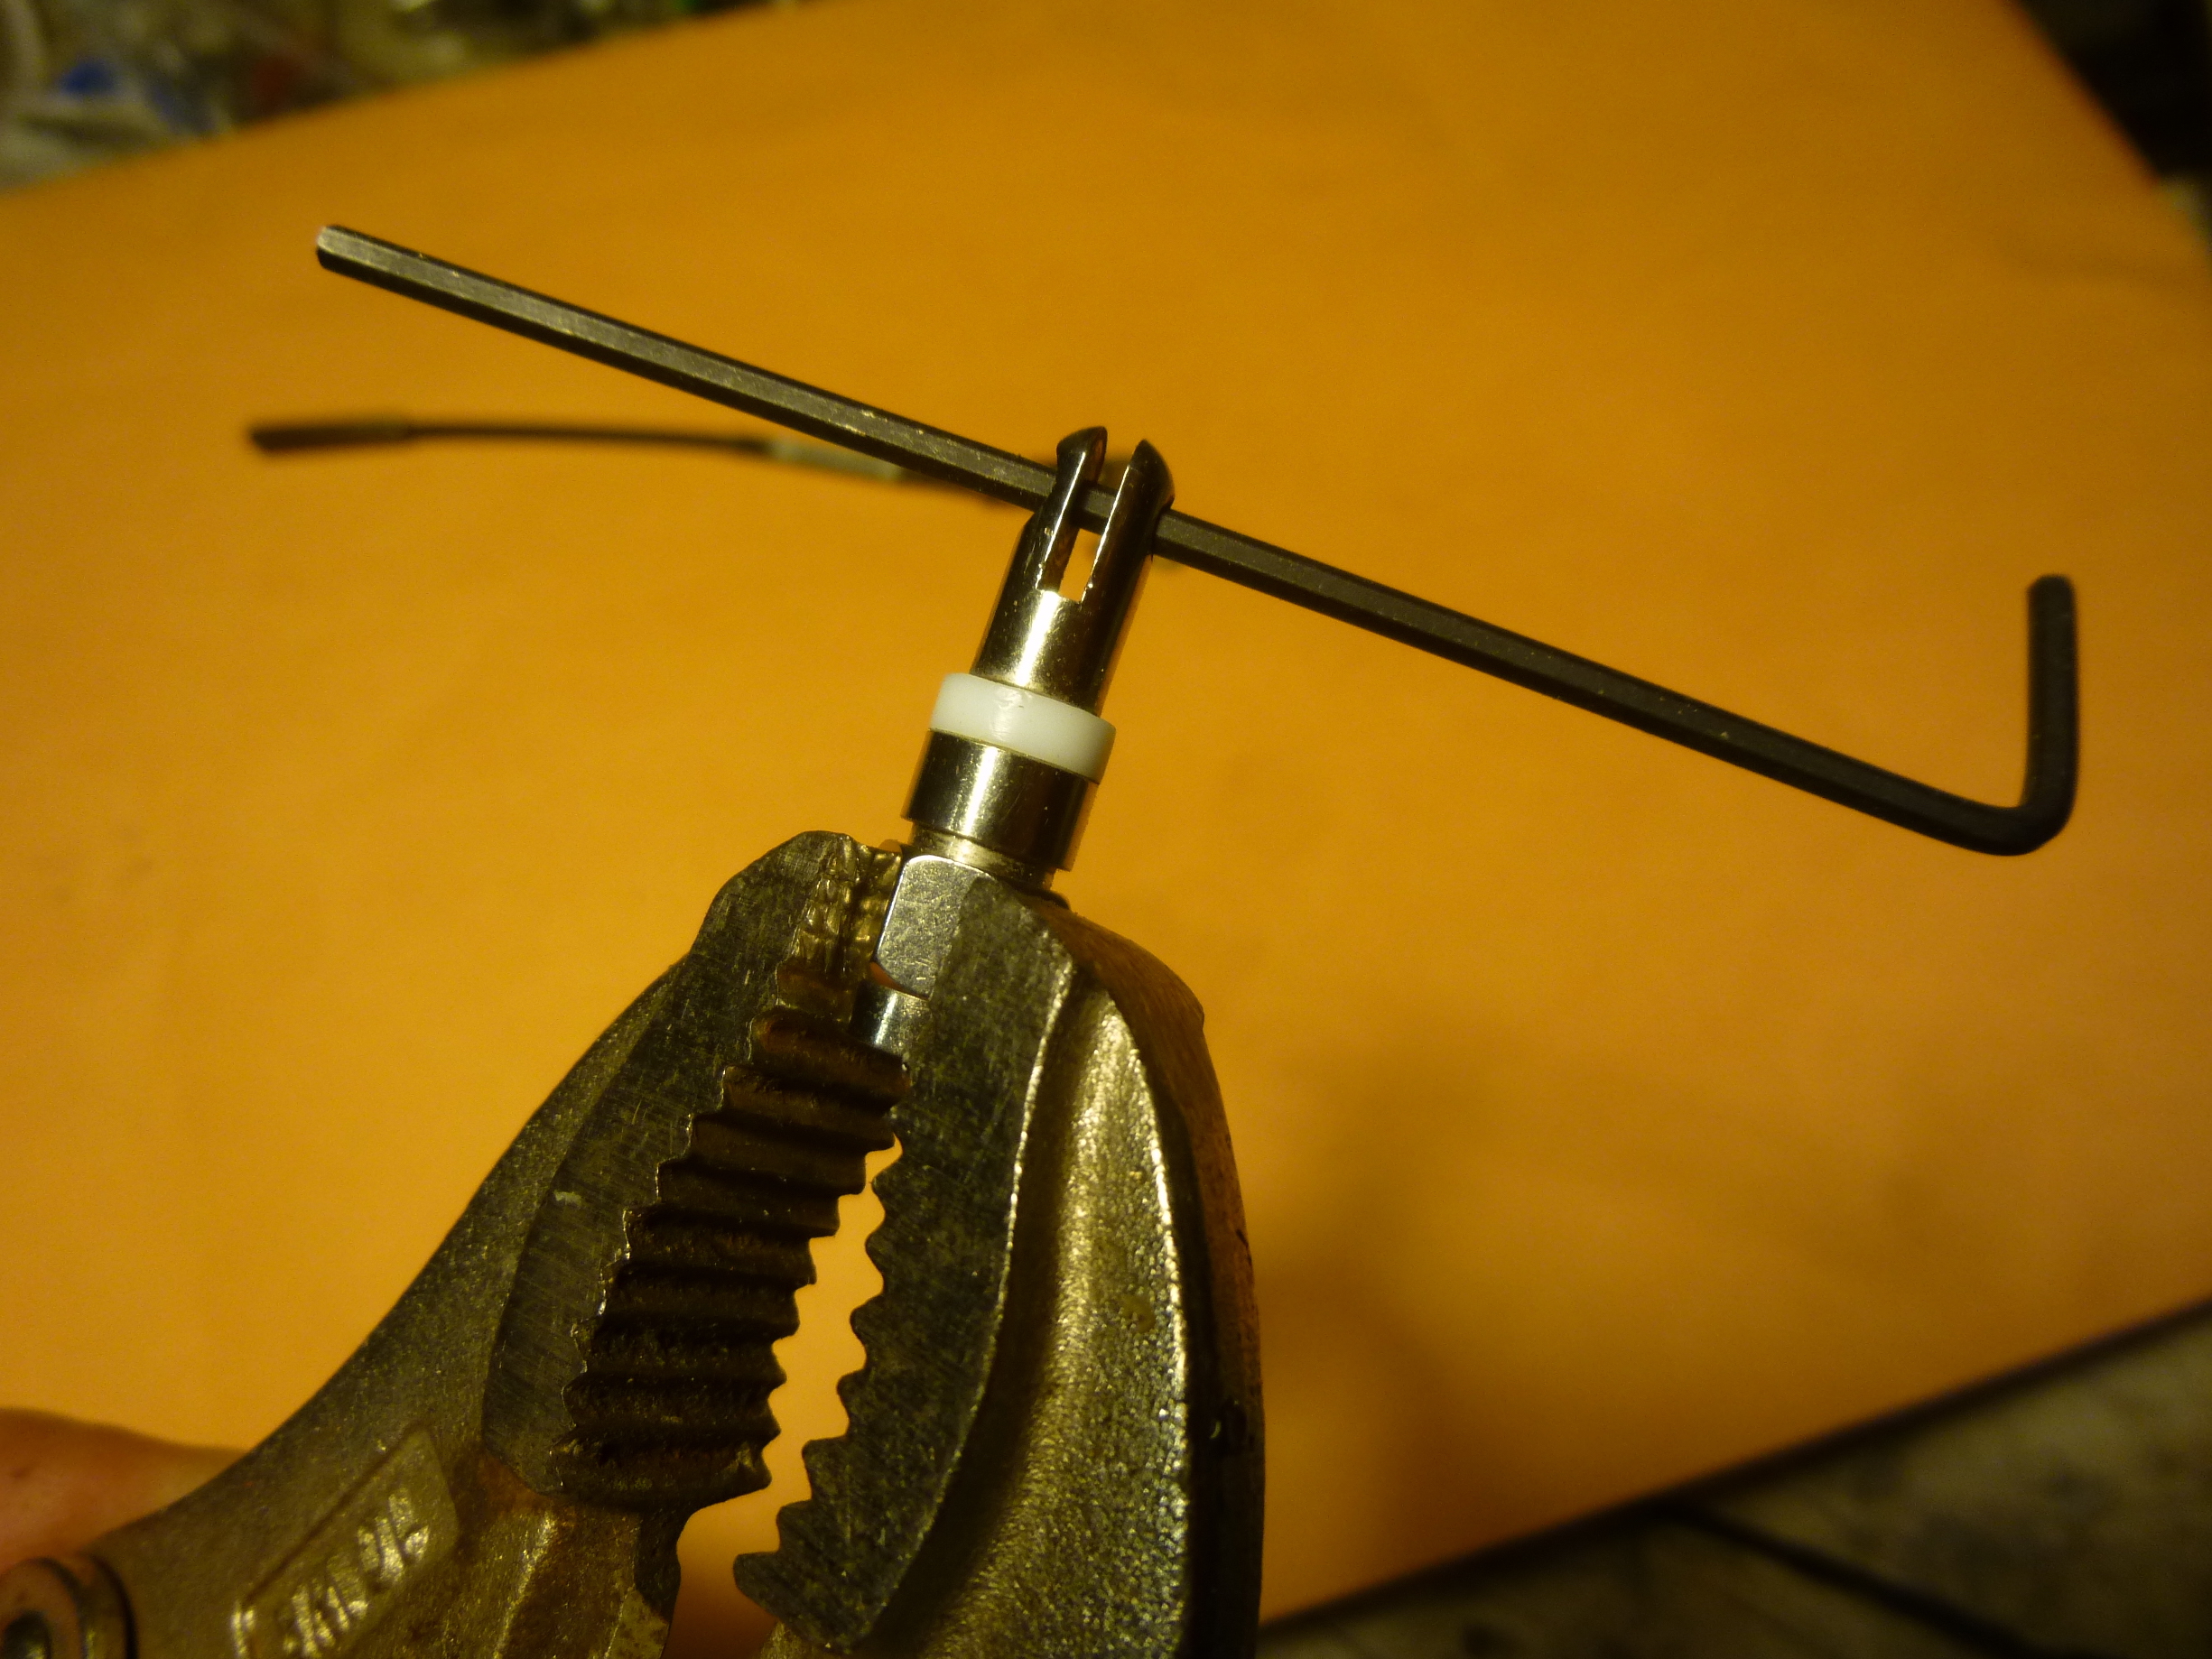
4. Insert an allen wrench (or something) through the holes for the screw. This gives you some purchase on the center assembly to pull it out of the connector body. 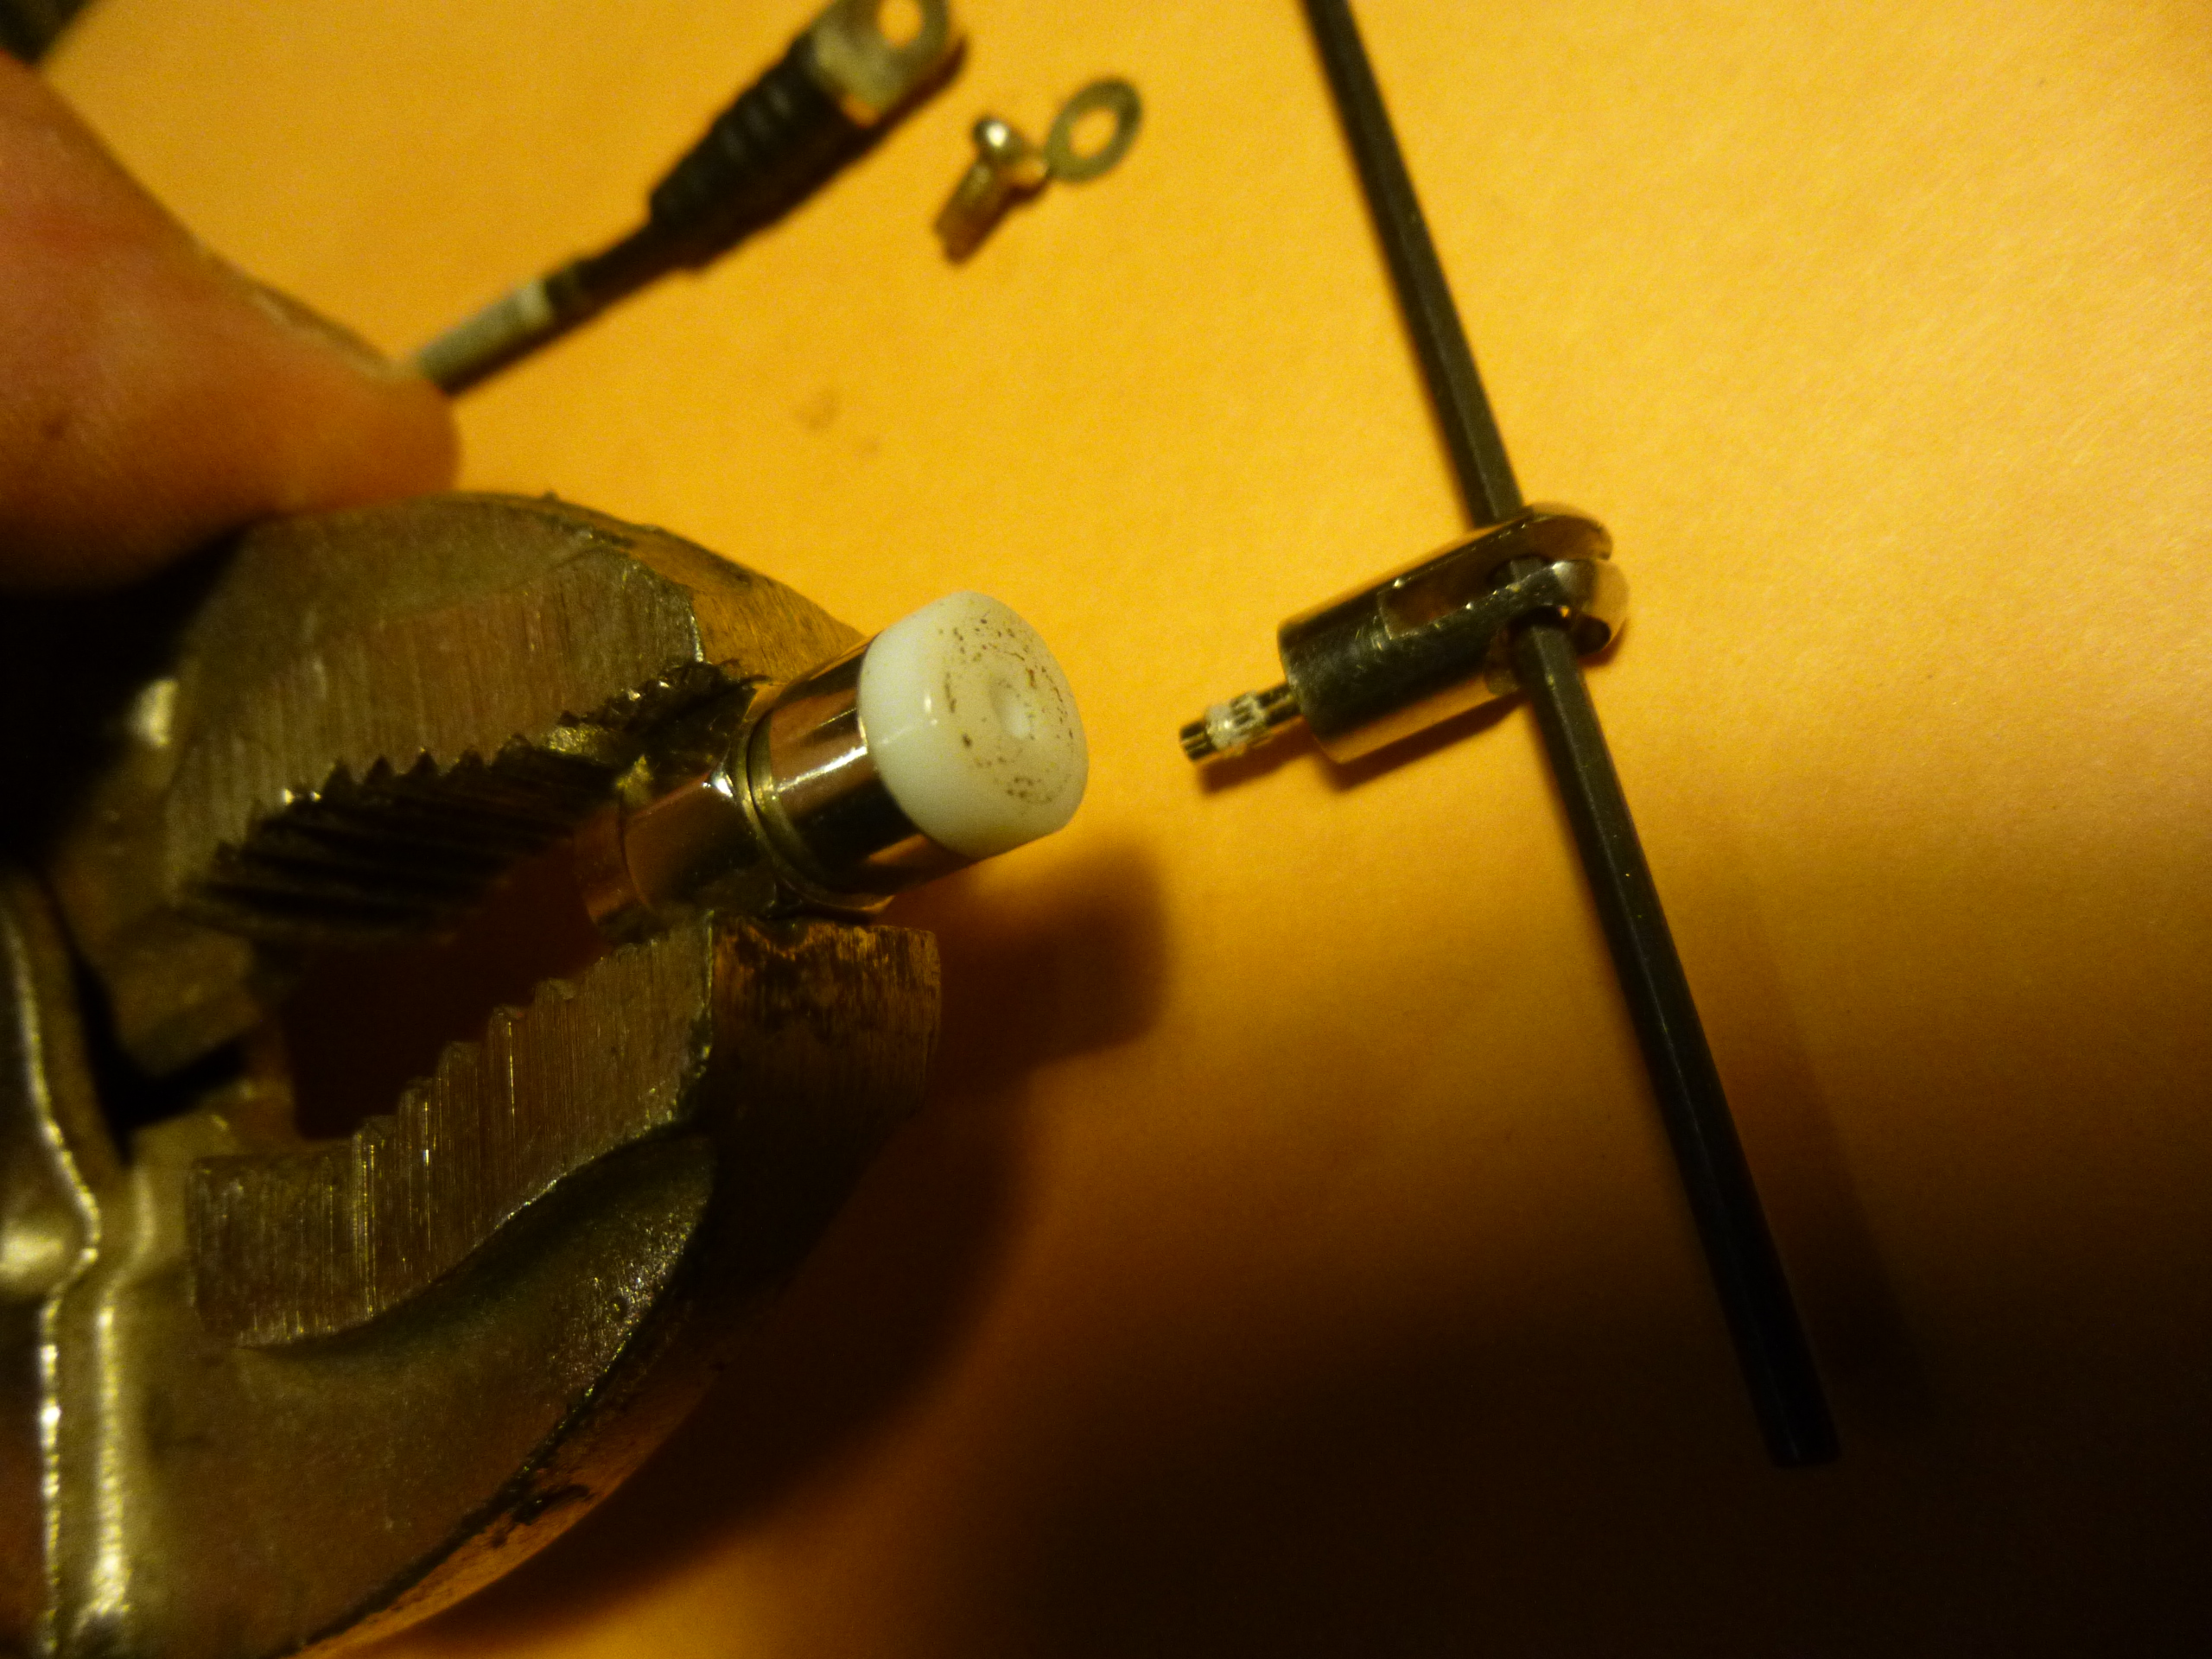
5. With the vice-grip in one hand and the allen wrench in the other, pull the two pieces apart, like you are un-corking a bottle of wine. Pull! 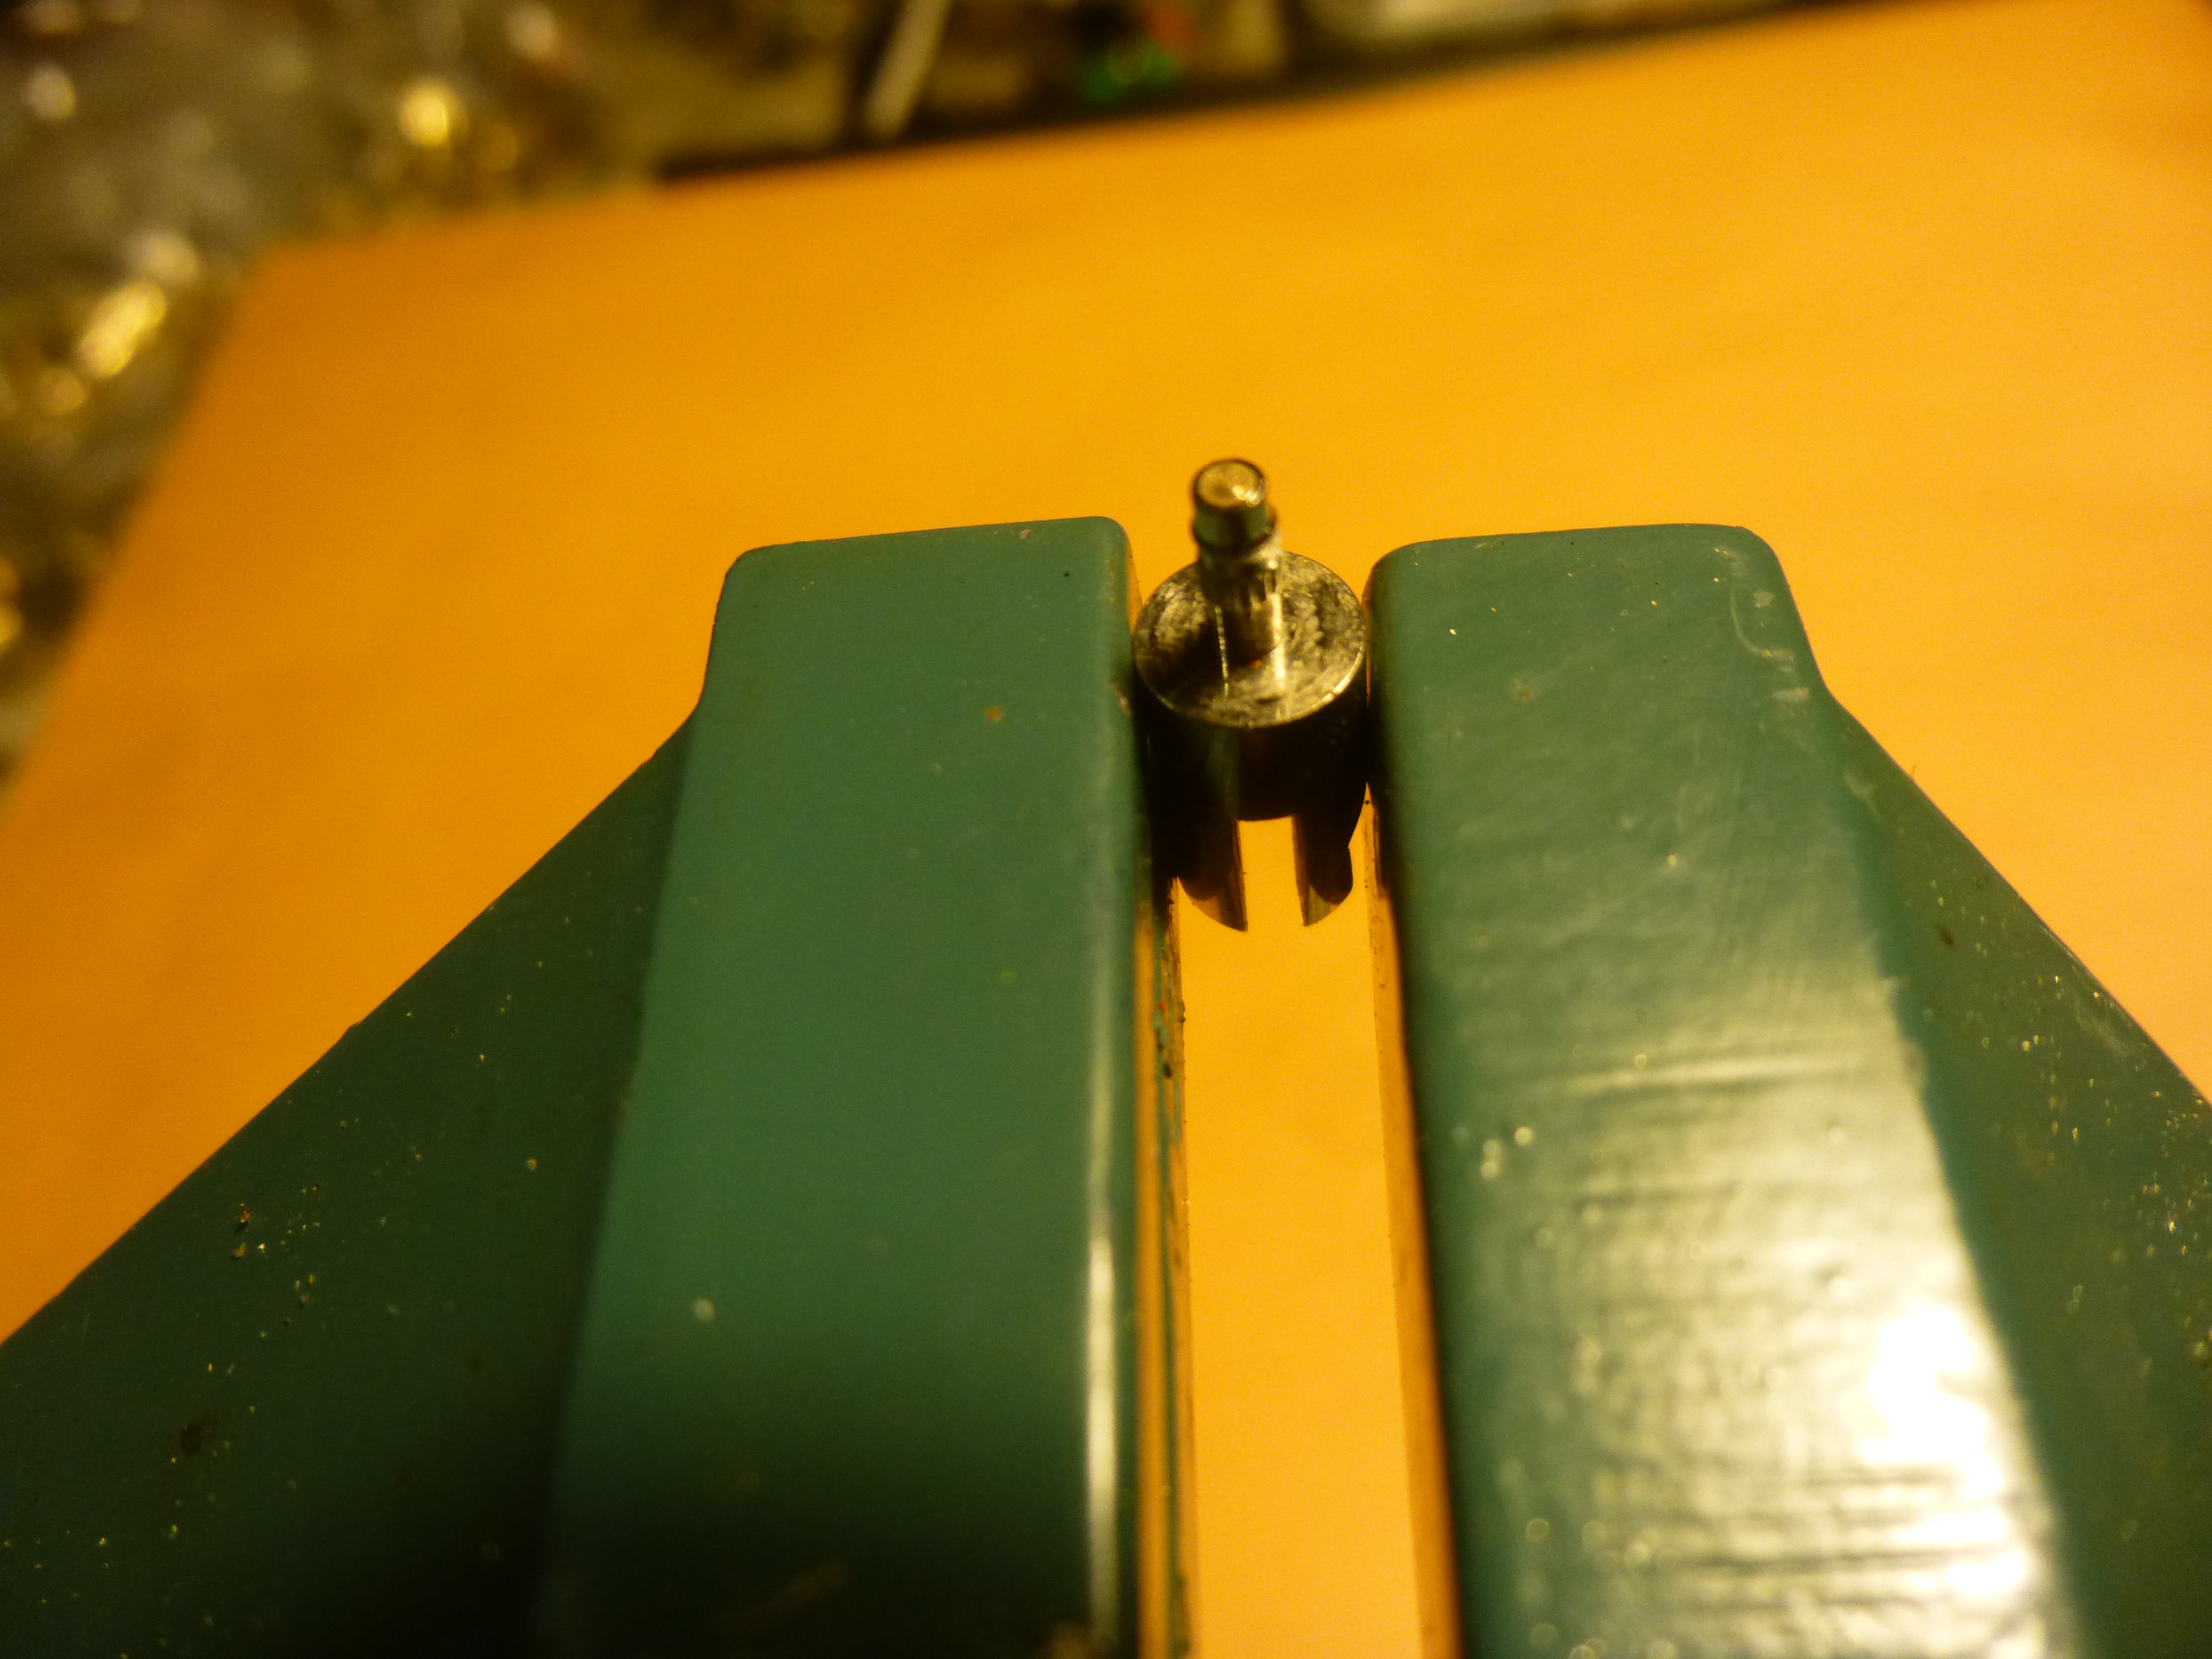
My solder is not black, it just looks that way in this pic.
6. Insert the antenna top-piece in the vice, broken-pin-area facing up. ( I call this the spud). Use your Dremel tool with a circuit-board drill bit to create a hole in the top of the spud where the old pin broke off.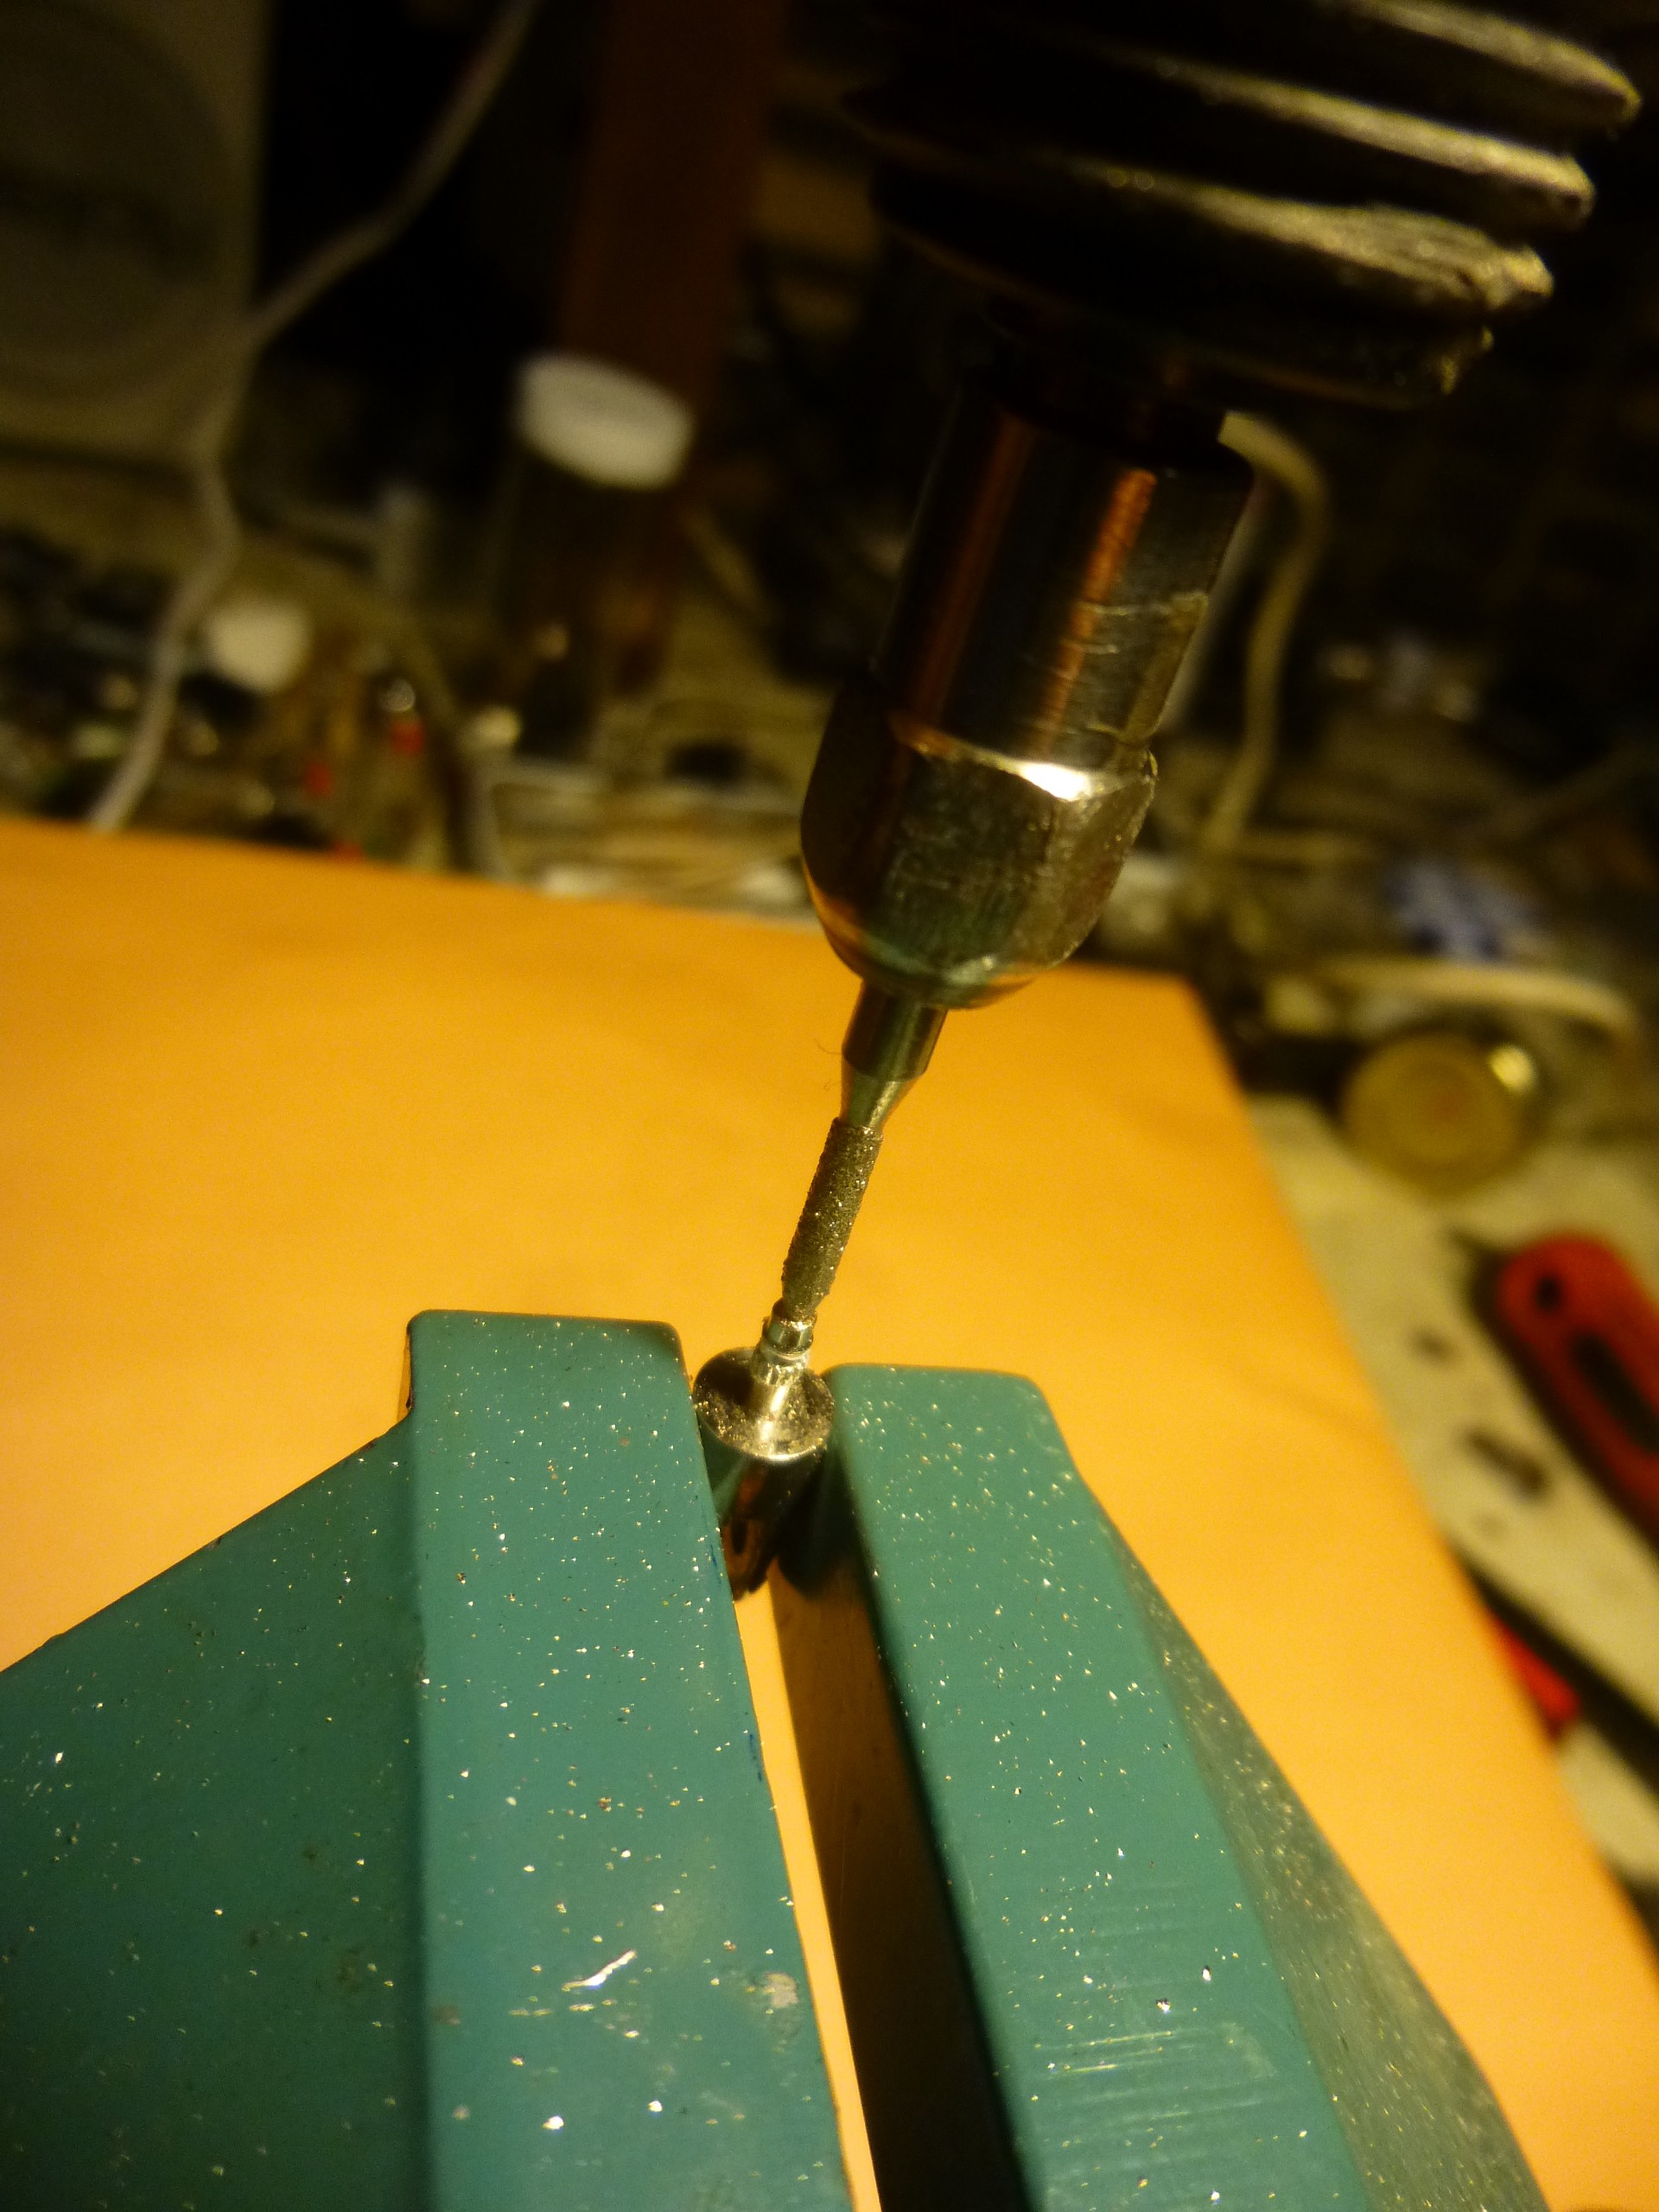 Make it as deep as you can, say 1/8 inch. Steady hands! Make sure the hole stays in the center of the spud. Tin the hole with some solder. Use a little too much solder, its ok. You’ll file off the excess later (below).
7. Remove the top piece from the vice, set aside, and Insert your thick wire (like from the 1 watt resistor) in the vice. Slide the new SMA pin over the wire. Solder the pin to the wire. Make a damn good connection. 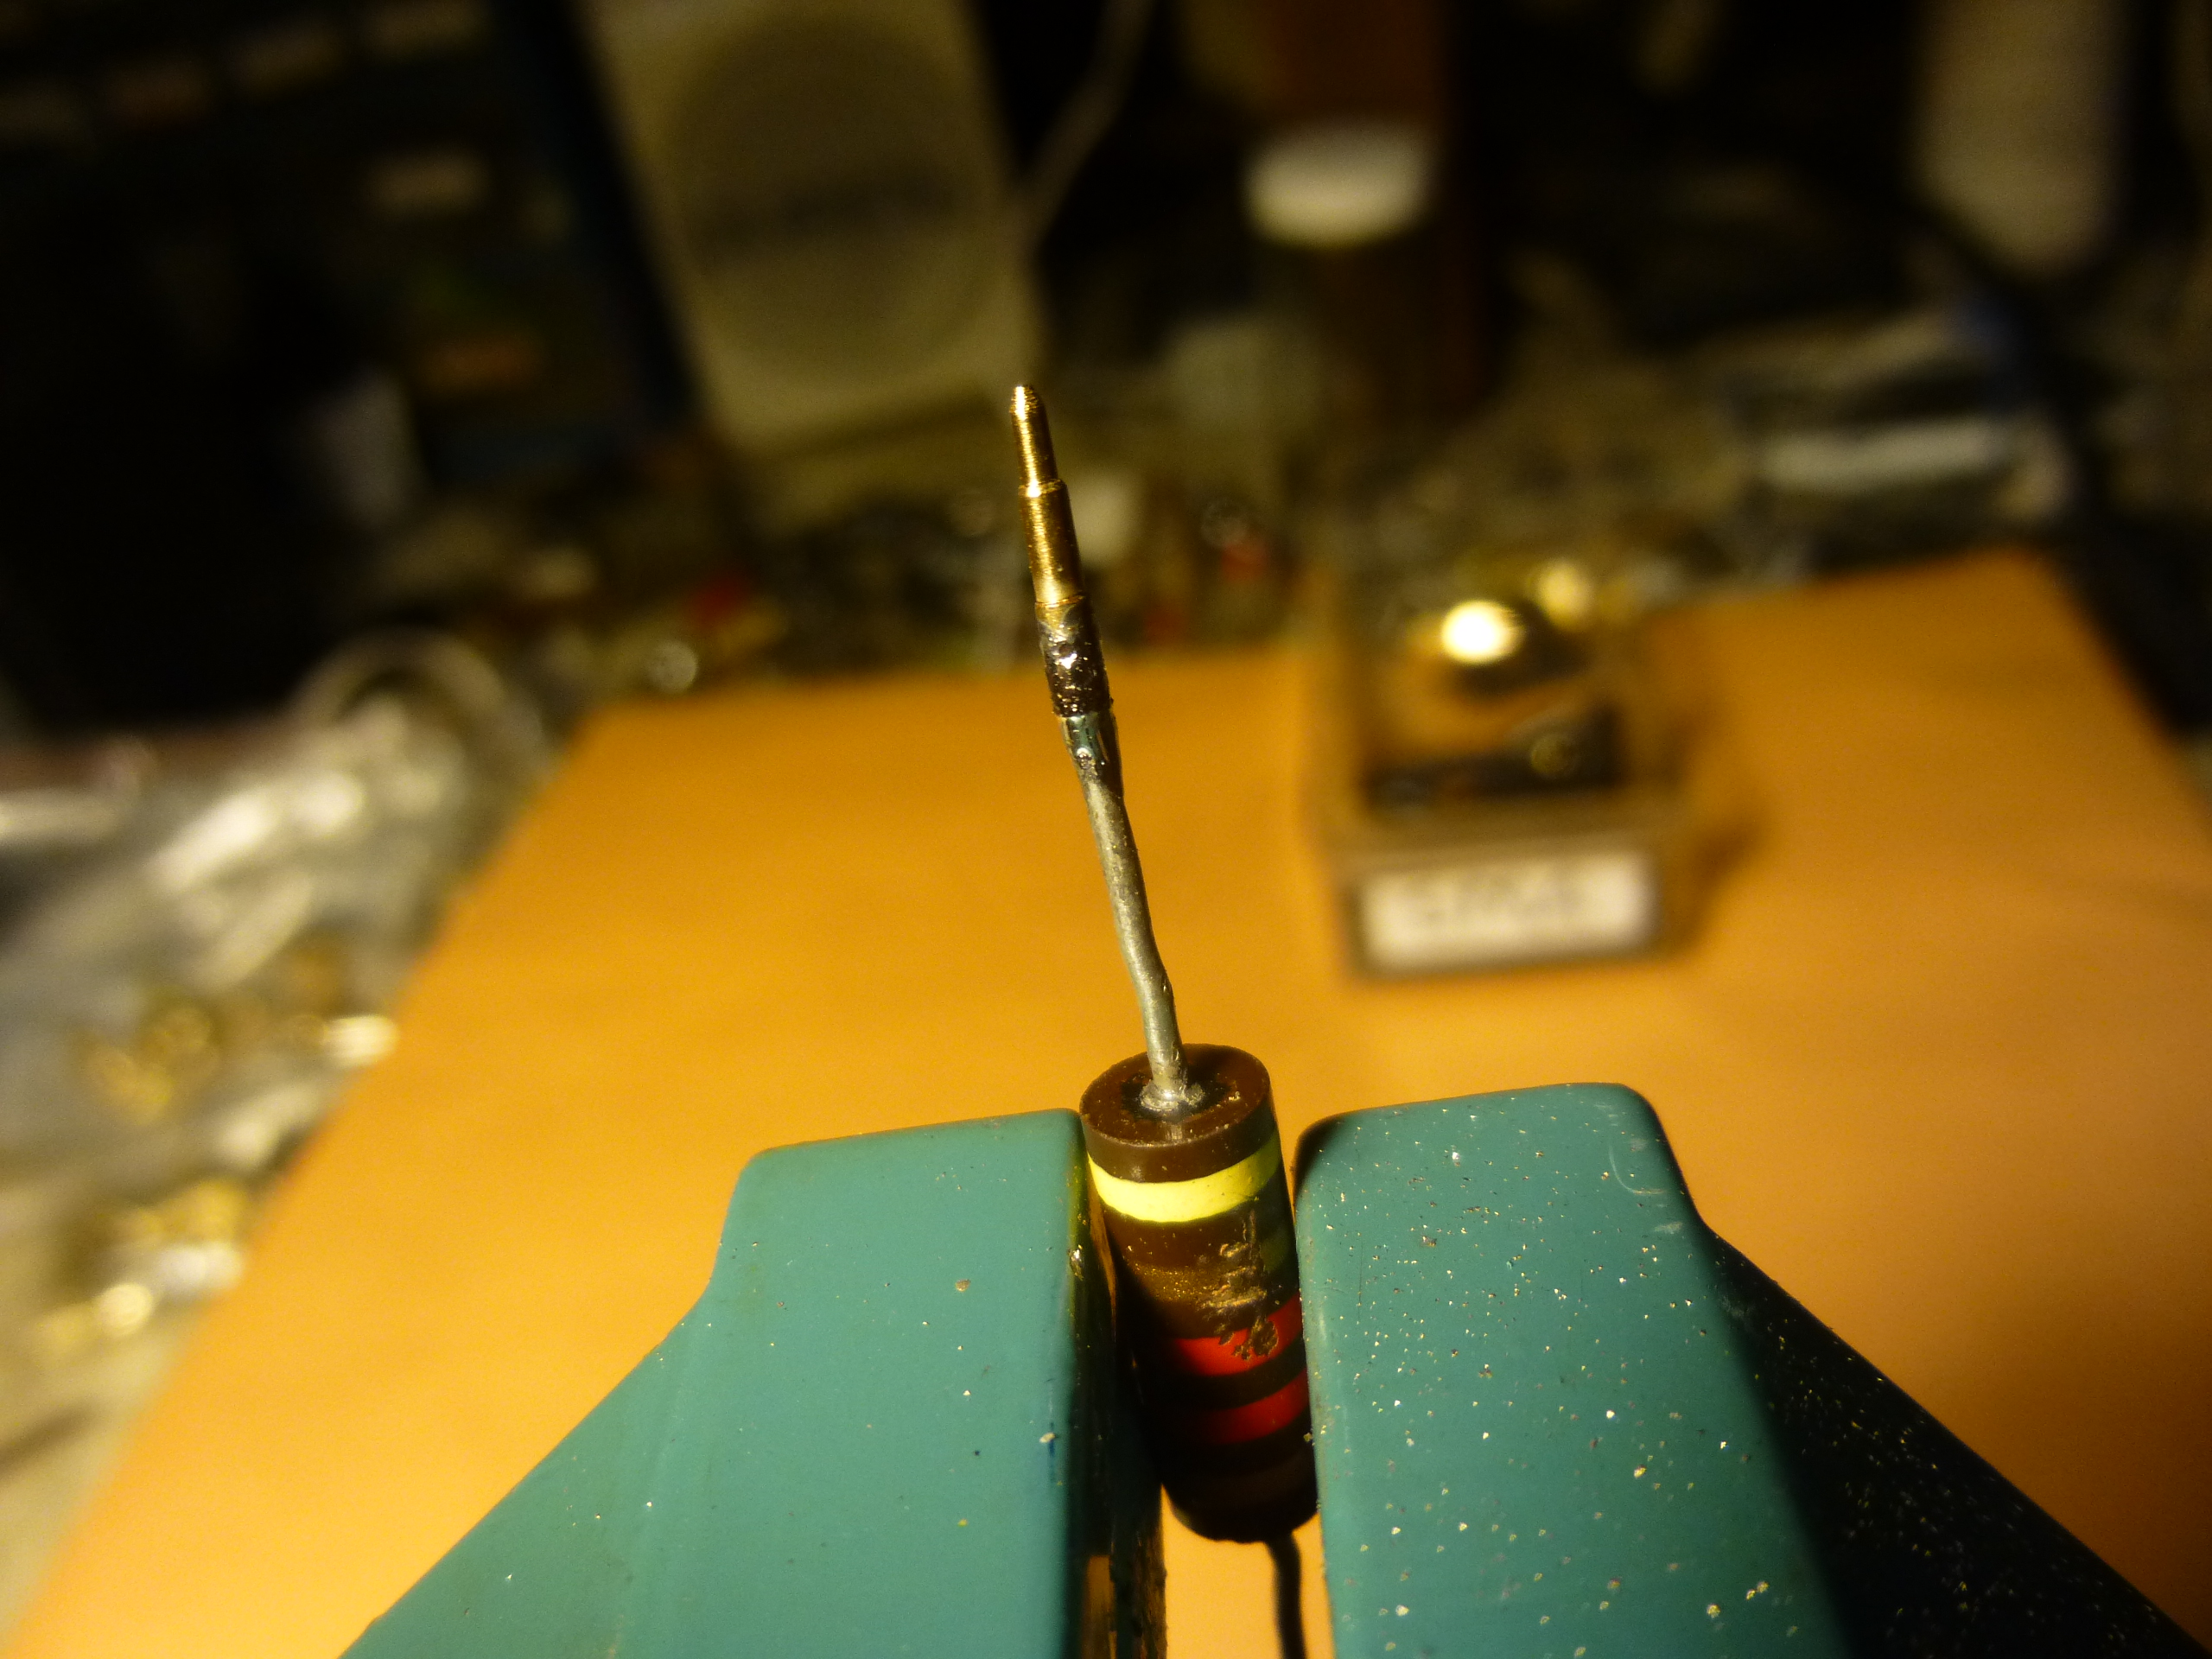
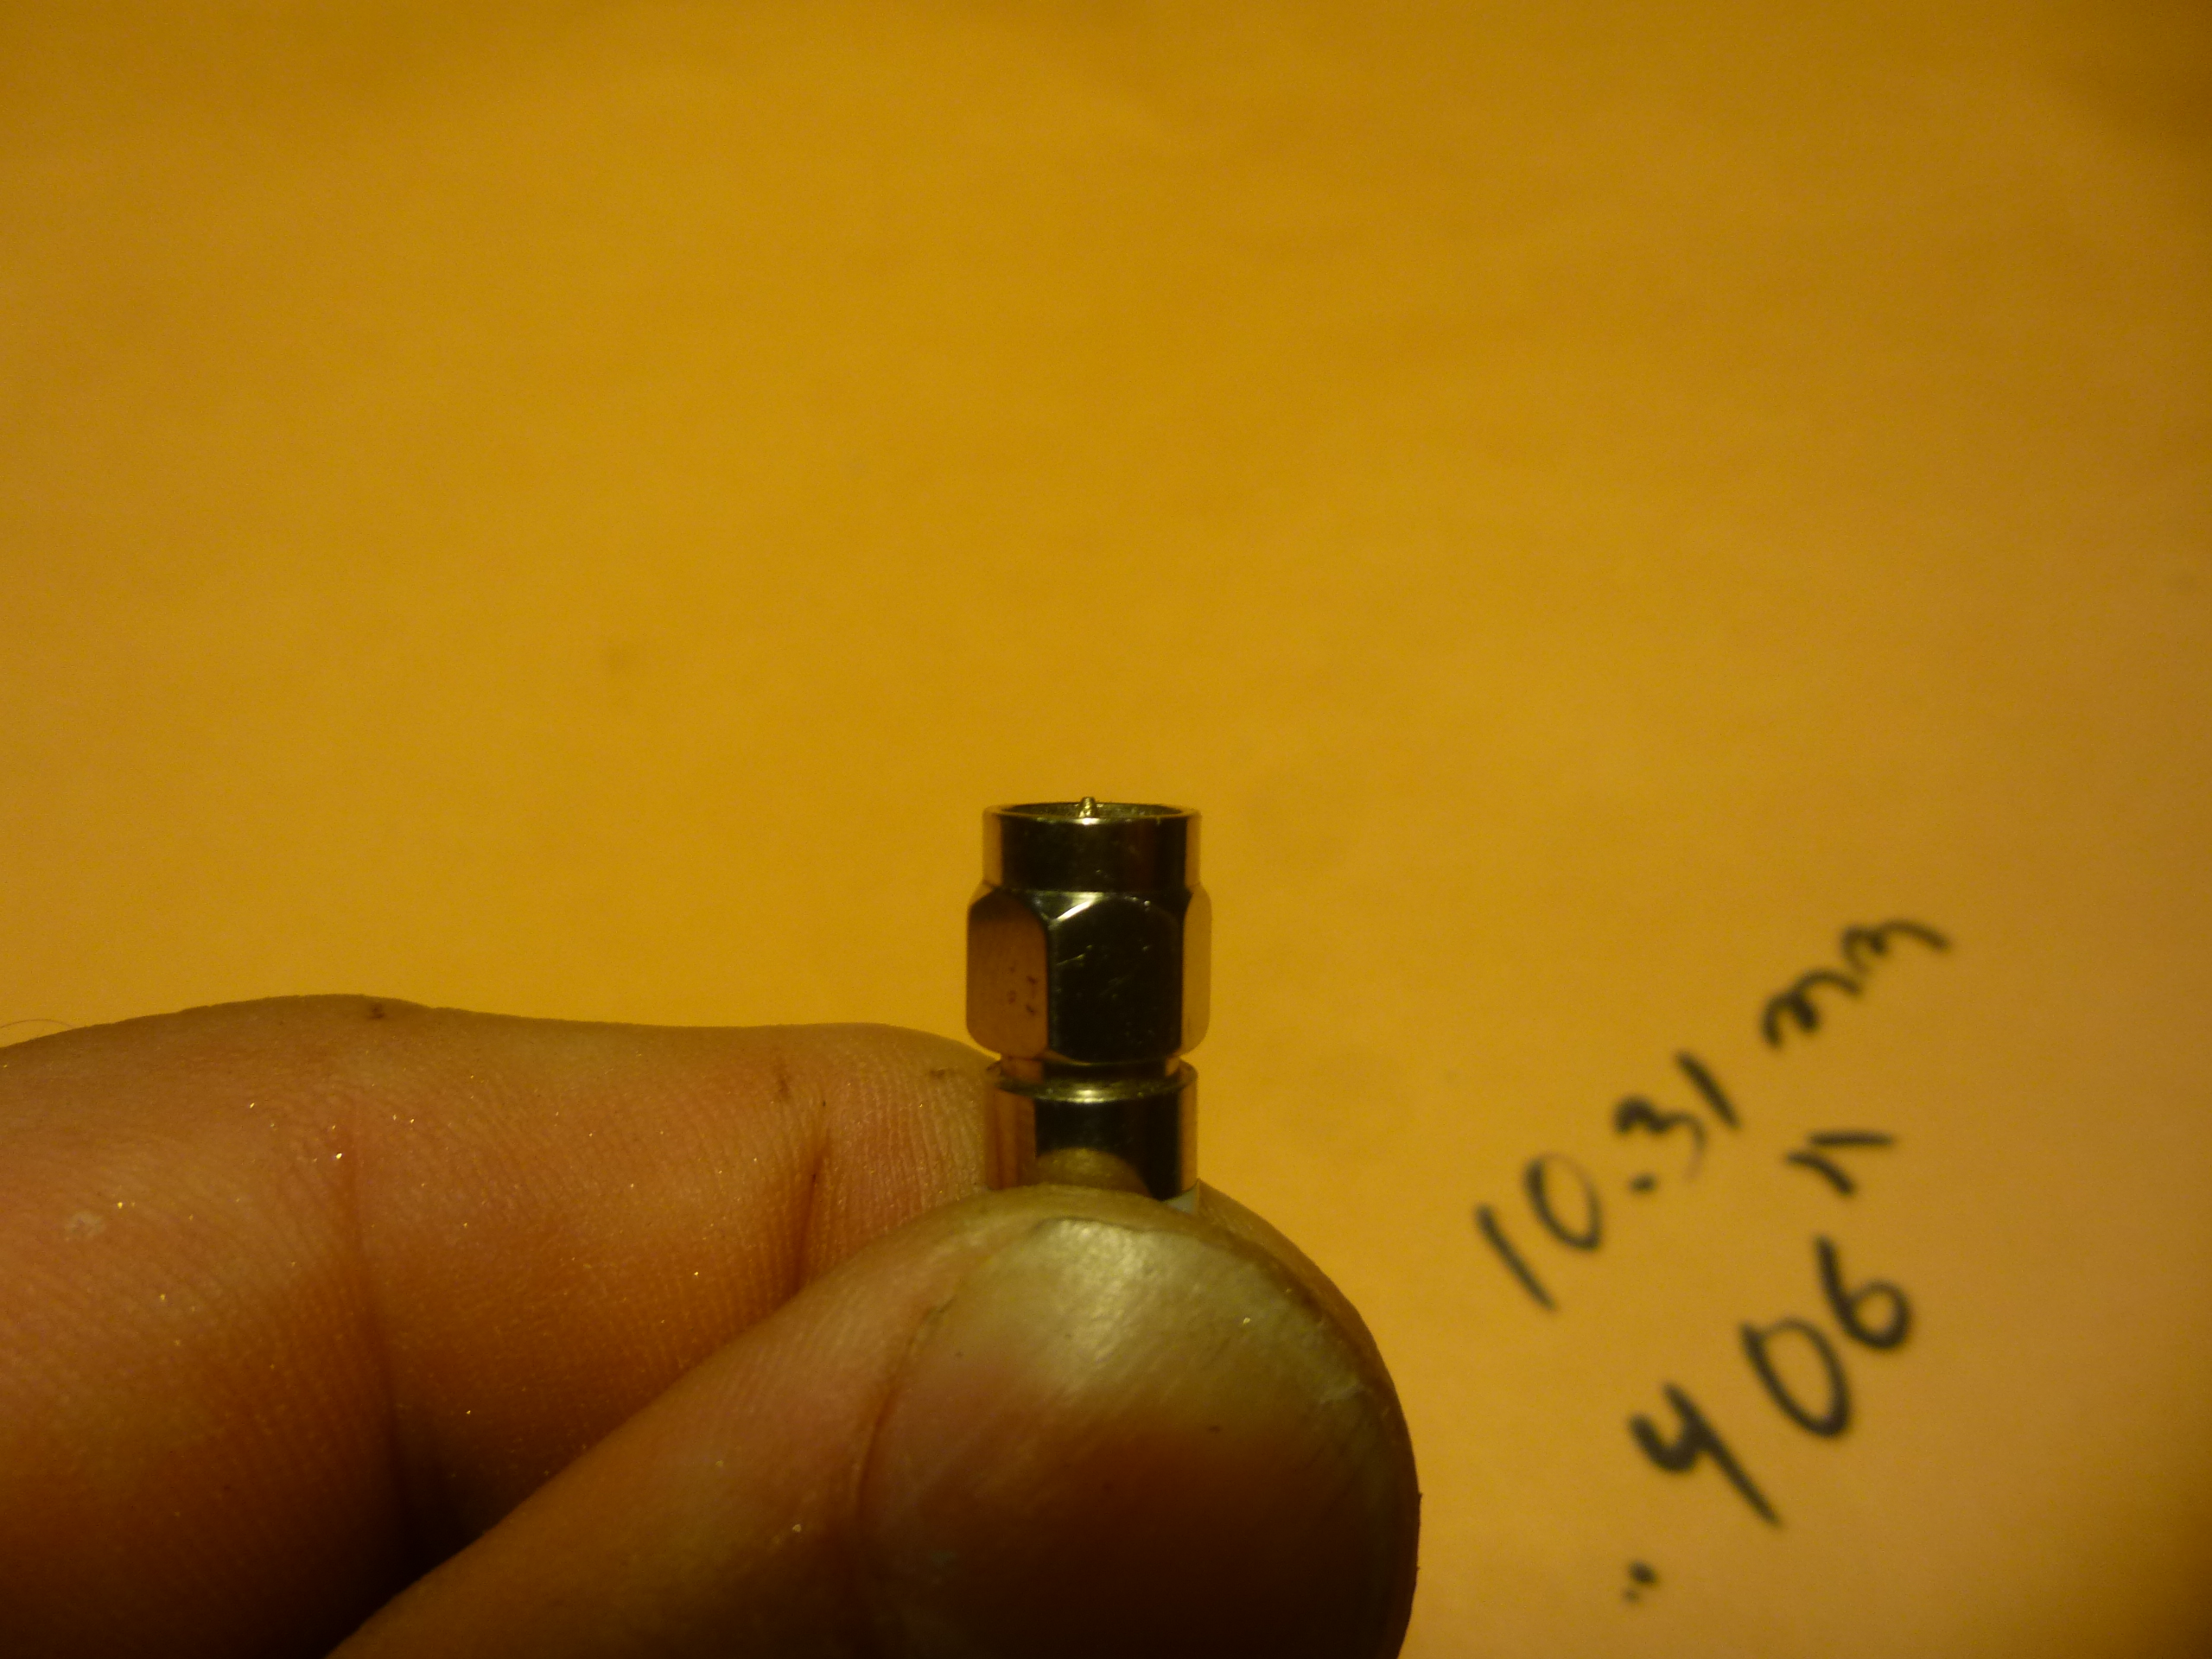
8. Measure at least 10.40 mm from the top of the pin and cut the thick wire at that point. This length may vary, depending on how deep a hole you drilled in the spud previously. Regardless, the tip of the new pin should end up 10.30 mm away from where the old pin broke off the spud. Thats .403 inches. Cut and trim the thick wire so the pin-tip arrives at this length. File down the cut point to smooth and round, OK?
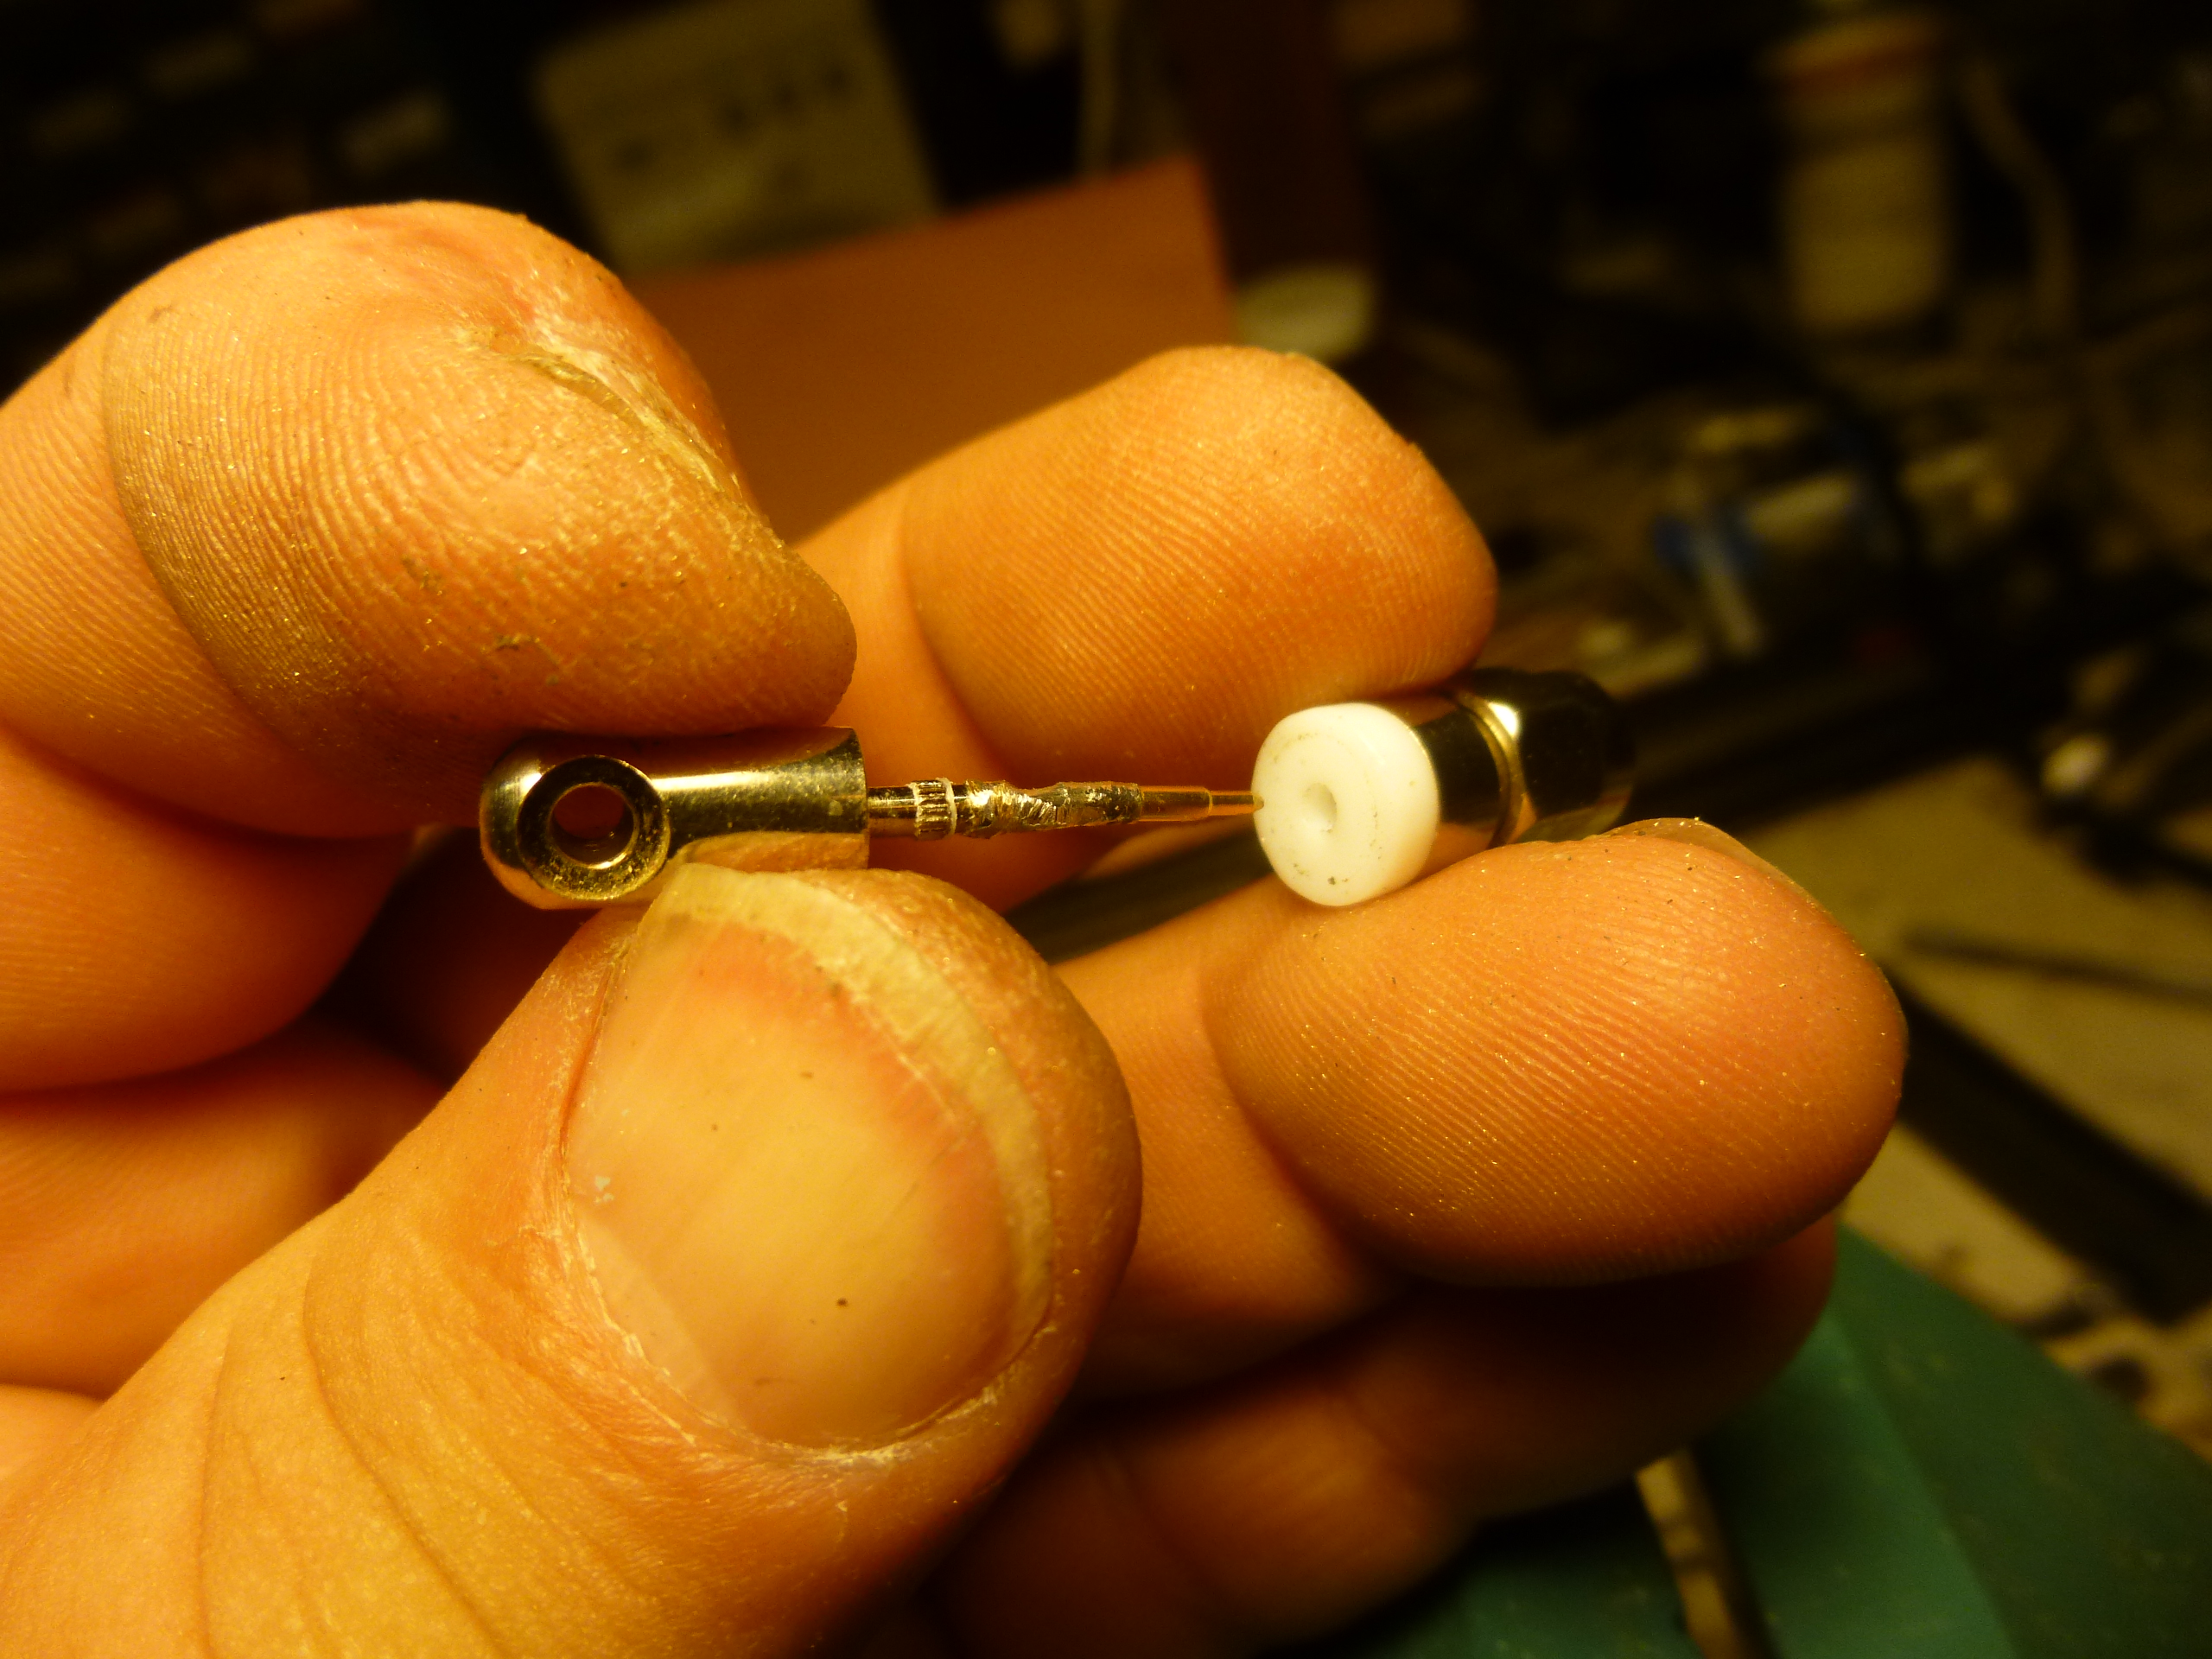
9. Put your drilled spud back in the vice. Insert the pin/wire combo into the hole in the spud. Again, make sure the distance from the tip of the pin to where the pin broke off is 10.30mm.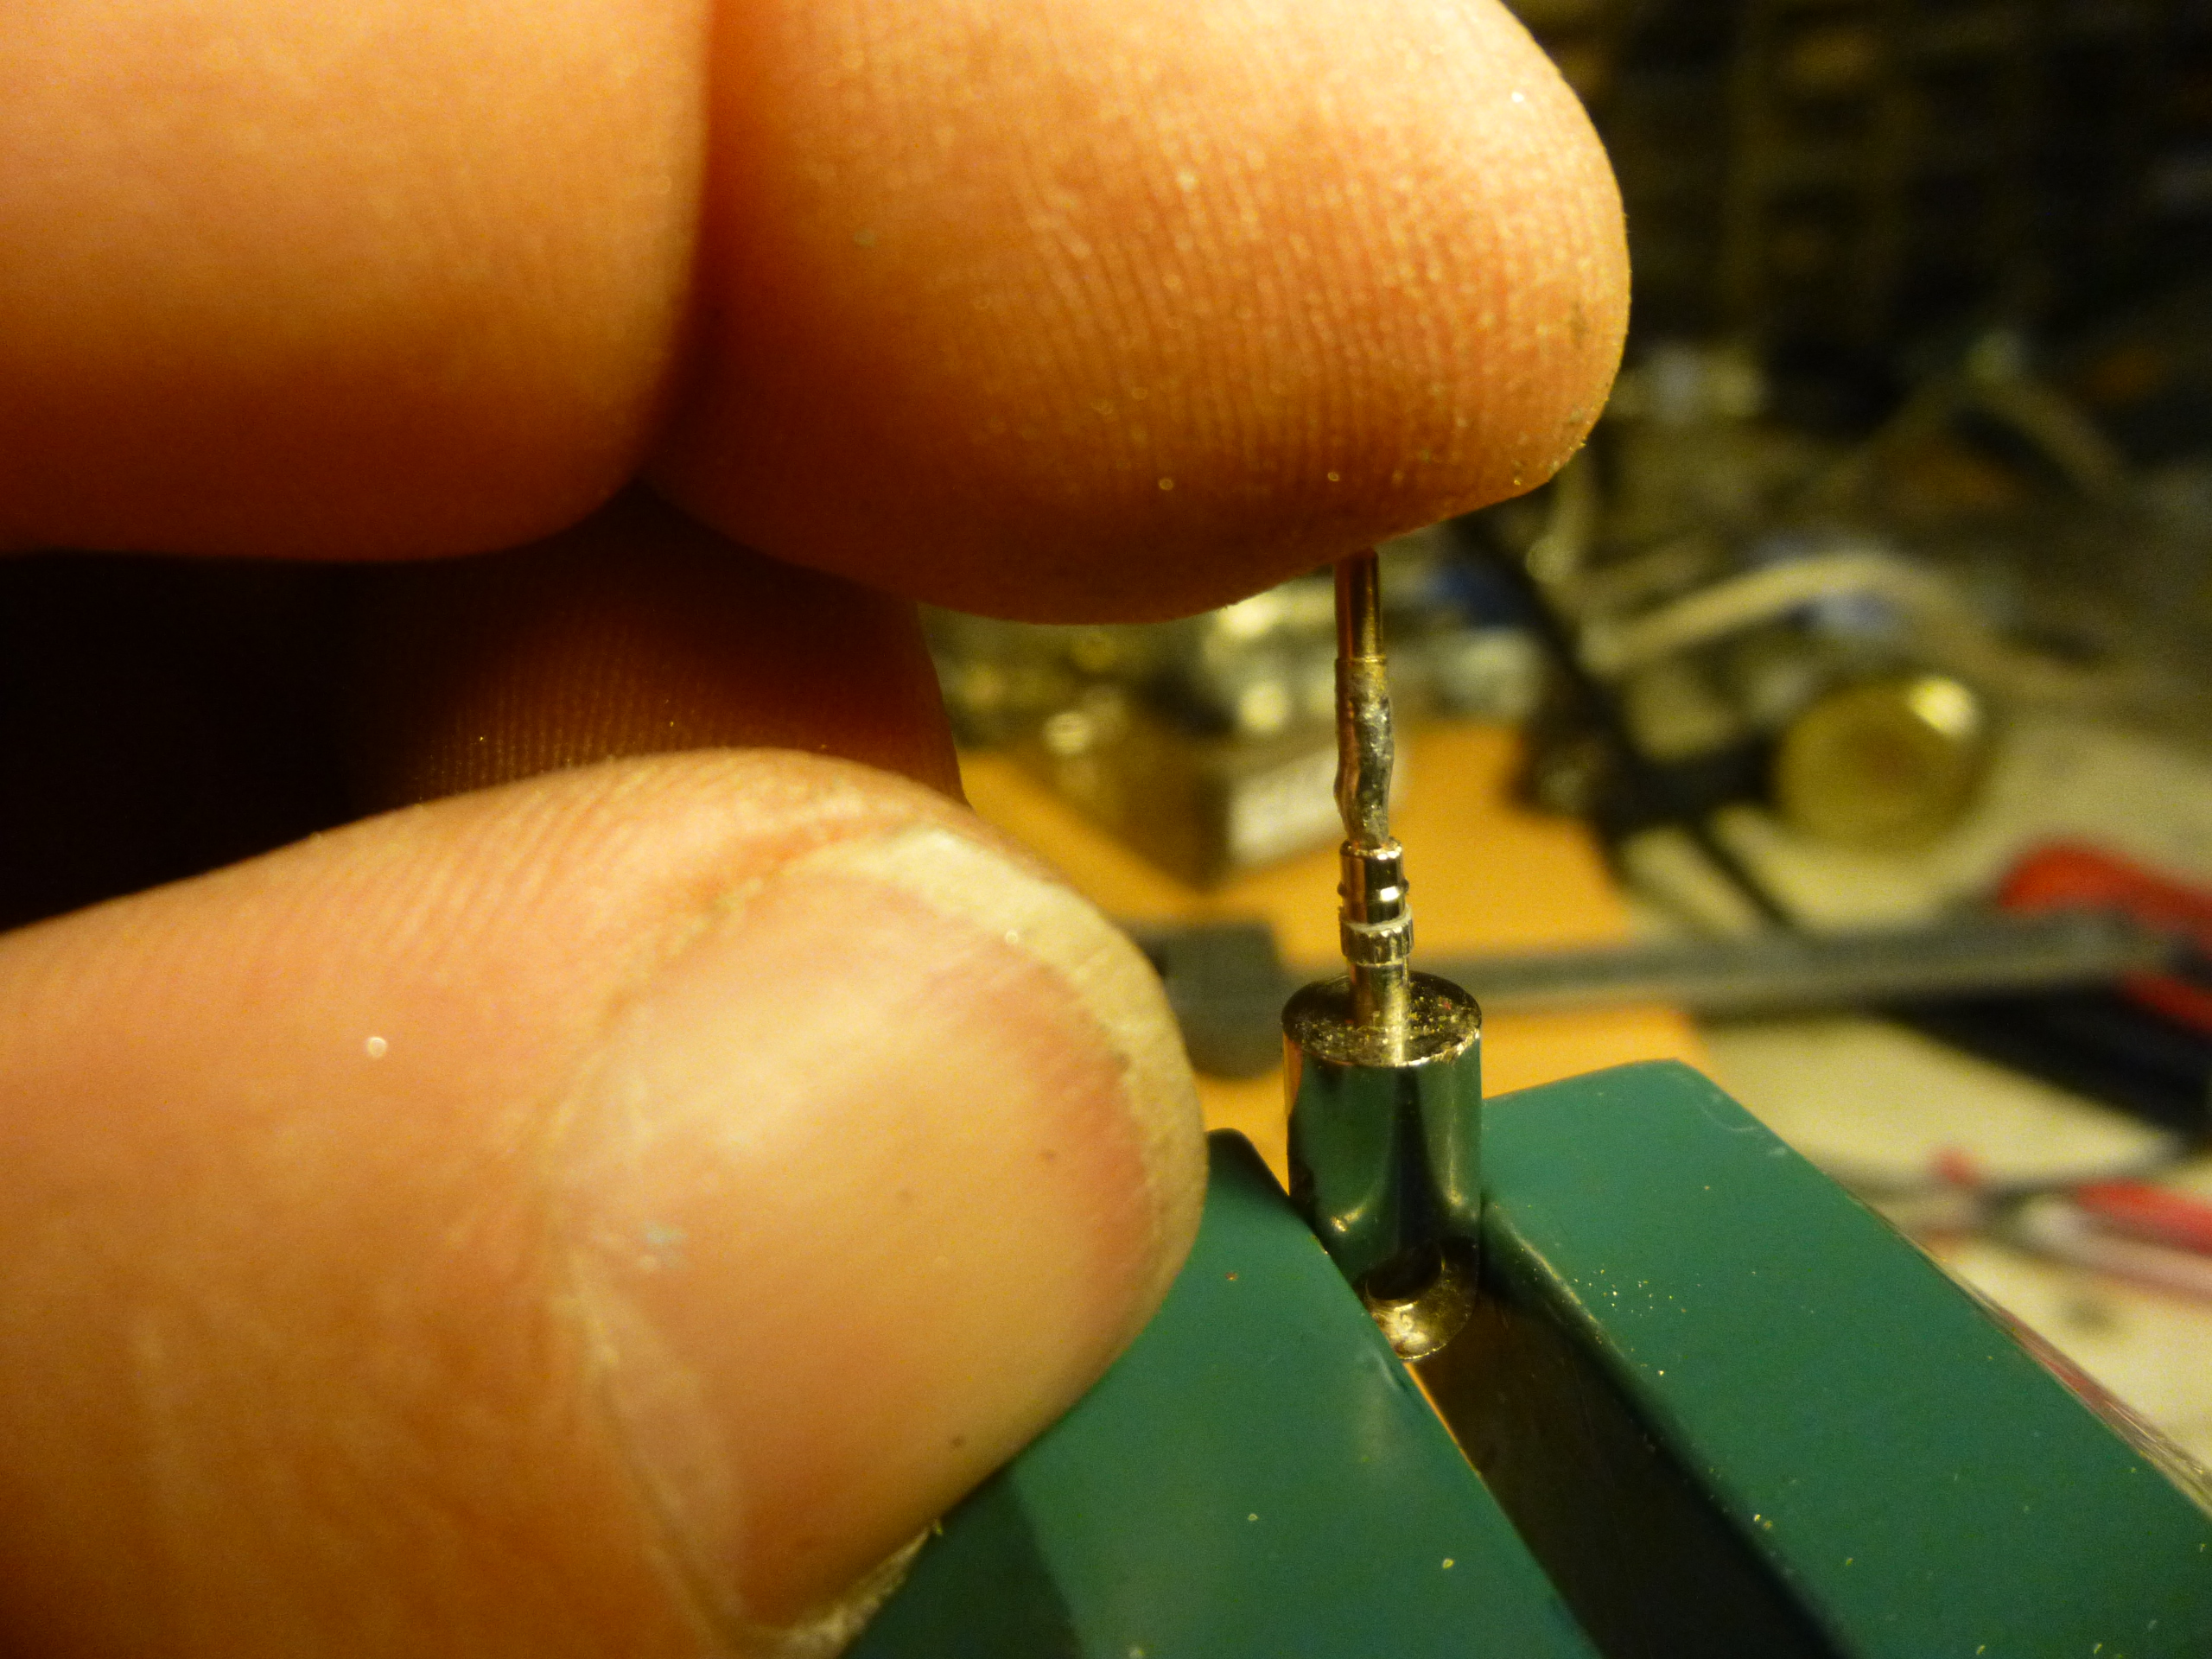
10. Holding the pin up straight in the spud, solder the wire to the spud. Solder gets weaker and shitty-er the longer it stays hot, so quickly solder up a damn good connection between the pin, wire, and spud. The thick wire will add some flexibility, length and integrity to the connection. Test the strength of the solder job, but don’t bend the shit out of it in testing! The wire will be thick enough to allow you to push top assembly back into the SMA housing, without smashing or bending the wire in the process. 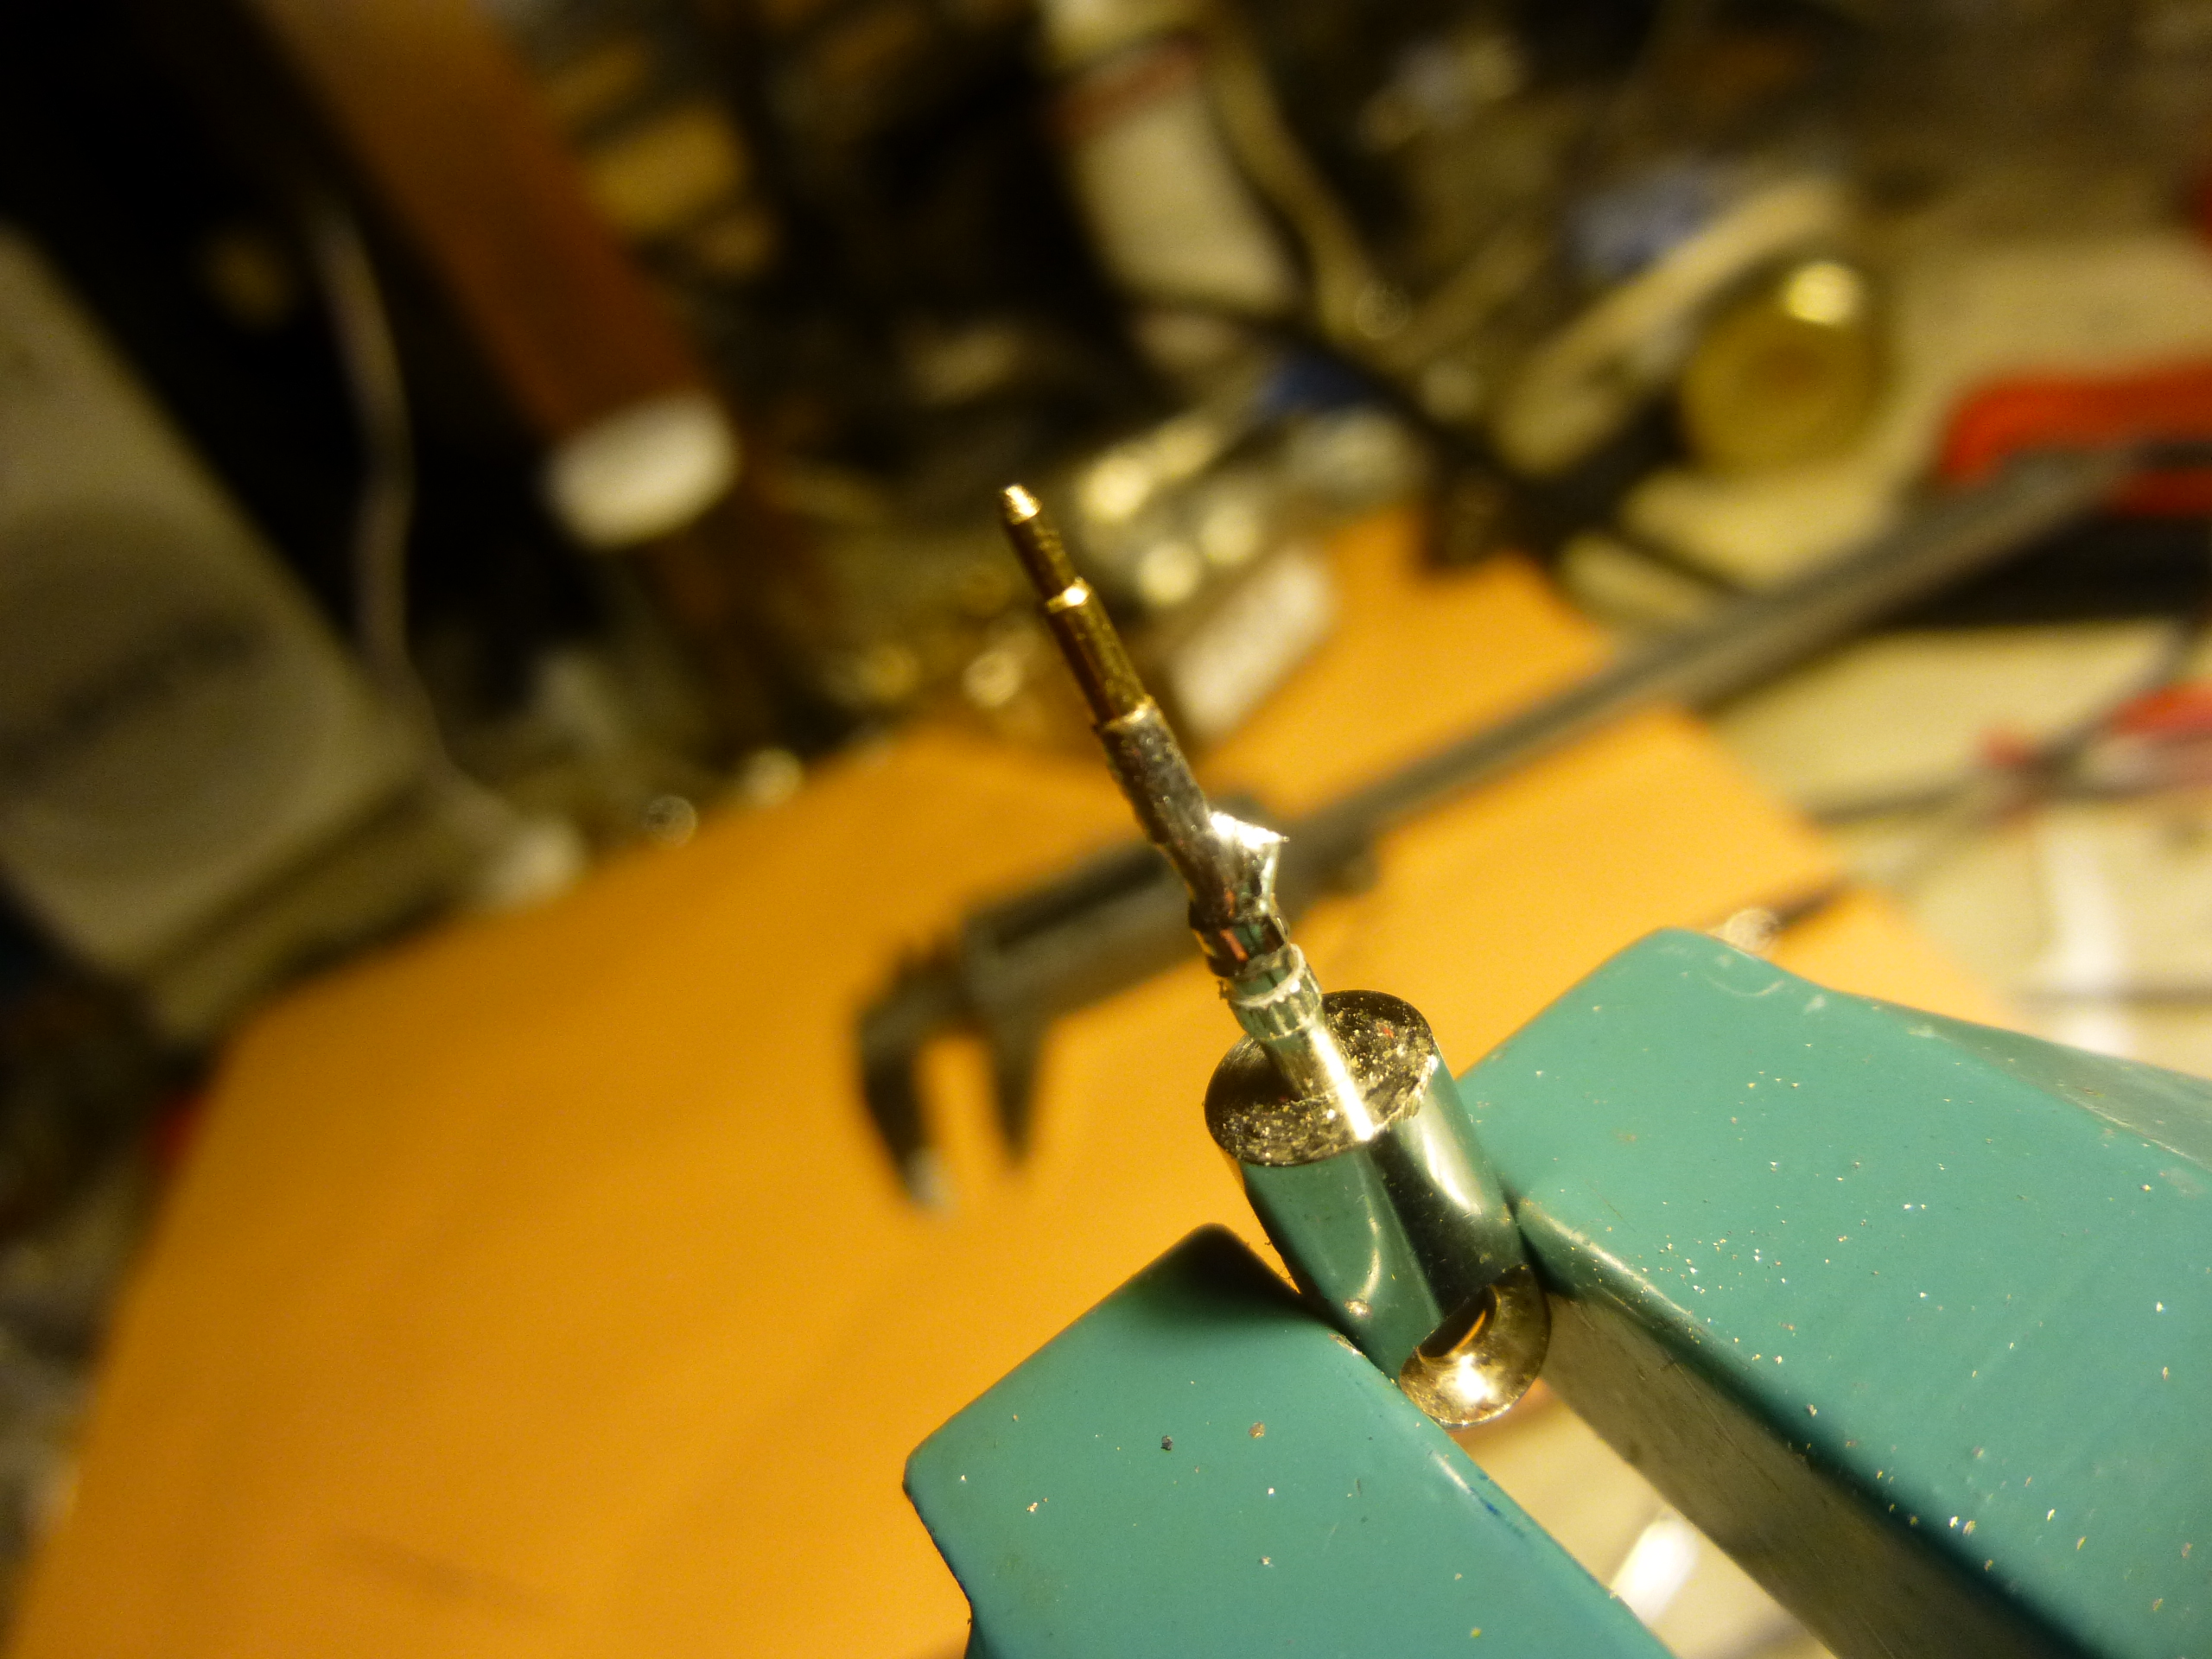
11. file or grind the excess solder around the joints. Don’t over grind, just make it level with the thickness of the spud. 
Dangerously close to drug paraphenalia and jewelry making.
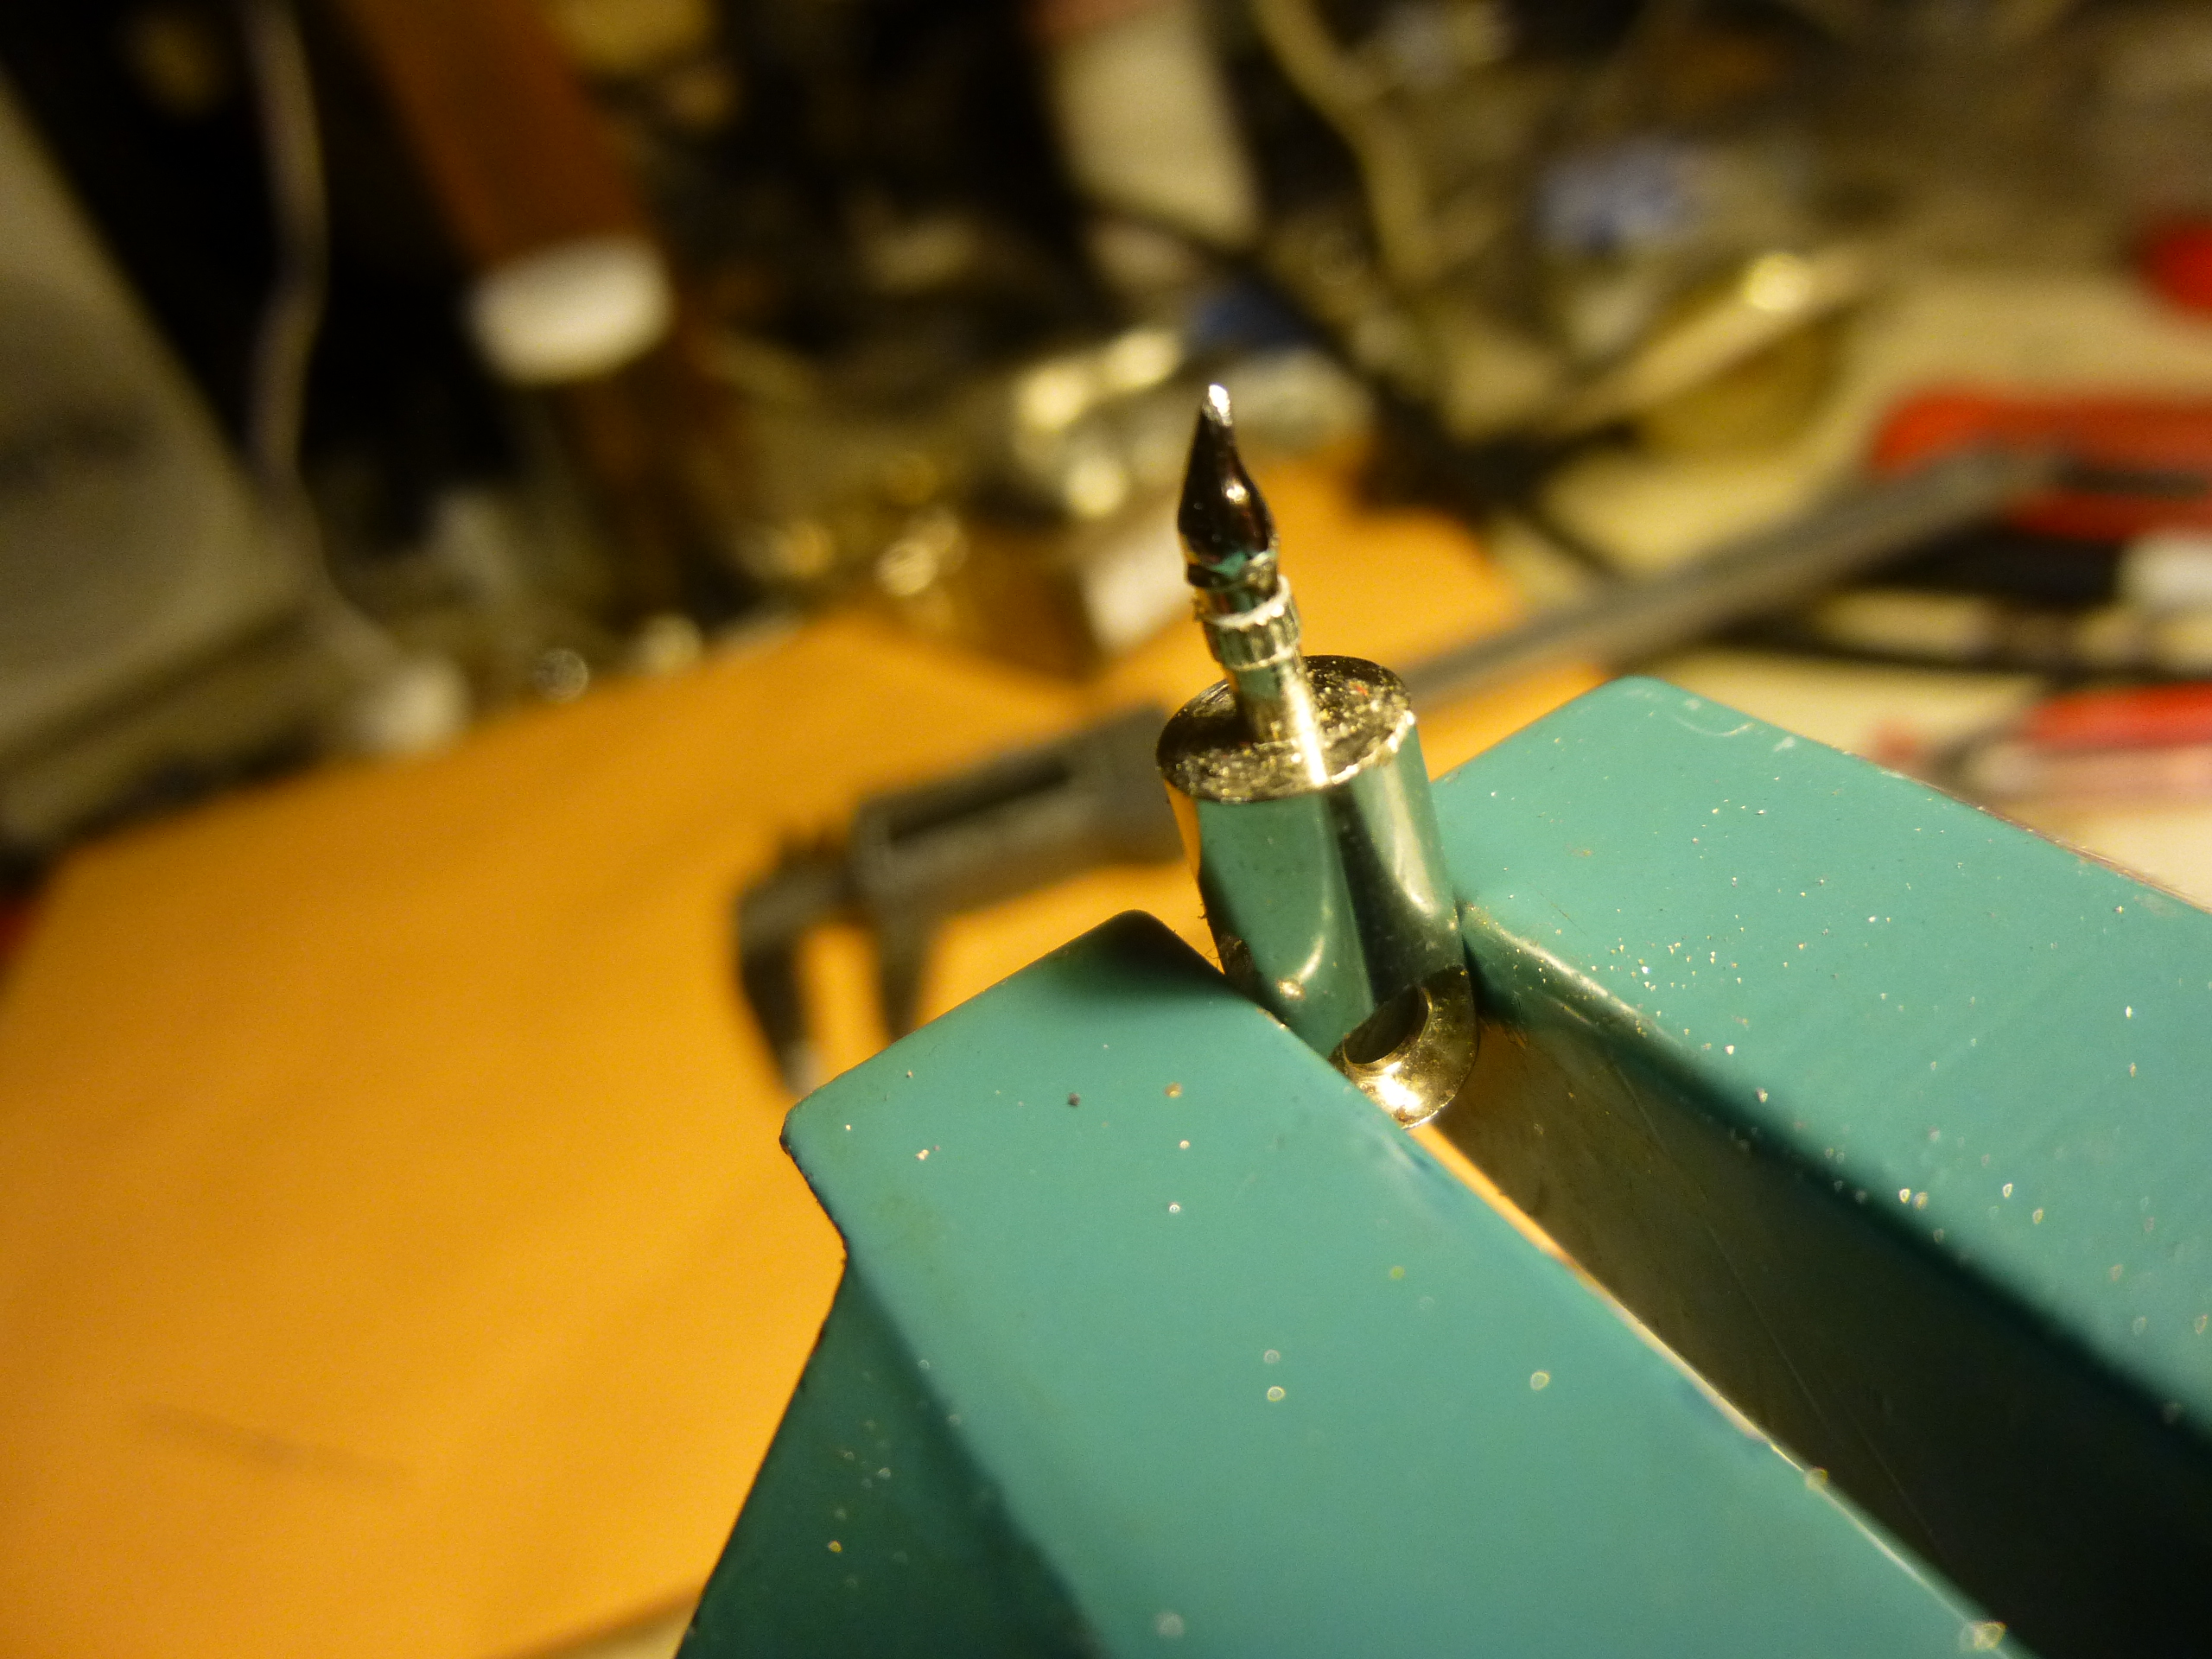
12. Insert your pin assembly into the SMA base and use the Vice -Grip to push it all the way in. There should be a fair amount of resistance from the white plastic surround, which is good. As Batman said to Robin, “Push it all the way in, and don’t let it fall out.”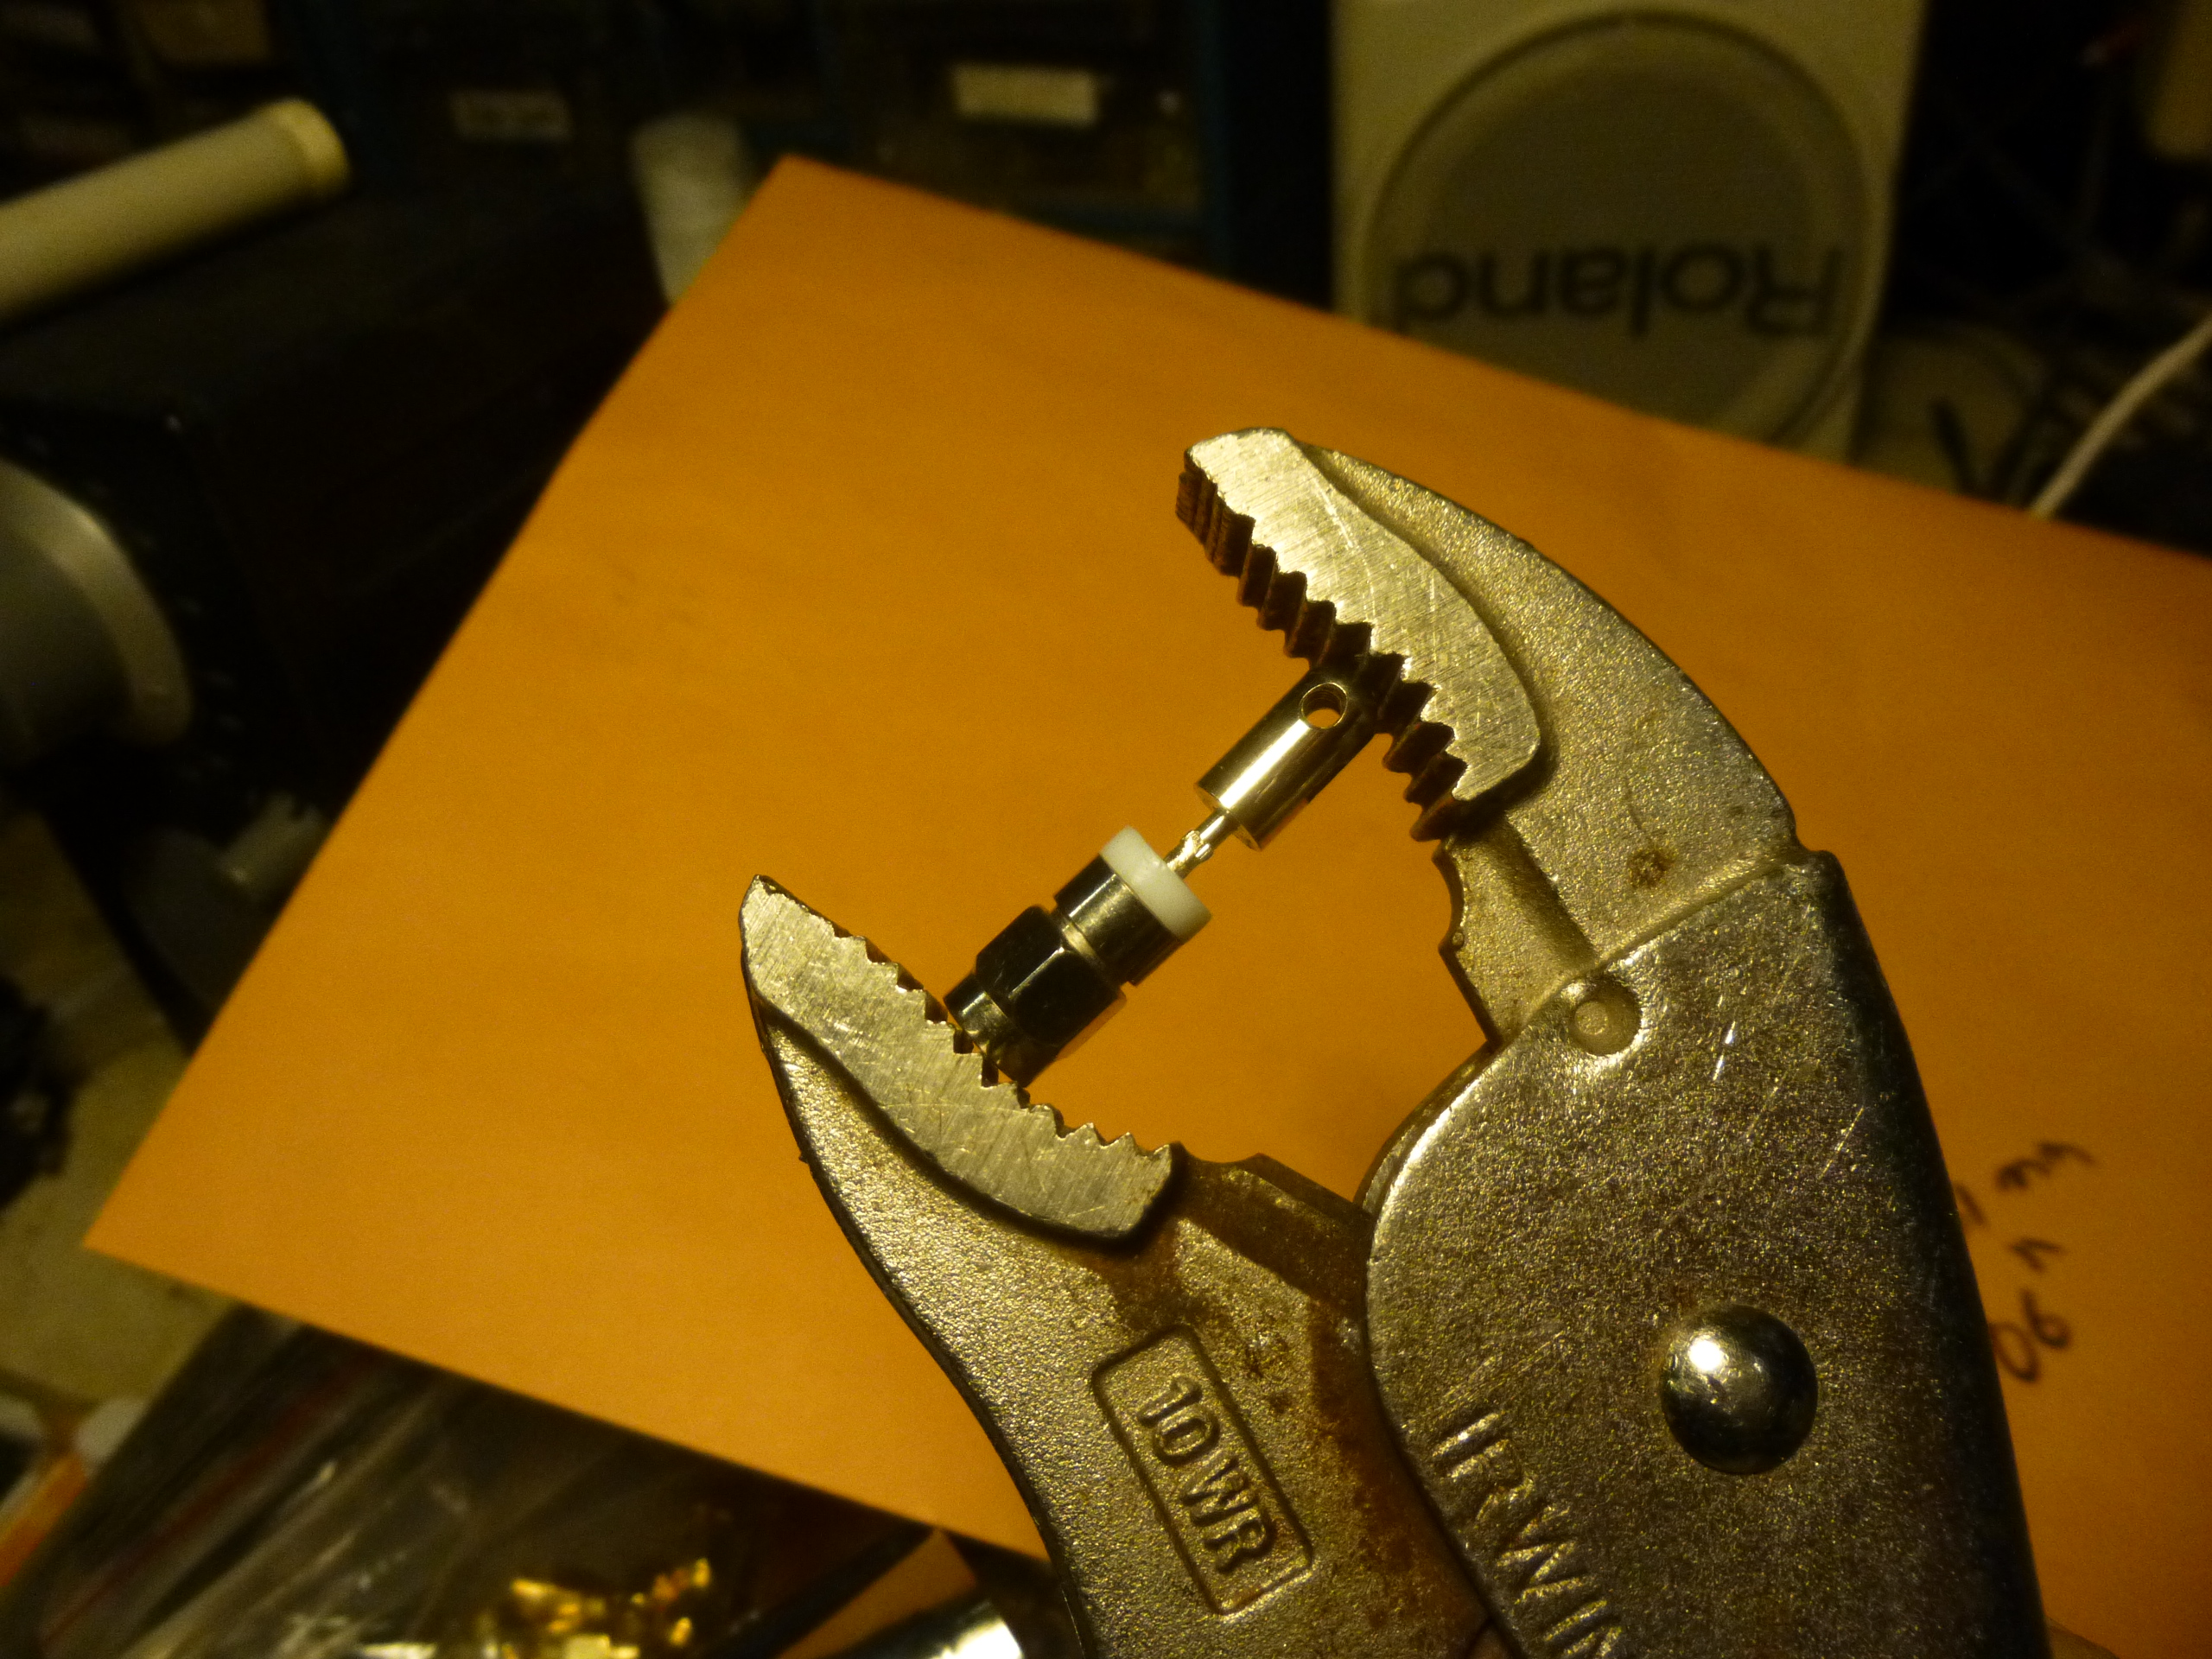
 13. Make sure the new pin doesn’t protrude from the face of the SMA nut . A little is ok. If the pin protrudes too much, It will run out of receptacle on the receiver. If it came out too long anyway, you can still grind it down level with the SMA nut. If you have to grind it shorter, round it out a little, too, ok? So the pin can “find” its way into the hole. Nuff said.
14 Do a continuity test between the pin and the elbow. Should be a half-ohm or less. No continuity? You fucked up! The solder connections were bad and broke when you pushed the assembly in.
15. Take a big swig of an alcoholic beverage of your choice. (Like I am doing right now). Repeat the process on your other broken Lectrosonics SMA elbow antennas, or just buy new ones. Or ask for a trade-in at LSC, like I heard some have done. I’m not that popular. But I am tenacious.
How long will your repair job last? I don’t know. Probably as long as the new Lectro units did, maybe longer. Ask about the warranty before you proceed. For fun, educational purposes only.
I would test periodically for continuity between the pin and the elbow.
Coming soon: how I made my own SMA whip antennas
-by Pete Verrando