 |
|
| 2006, Betacam SP, 10 hour days. |

|
|
| 2006, Betacam SP, 10 hour days. |

|
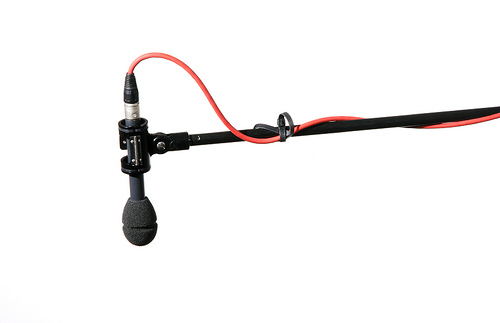
| Think you got enough VTVMs there, Stefan? |
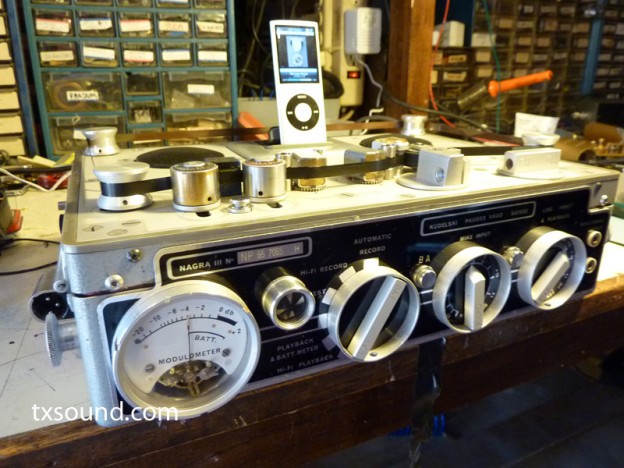

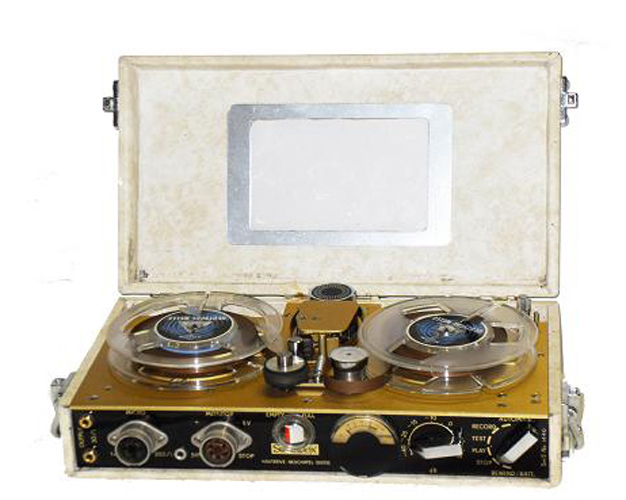
In the spirit of the holidays, thought I would send along a couple of pics of the Ipod Nagra. It’s a work in progress. Was hoping to sell it for holidays this year, but I keep adding things. It actually sounds pretty good, those are Tivoli Audio speakers in the deck, sealed speaker enclosures and a class T amplifier inside. The mic input works, tone generator, tape transport, playback head, and has bass, treble controls, RCA stereo ins and outs. Runs on D cells or external power supply. All the selector positions have a specific function. Pilot flag indicates that ipod is charging. Last hurdle is to create some record capability with the tape loop, to create a short message or slapback echo gag. I’ve got to find or create a small enough record amplifier with bias generator. Any ideas? It will play the loop now. But if it can’t record, its not a Nagra.
Selector:
Automatic Record -selects external RCA stereo line inputs (may activate record feature in future)
Hi-Fi Record- ipod mixed with mic input or tape head (selectable)
Test- tone generator (original circuit) (when front button pushed)
Stop – Power Off – Ipod charging
Playback/Batt. Meter- Ipod Playback only, no mic or tapehead, battery reserve shows on meter
Hi-Fi Playback – Ipod Playback, meter displays audio level (independent of speaker volume)
Meter displays audio level at all positions except in Batt Meter position
Other controls
Line input/playback control – Speaker volume
Mic input – microphone input/tape head preamplifier level
Fast Forward button – activates motor for tape loop (for now)
B/A button – may activate record in future
Tone button – sounds reference tone
Bass and treble controls/ RCA ins/outs on right side
Tape/mic select and motor speed control on left side
by Pete Verrando
 |
|
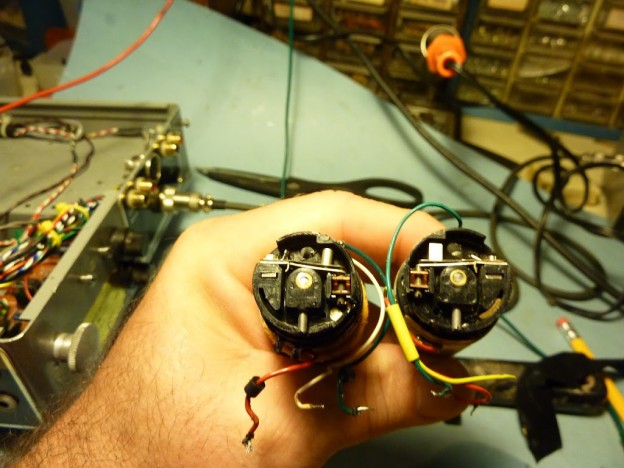
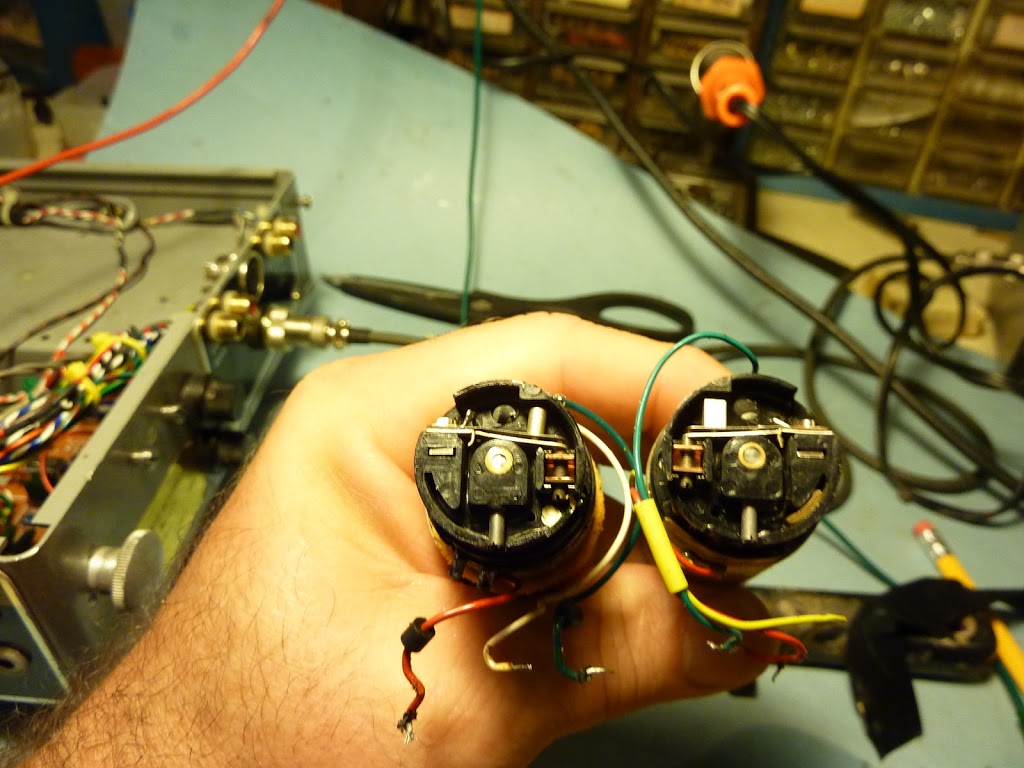
| The motors from a Stellavox SM5 and a Fi-Cord 101S are identical. Except they run in opposite directions. Shown is the rear centrifugal startup flywheel. |
 |
|
| Here’s the record electronics, the db15 connector/cable is running to the transport for testing. |
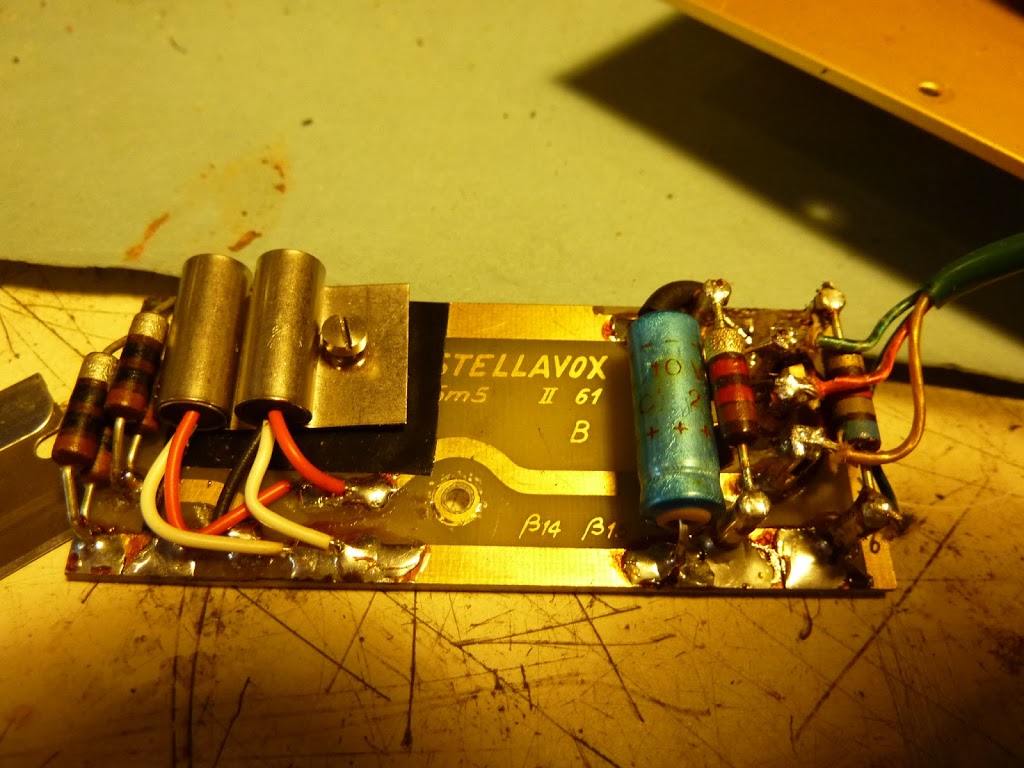 |
| Here is the motor speed regulator board. That ’61 is year. |
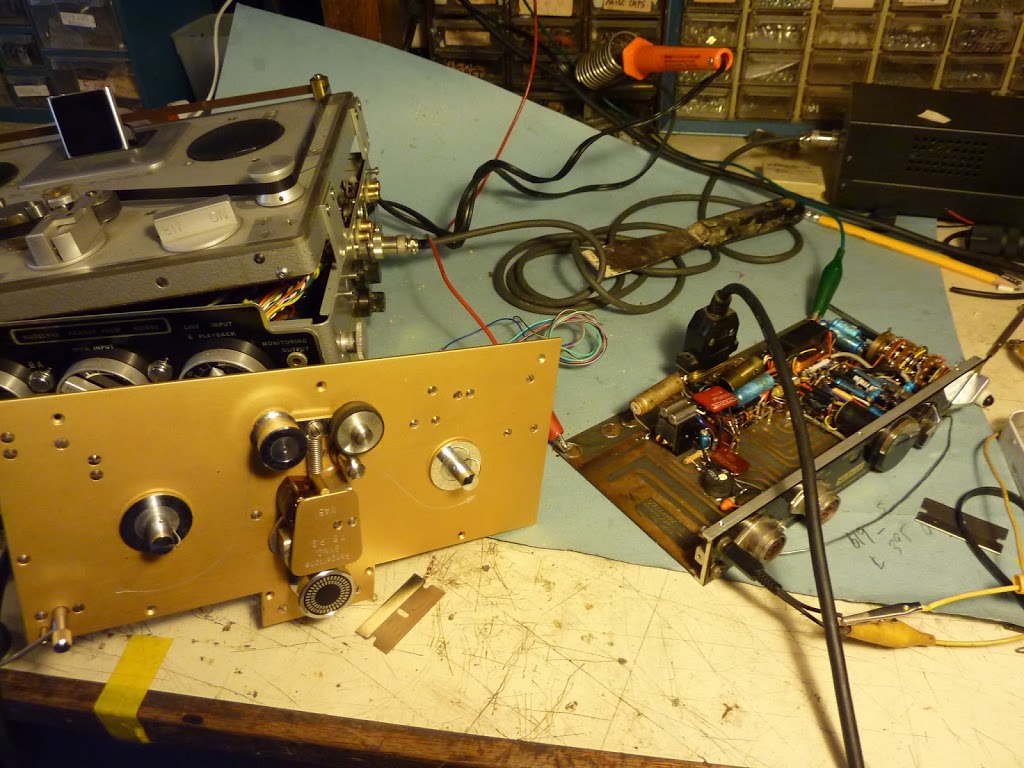 |
| Here is the tape transport and the electronics. Ipod Nagra in the background. I work on about 6 projects at once. |
The Stellavox SM5 project is moving ahead. Got the motor running. Imagine, the armature was rotating around the shaft, and apparently the fixation was lost between the two. That was a freakin’ mystery. Imagine hearing the motor spin, but the shaft did not turn. Twilight Zone! No way to take the motor apart without destroying it. A few well aimed taps on the shaft with a hammer seems to have fixed it. I’ve removed and installed that motor on the transport about twenty times. Now to prime and paint the wooden enclosure, which has the integrity of a cigar box. Originally covered in Tolene (guitar amp vinyl covering), it looked like crap. The wood is too cheap to finish out, so I’ll prime and paint to some astonishingly lovely color (yet to be decided) and add rubber feet on the bottom. Fun!
 |
||
| 1st coat of primer on the box. Notice the inspiration for this Blog name in the background. |
You know, I haven’t worked in about two weeks. And I’m having the time of my life.
My daughter’s home from college, watching her become an adult is like, what… a butterfly emerging. My son’s been out of (home)school for Thanksgiving, and we’ve re-roofed the doghouse, hit the skatepark, cleaned his room, and broke into the fireworks. Sally’s made a stunning amount of Thanksgiving food that’s all gluten-free. I’ve been raking leaves, washing windows, playing with the dogs, and projects. Ohhh, the projects.
There’s some home projects, it’s true. I have 20 reflectors on our flat roof that keep the 2nd floor cool in summer, that I stacked and tarped for the winter. We had a lot of tree work done, and Joey and I sliced it up into firewood. Good lesson for Joey on the circular saw. I replaced my 2001 GMC Safari Van with a newer model, and finally got around to selling the old one. Treadmill 30 minutes every day. Did it twice on Thanksgiving. (Still loosing the war, tho…)
Watching “The Walking Dead” on the treadmill. All caught up on “Homeland,” waiting for the new episodes to emerge. Waiting for the mid-season break of “Breaking Bad,” or is it just me? My illegal download site doesn’t show any episodes beyond #8.
Just took delivery on three “Greta” tube amplifiers from Fender, so I can see how they can be hacked/modified into Ipod docks or something… got ’em for half price on Black Monday. $99! No Tax! Free Shipping!
|
|
| The Fender “Greta” table-top amplifier. |
And finally, digging deep into a restoration, a Stellavox SM5 portable reel recorder. A stunning Swiss Watch of analog recording heaven…if only I can get the DC motor to hold steady speed. Take it apart, and it explodes…an overnight run test should bear out if I have the solution- seems like a victim of water damage. This tiny recorder is a jewel, and the record electronics are working upon power-up. Just have to re-finish the cigar-box wooden case (what color?) , get that motor running, make a custom drive belt, and re-assemble. I’ll soon have 50-12000hz response in a 7″x4″ box with 3″ reels of recording tape. Machined gold-anodized aluminum parts, lots of tiny screws, massive flywheels and vintage germanium record electronics. And a hot modulometer.
 |
|
| Stellavox SM5, full track mono with synchronous recorder with pilot, 1961 |
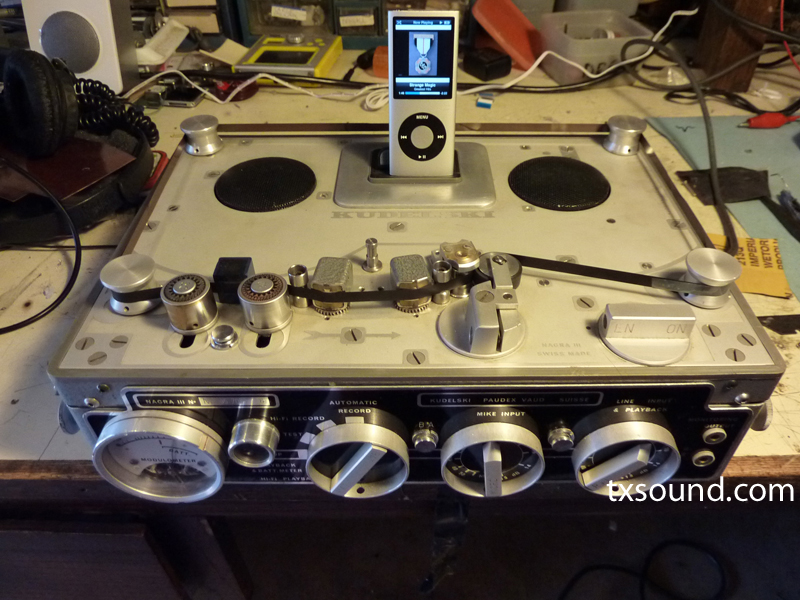
Also working on the Nagra Ipod Dock at the same time. Trying to incorporate some kind of record capability into this beast… Having trouble finding a record amplifier with bias oscillator to create a slap-back echo affair on the tape drive. While still a functioning custom Nagra-based Ipod dock. And then the Lightining connector had to come along. Shit. This thing’s been in the works for over a year.
 |
| The Nagra Ipod Dock on the bench. . It must record. Or will it? |

|
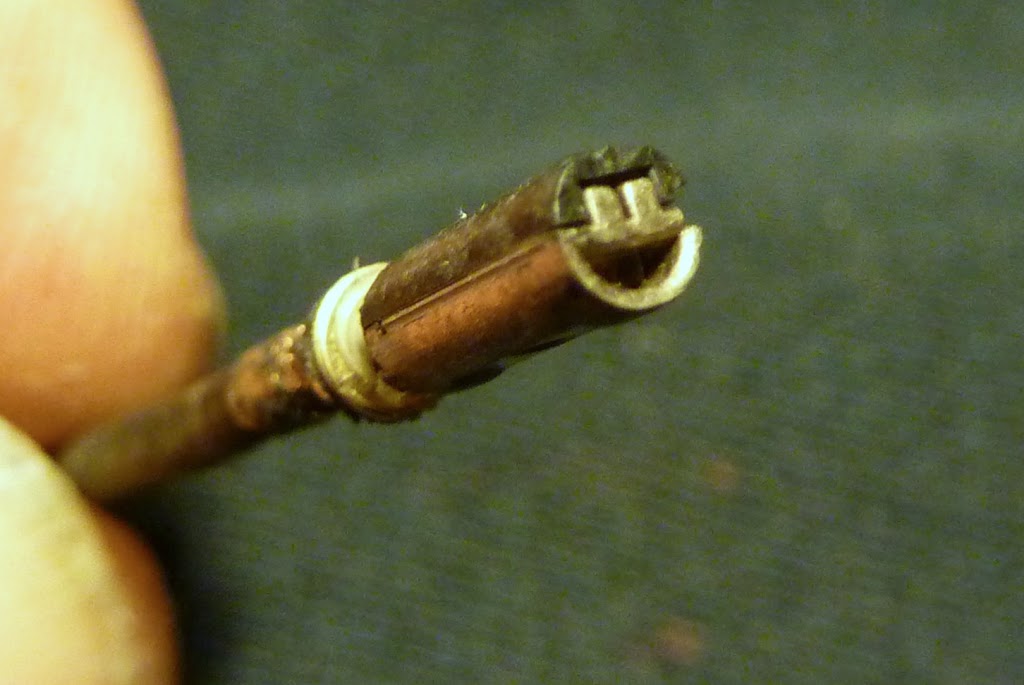
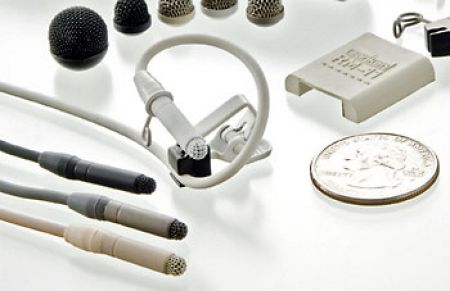
| The Sanken COS-11 lavalier mic and accessories. Notice the length of the capsule. |
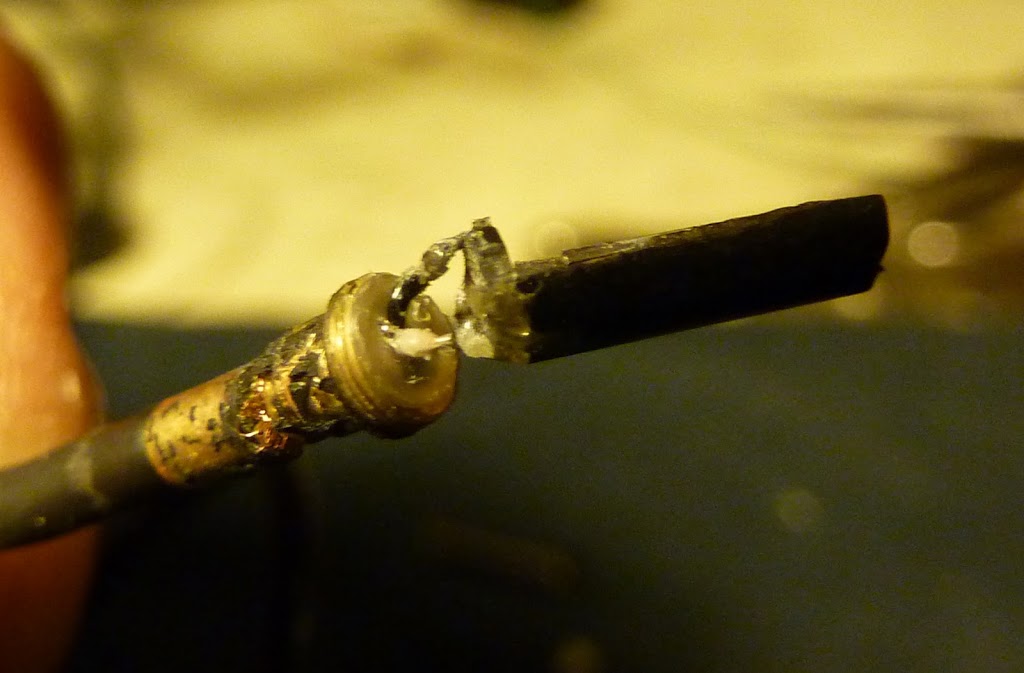
A couple of my Sanken COS-11 lavalier microphones bit the dust lately. I had one cast member, a young mom, who routinely breast-fed her baby, often while wired with one of my lavs. Hiding a mic in wardrobe is sort of a black art, and further mystified by a nursing bra and a fussy, groping baby. No matter where I hid that lav, those groping hands would find it. Anyway, the kid managed to pull on it enough to create an intermittent where the wire enters the microphone. Sanken COS-11’s retail for about $350. Production bought me another mic and left me to play with the broken one.
Sound mixers gush about the great sound of COS-11 microphones. It seems no matter how it is oriented on wardrobe, or how it may be buried, it still sounds bright and natural. It is easy to hide. The cable is very soft and lays flat on the body’s curves.
Most miniature lavalier microphones are manufactured using hearing-aid capsules. These are the ultra-miniature microphones that are built into hearing aids. There’s probably a hundred or more different capsule models, by a range of manufacturers. The first really miniature lavalier, the TRAM TR-50, was based on a side-entry hearing aid capsule. I took apart an old TR-50, and I could see the logo and model number of the capsule printed on the back, and was able to source the capsule on the internet.
 |
| Tram TR50 Lav microphones contain Zero G 1506 hearing aid capsules |
Sanken COS-11’s are said to have the diaphragm (the membrane that vibrates in reaction to sound) run lengthways down the capsule case. The membrane can therefore be larger than the typical hearing aid membrane, which is as tiny as practical, and round. Some describe the COS-11 as a ribbon mic in a lavalier. True?
Well, I wanted to see if the sales pitch of the COS-11 is true. Does it have a large membrane, or just another hearing aid capsule in a long case?
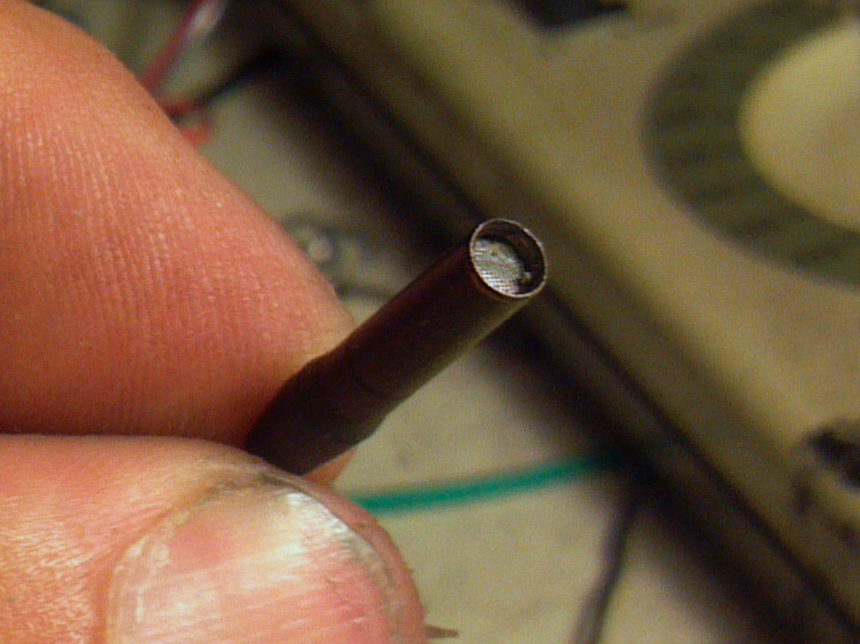
The microphone body is permanently assembled and sealed. You really can’t take it apart without destroying it. So, as I offered up my $350 microphone to curiosity, I took some pictures of the dissection. Here we go.
This is the COS-11 with the exterior windscreen removed. Inside, there is a fine mesh screen, presumably to help keep out dust and add a layer of wind protection. The exterior screen often falls off these lavs. Users who try to re-glue them with super-glue will destroy this interior screen, which sucks up the glue like a wick. (You need to use a thick epoxy that sticks to the walls of the case, and won’t pool up on the interior screen.) J.B. Weld is the most magnificent epoxy in the world.
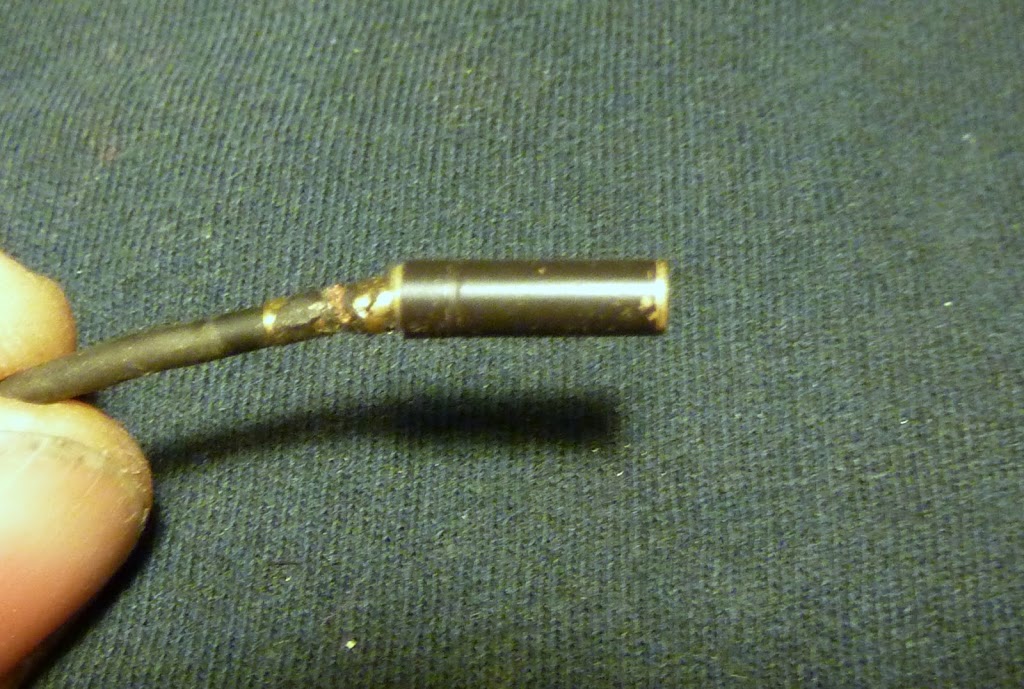
Here is the mic with the rubberized strain-relief removed. This was a thick, tough cover that protects where the wire enters the mic. Underneath, there is a metal collar that clasps the cable onto the underside of the case. The tubular case looks crimped on, but it is not. It is actually threaded, and screws on to the base. However, there is a leaf-spring securing the interior capsule inside the case. If you attempt to twist off the case, you will tear the wiring. One would have to secure the lower collar, and secure the interior capsule from the top, while unscrewing the outer case. Custom tools required.
I decided to cut the case open laterally with a Dremel Moto-Tool.

This cut presents a nice cross section of the mic, showing the screen and interior capsule. Onward…
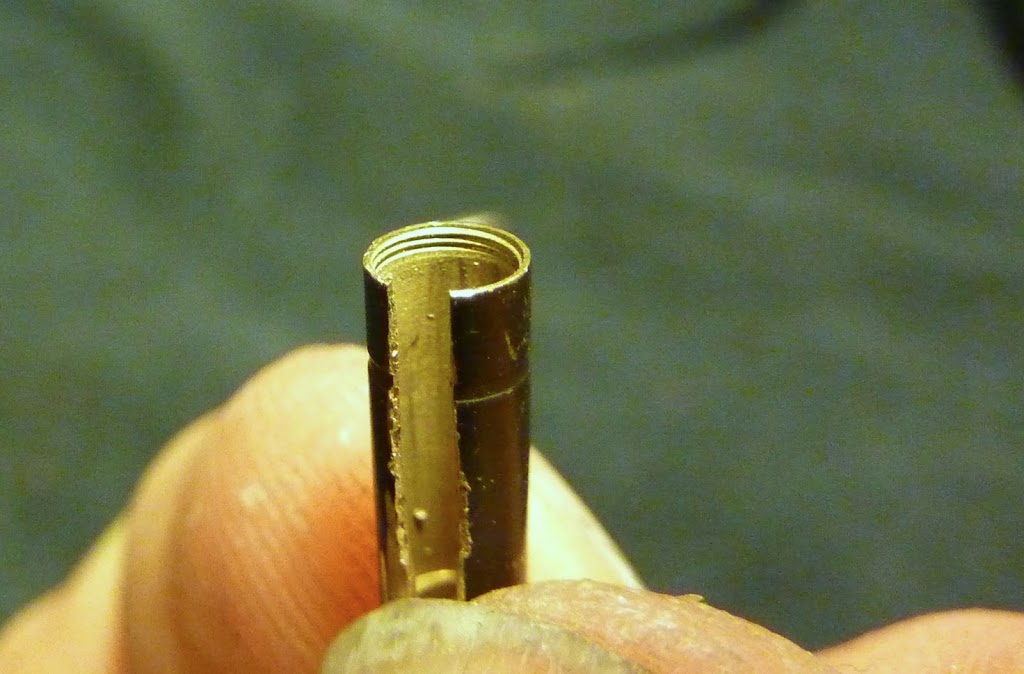
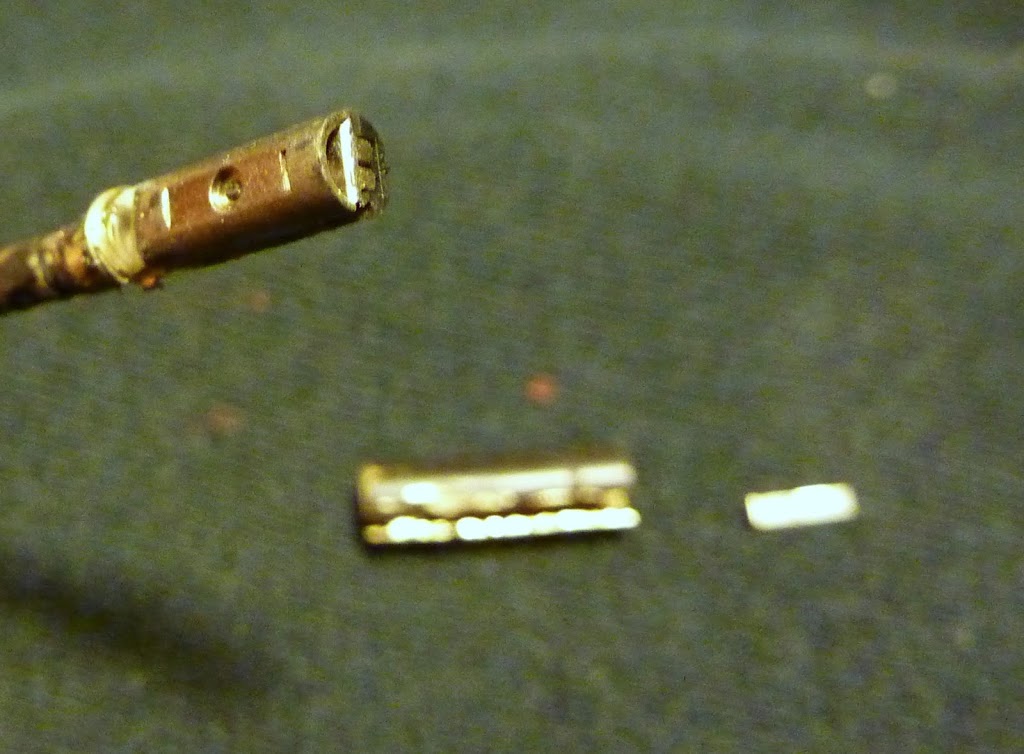
Here is the outer shell removed, the threads at the base are evident. Next…
The interior capsule exposed! A curious assemblage. the top half is plastic, the bottom half is metal.
Here’s a view of the metal side. The indentation is where the leaf spring goes, which is that small out-of-focus thing in the background. I believe the dimple supports the FET inside the metal half.

Here’s the leaf spring in place on the capsule. This would certainly insure a good electrical connection between the capsule and the case.
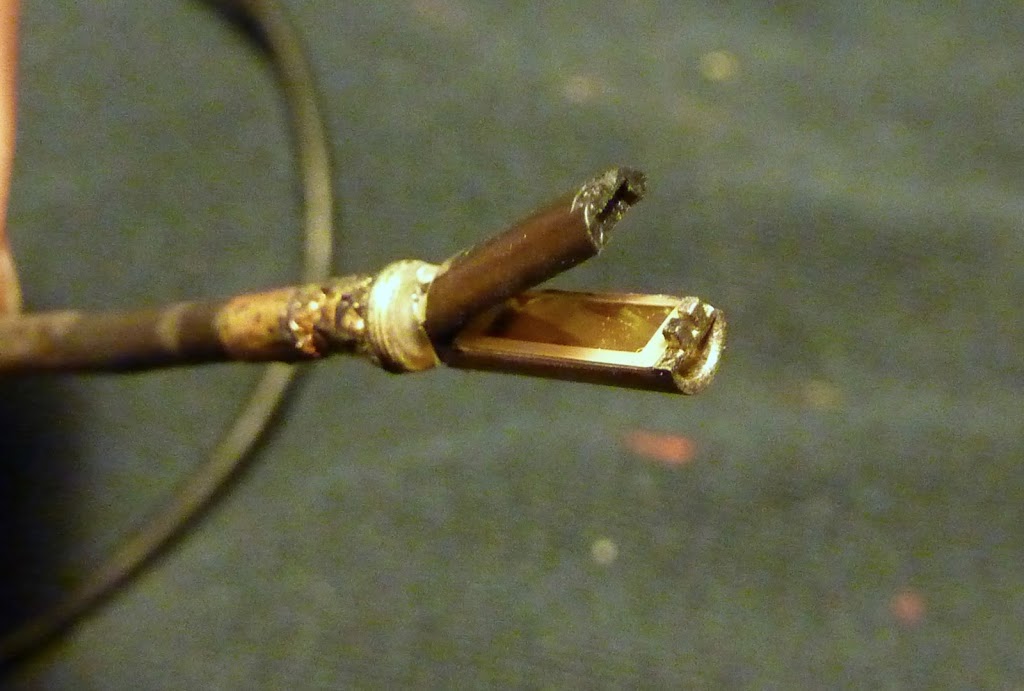
The two halves open like a clam-shell to reveal the delicate membrane inside. It is a translucent metalized sheet. In electronics, a capacitor, or condenser, consists of two plates separated by a dialectric, or insulator. What we seem to have here is one of those plates, served by the membrane.
If we look down the clamshell, we see…. the other plate? Could it be that the dialectric is air, separating the two plates? Those who have wired a connector to a COS-11 know that the cable contains a black wire, white wire, and an uninsulated shield wire. These wires, impossibly short at the bottom of the mic, are soldered this way: White to the plate on the plastic side, black to the membrane & the metal side, and the shield- it either goes to the case, or terminates unconnected to anything. Side note: In many audio applications, the shield is not always connected to both inputs and outputs. One side or the other is often lifted to prevent hum issues.

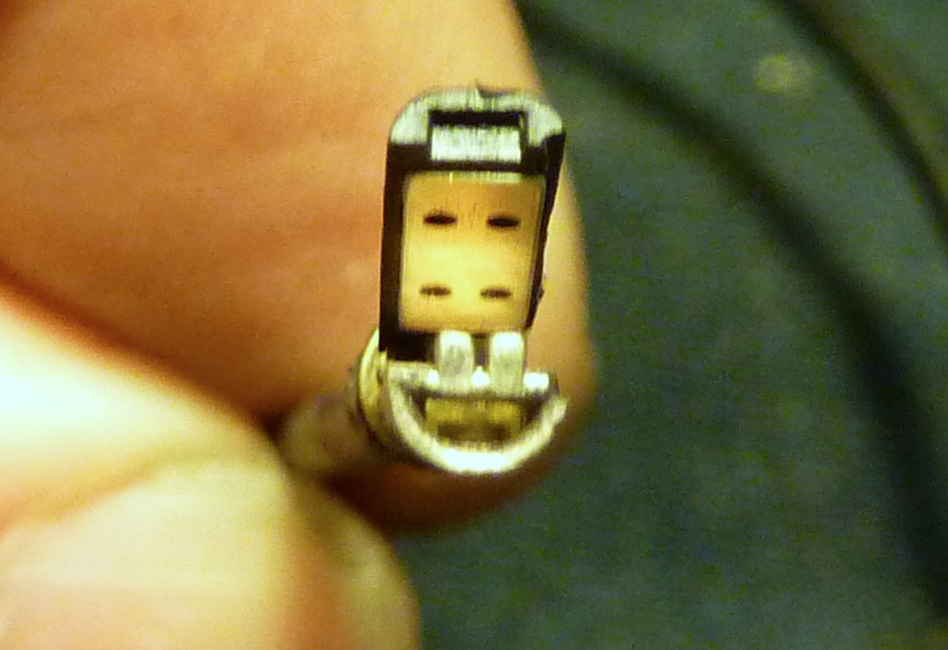
In my final act of destruction, I pull away the two halves. One can see the translucent metalized diaphragm, and the opposing metal plate. Sound enters in through the top, and excites the diaphragm, creating minute changes in capacitance between the plates. This signal is amplified by the FET (field effect transistor). That diaphragm is about 6 times larger than a conventional hearing-aid capsule diaphragm.
Hence the “sound”, and perhaps other engineering of which I’m totally unaware…
Finally, here is a close-up of the impossibly short wires that are directly soldered to the two halves of the capsule sandwich. No immediate evidence where the shield wire may be terminated. The threading on the base is visible. Again, one would need some special tools to unscrew the outer case while holding the base/interior capsule stationary. Otherwise, the wires would tear right off. What to do with the resulting mess? Maybe earrings…

Update- here is the metal base with the membrane removed. No FET, but a channel thru which sound enters from the top and is exposed to the length of the diaphragm. The FET must be on the plastic half of the sandwich.

-by Pete Verrando Please visit my home pages at www.txsound.com

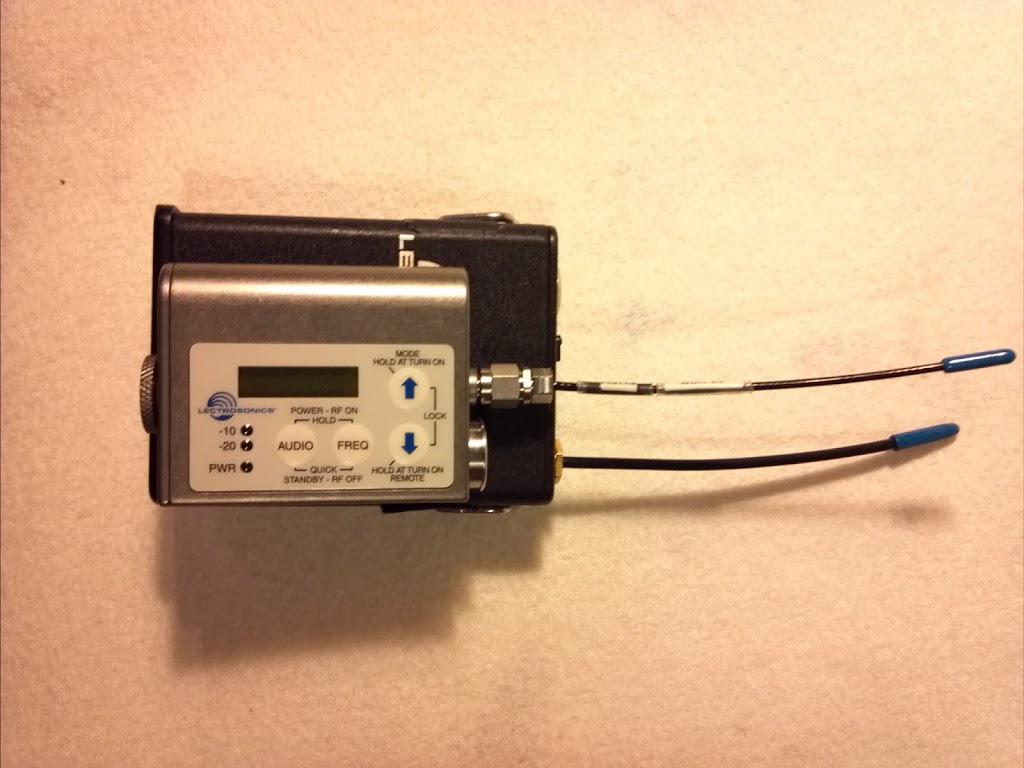
I just added two more SMV transmitters, and my hands are tired from mashing those little buttons. The Reality Soundman Army continues to rack up transmitter count without regard to ROI. Its a bit like collecting Hot Wheels cars. Bexel and VER keep a bowlful at the checkout desk. Happily, I don’t give away services and gear, and my schedule is still full. I’m a one-man army, knee-deep in the Full Catastrophe, (google it, son) and the LMa wireless transmitter from Lectrosonics will be our little secret.
|
| The SMV series from Lectrosonics. $1300 and up. |
One thing you can’t beat the SMV for…wireless on children. The SMQV? I don’t get. Too big for the bucks.
 |
| The $650 LMa. |
 |
| To whom does this size difference matter? Catherine Zeta Jones, maybe. Reality Cast…? |
I’ve always resisted commenting on the LMa because I’m afraid Lectro is going to wise up and start charging more for them. But I’ve knocked back a couple, which is always ill-advised when posting, and I’ll probably delete this in the morning anyway.
The LMa‘s lower power is virtually indistinguishable from an SMV or any Lectro 100mw transmitter. While visiting with the bunch of hams (I’m KQ5I) who volunteered to check freq’s at the last Superbowl, we did comparisons and measurements with their very expensive spectrum analyzers, and found the LMa has to have at least 70+ mw of power, and in real world situations, the difference between the two matters little. Audio-wise, they are identical, both in specification and in the real world. The fixed antenna on the LMa is an advantage, as it is more robust than the connector affair, and makes the antenna physically shorter by eliminating the connector. The spring clip has a lower profile than the clunky um400a clip, and the “lip” can be bent down to make the profile even lower. Excellent in a bra-strap mount, where I go 90% of the time. Less excellent on the waistband, tends to fall off, but considering the LMa‘s low-profile without clip, pouch-wise and concealment-wise, it runs a close second to the SM’s and their ilk. Hides well in the men’s front pants pocket, I defy you to see it on camera. The clip pops on and off in a second, no tools required. The power switch seems different than the um’s, and is mounted differently, but I can shut it off and adjust gain by feel thru most materials on a women’s back. (somehow my jobs are mostly women on camera). Finally, when monkeying with 10 wireless going at once, I’ll take lower power over higher. There, I’ve said enough already. Larry please don’t raise the price on the LMa‘s…
by Pete Verrando
www.txsound.com

 |
| Record Now, Decide Later. |
oh shit oh shit oh shit
You can imagine what came next. Horrible audio came flooding into the edit bays. Poorly cued booms, lavs placed too low or too high, or no mic at all- when the soundman forgot to switch from the camera mic, or connect the umbilicle. If a mic battery died, or a location was noisy, the editor got what he got– 1 channel of crappy audio from one mic, recorded by a beginner.
– by Pete Verrando
www.txsound.com
Seeburg 1000 BMC background music player restoration Spotted in Russia! Starting to make the rounds.

|
| Hi, and Welcome! Bend Over! |
A few years ago, there was a great t-shirt, occasionally seen around the set, featuring “The Six Stages of Film Production.” Perhaps this was modeled after the college textbook dogma, which follows:
 |
| Actual picture from production company website offering perks to anyone who contributes $ to the film. |
Found recently is another “6 Stages” List, with a bonus 7th stage:
The 7 Stages of Film Production
1. Wild Enthusiasm
2. Total Confusion
3. Utter Dispair
4. Search for the Guilty
5. Persecution of the Innocent
6. Promotion of the Incompetent
7. Distribution of T-Shirts
Hi, welcome to Television!